Tools
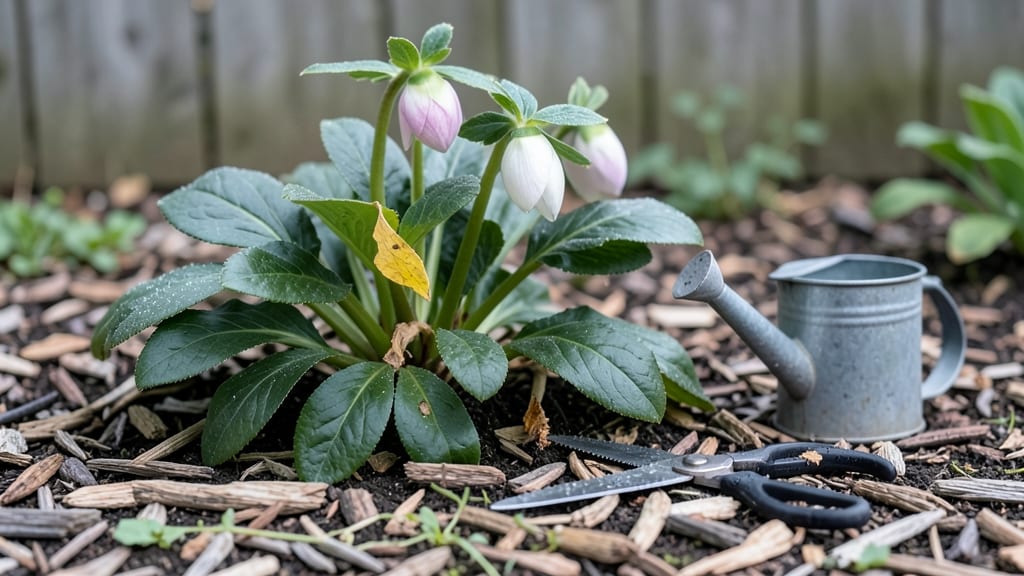
Gardening in January might seem like a lost cause, but it’s actually where the smartest prep happens. ✨ I’ve spent more January afternoons than I can count with a notebook and a thermometer, planning the year’s harvest while everything outside sleeps.
This is the month to turn cold days into productive ones—no dirt needed.
The key is focusing on what you can do: seed starting for heat-loving crops, organizing tools, and even pruning dormant perennials. You’ll need a warm spot for seedlings, some basic supplies like seed trays, and a clear head for planning.
Most people skip this step, but those who don’t end up with a head start when spring arrives.
By February, you’ll have sturdy seedlings ready for transplanting, a garden layout mapped out, and even some winter-hardy greens still producing. The best part? You’ll avoid the springtime rush and the frustration of last-minute mistakes.
This is how you build a garden that works for you, not against the calendar.
Works for any climate—just swap out the exact tasks based on your first frost date. Whether you’re a beginner or a seasoned gardener, January is your chance to set the stage for a year of growth. Let’s get to it.
📚 In This Guide
- What you need
- Instructions
- Tips and common mistakes
- Wrapping up and next steps
What you need
- ● Garden Gloves: 1 pair (waterproof, insulated for cold weather—look for nitrile-coated or leather options).
- ● Pruners: 1 pair (bypass pruners for clean cuts, sharp and rust-resistant).
- ● Trowel: 1 (stainless steel, 6–8 inches long for digging small holes).
- ● Garden Fork: 1 (heavy-duty, for aerating soil or turning compost).
- ● Wheelbarrow or Bucket: 1 (5–10 gallons, for hauling soil, mulch, or debris).
- ● Shovel: 1 (round-point for digging, flat-edged for moving soil).
- ● Rake: 1 (bow rake for leaves/debris, leaf rake for fine cleanup).
- ○ Cold-Frame Kit (Optional): 1 (clear polycarbonate panels + frame, 2’x4’ size for seedling protection).
- ● Mulch: 2–3 bags (straw, pine straw, or shredded leaves, 2–3 cubic feet per 100 sq. ft.).
- ● Compost: 1–2 bags (well-aged, 2–3 cubic feet for amending soil).
- ● Row Covers/Frost Blankets: 1–2 (floating row cover or breathable fabric, sized to fit garden beds).
- ● Seed Starting Mix: 1 bag (sterile, peat-based, 10–20 quarts for indoor seed trays).
- ● Seed Trays/Flats: 2–4 (biodegradable or plastic, 72-cell trays for seedlings).
- ○ Grow Lights (Optional): 1 (LED full-spectrum, 12–18 inches above trays, 12–16 hours/day).
- ● Thermometer: 1 (soil or air thermometer to monitor cold snaps).
- ● Check your USDA Hardiness Zone (use the USDA Plant Hardiness Zone Map to pick cold-hardy plants).
- ● Review your garden layout—sketch bed sizes, sun exposure, and plant rotations.
- ● Test your soil pH (kit or lab test; ideal range: 6.0–7.0 for most veggies).
- ● Order cold-hardy seeds (e.g., peas, spinach, kale, or onions—check seed packets for cold tolerance).
How to plan your January gardening for a thriving season
January’s quiet—perfect for laying the groundwork that’ll pay off in blooms and harvests.
📝 Step 1: Review Last Year’s Garden Journal
Pull out your notes from last season—what worked, what flopped, and what pests showed up. I always circle the standout performers (like my ‘Sugar Snap’ peas) and the problem spots (like the shady corner where tomatoes struggled). This is your blueprint for adjustments.
If you didn’t keep a journal, no stress—just walk your garden beds now. Notice where soil looks compacted, where weeds popped up early, and which plants thrived despite the weather. January’s the time to sketch a rough map of your space, marking sun exposure and drainage issues.
🛠️ Step 2: Order Seeds and Plan Your Layout
Place your seed orders now while catalogs arrive and supplies are fresh. I prioritize heat-loving veggies (tomatoes, peppers) for early spring starts and cool-season crops (lettuce, spinach) for late winter sowing. Check your frost dates—most seed packets list them, but I double-check with my local extension office just in case.
Sketch a rough grid of your beds, noting where you’ll rotate crops this year. Avoid planting the same family (like tomatoes and peppers) in the same spot two years running—that’s how diseases build up. Pro tip: Use colored pencils to mark sun exposure (yellow for full sun, green for partial shade) so you don’t misplace light-loving plants.
🌱 Step 3: Prep Tools and Gather Supplies
Clean and sharpen your tools—pruners, trowels, and hoes—before you need them. I soak rusty blades in white vinegar overnight, then scrub with steel wool. Check your garden gloves for holes and replace if needed. This is also the time to oil wooden handles so they don’t splinter when wet.
Gather compost, mulch, and fertilizer you’ll need for early spring. If you’re using raised beds, now’s the time to measure and order lumber if you’re expanding. I like to label everything with masking tape and a Sharpie—my 10-10-10 fertilizer and slow-release compost look identical until I mark them.
❄️ Step 4: Protect Winter-Blooming Plants
Inspect your tender perennials, tropicals, and winter-blooming shrubs for signs of stress. Wrap bamboo or boxwood with burlap if temps dip below 20°F, and mulch heavily around the base (I use 4-6 inches of straw). For potted plants, move them to a garage or shed if nighttime temps drop below 25°F—frost will wreck them overnight.
Check for dormant pests like scale or spider mites on evergreens. A strong spray of water from the hose usually dislodges them. If you see sap oozing from cuts or branches, it’s a sign of bacterial canker—prune those branches now and sterilize your tools with rubbing alcohol to prevent spread.
☀️ Step 5: Plan for Early Spring Starts
If you’re growing cool-season crops like spinach or kale, now’s the time to start seeds indoors under grow lights. I use small seed trays and bottom watering to keep moisture even. For hardy greens, you can even direct-sow outdoors if your soil isn’t frozen—just cover with row fabric if nights are chilly.
Plan your succession planting schedule so you’re not scrambling in April. Note which crops need long growing seasons (like broccoli) and which can bolt quickly (like radishes). I keep a simple spreadsheet with planting dates, harvest windows, and spacing needs—it saves me from overcrowding later.
Tips & tricks for perfect January gardening prep
January’s the perfect time to set your garden up for success—here’s how to avoid common pitfalls and maximize your early planning.
Documentation is Key: If you didn’t keep last year’s garden journal, don’t stress—just walk your beds now and take photos of problem areas. I’ve started using a simple voice memo app to record observations while I’m out there. This creates an instant digital record of sun exposure, soil conditions, and plant locations that’s easier to reference later than scribbled notes.
Crop Rotation Matters: When sketching your garden layout in Step 2, use different colored pencils for each plant family—yellow for nightshades (tomatoes, peppers), blue for brassicas (broccoli, kale), and red for legumes (peas, beans). This visual system helps you instantly see where you’ll need to rotate crops next year. I keep my map in a plastic sleeve with my seed catalogs for easy reference.
Tool Maintenance Pays Off: The overnight white vinegar soak for rusty tools in Step 3 works wonders, but I’ve found adding a few drops of mineral oil to the vinegar prevents future rust buildup. For wooden handles, I use a mix of linseed oil and turpentine (1:1 ratio) instead of regular oil—it penetrates deeper and lasts longer. Always store tools indoors to extend their life.
Cold Protection Hacks: For plants needing protection below 20°F, I’ve had great success with bubble wrap instead of burlap—it’s more insulating and doesn’t absorb moisture. For potted plants at risk below 25°F, I place them on upside-down flower pots to elevate them slightly above potential frost pockets. A simple thermometer in your garden helps track exactly when protection is needed.
Pro Tips for Gardening In January
- January’s the perfect time to set your garden up for success—here’s how to avoid common pitfalls and maximize your early planning.
- Documentation is Key: If you didn’t keep last year’s garden journal, don’t stress—just walk your beds now and take photos of problem areas.
- This visual system helps you instantly see where you’ll need to rotate crops next year.
Frequently asked questions
Can I still plant in January, or is it too late?
January is a great time for cold-hardy crops like kale, spinach, and garlic—just check your USDA zone! For tender plants, wait until after the last frost (usually late winter/early spring). Start seeds indoors now for an earlier spring harvest. Pro tip: Use row covers to protect young plants from frost.
How do I protect my garden from freezing temperatures?
Layer up! Use mulch (straw or leaves) to insulate soil, and cover delicate plants with frost cloth or old blankets. Group containers close together to trap warmth. For trees, wrap trunks with tree guards to prevent sunscald. Avoid watering before hard freezes—wet soil freezes faster.
What tools should I have ready for January garden tasks?
Stock up on these essentials: a pruning saw (for winter tree pruning), gloves (waterproof + insulated), a shovel (for clearing snow), and a thermometer (to monitor soil temps). A garden hose with a frost-proof spigler is a lifesaver for thawing frozen tools or soil.
Can I compost in January, and what should I add?
January is perfect for browns (dry leaves, shredded paper) to balance greens (veggie scraps, coffee grounds). Avoid meat/dairy—stick to plant-based scraps. Turn your pile every 1–2 weeks to speed up decomposition. If it’s too wet, add more carbon (straw, cardboard); if too dry, sprinkle water. Pro tip: Bury citrus peels to deter pests!
How do I prep my soil for spring planting in January?
Start by testing soil pH (kits are cheap at garden centers). Amend with compost or aged manure to boost nutrients. If your soil is compacted, till in sand or perlite for better drainage. Don’t overwork wet soil—wait for dry spells to avoid clumps. Mark garden beds with stakes to plan rotations.
Will pests still be a problem in winter?
Some pests (like slugs or rodents) are active year-round! Inspect stored tools/woodpiles for overwintering pests. Set out traps or diatomaceous earth near entry points. Clean up debris (fallen leaves, old plants) to remove hiding spots. Pro tip: Chickens or ducks can help control pests naturally!
Wrapping up and next steps
January might feel like the quietest month in the garden, but it’s actually your secret weapon for a thriving year ahead! 🌱 By planning, organizing, and prepping now, you’ll set the stage for bountiful harvests, lush landscapes, and fewer surprises when spring arrives.
Think of this as your backstage pass to gardening success—small steps today mean big rewards later.
Ready to turn your vision into reality? Start by picking just one task from this guide—whether it’s sketching your layout, sharpening tools, or researching cold-hardy crops—and take action this week. Your future garden will thank you! 🌿