
Landscaping
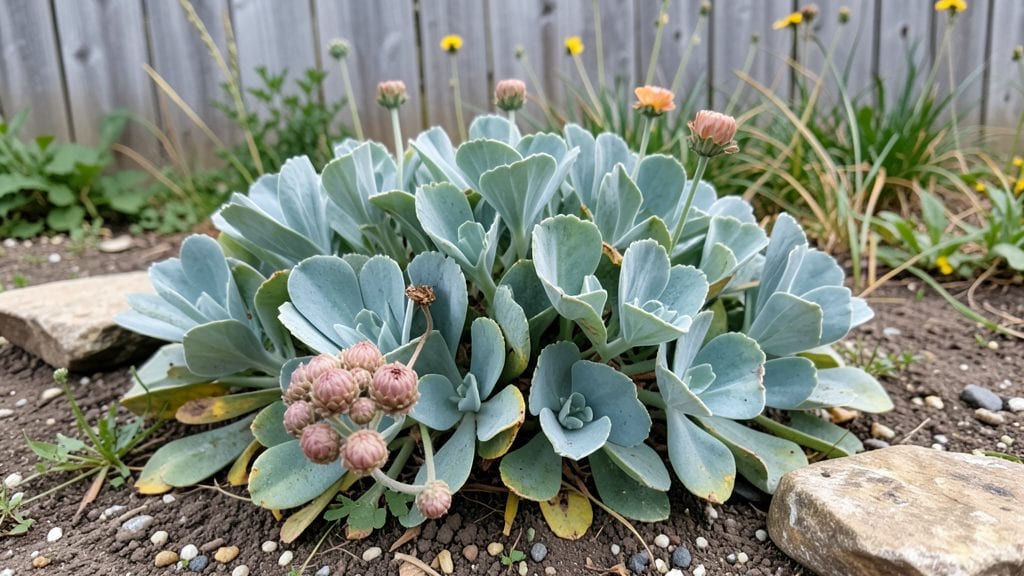
My rockery garden ideas start with a simple truth: rocks don’t just look good—they create microclimates perfect for drought-resistant plants. 🌿 I built my first tiered terrace last spring, and now I’m obsessed with how it transforms a dry corner into a lush, low-maintenance oasis that thrives even when summer bakes the rest of the yard.
The secret lies in layering rocks of different sizes and textures—smooth river stones for contrast, jagged slate for drama, and flat flagstones for planting shelves. Pair them with alpine plants like sedum or sempervivum, which cling to crevices like tiny green waterfalls.
Drainage becomes effortless when you stack rocks with gaps between layers, letting water flow freely while roots stay snug.
By the time you’re done, you’ll have a garden that feels like a natural sculpture park, where every plant has its own perfect spot. The colors pop against the rocks—think deep purple lavender, silver-blue artemisia, and fiery red sedum—while the structure stays sturdy for years.
Even my black thumb can’t kill this setup.
Works for any space, from a balcony planter to a full backyard hillside. The key is starting small—one tier at a time—and letting the plants grow into their home. Ready to turn rocks into a showstopper?
📚 In This Guide
- What you need
- Instructions
- Tips and common mistakes
- Wrapping up and next steps
What you need
- ● Rocks & Stones: A mix of medium to large-sized rocks (6–12 inches in diameter) for structure, plus smaller stones (1–3 inches) for filling gaps. Aim for at least 50–100 lbs depending on your rockery size. Choose locally sourced or weather-resistant options like granite, slate, or river rocks.
- ● Gravel: Coarse, decorative gravel (¼–¾ inch) for drainage and aesthetics. 1–2 cubic yards should suffice for a small to medium rockery.
- ● Soil: Well-draining cactus/succulent mix or a blend of potting soil with perlite/sand (50/50 ratio). 2–3 bags (40 lbs each) for planting pockets.
- ● Drought-Resistant Plants: Succulents (e.g., sedum, echeveria), ornamental grasses, and hardy perennials like lavender or yarrow. 5–10 plants to start.
- ● Heavy-duty gloves (for handling rocks and sharp edges)
- ● Wheelbarrow or sturdy bucket (for hauling materials)
- ● Shovel and garden trowel (for digging and planting)
- ● Level and measuring tape (to ensure even tiers)
- ● Landscape fabric (to suppress weeds; 1 roll, 3–4 ft wide)
- ○ Optional: Rubber mallet (for settling rocks) or a landscape stapler (to secure fabric).
- ● A sunny or partially shaded spot with good drainage (avoid low-lying areas where water pools).
- ● Access to a water source (for initial planting and occasional drought care).
- ● Time to plan your design—sketch a rough layout of tiers and plant placements!
Step-by-Step instructions for building a stunning rockery garden
Here's how to create a striking tiered rockery that thrives on minimal water while adding bold texture to your landscape.
🪴 Step 1: Choose and Prepare Your Base Layer
Start by selecting a location with good drainage—rockeries hate soggy roots. I like to lay down a 6-inch thick layer of crushed gravel first, tamped firmly to create a stable foundation. This prevents erosion and lets excess water drain away immediately. For a 4-foot wide rockery, you'll need about 1 cubic yard of gravel spread evenly across the area.
Next, add a 4-inch layer of coarse sand over the gravel. This creates a buffer zone that keeps rocks from sinking into the soil over time. Use a rake to level everything out—you want a perfectly flat surface before adding the first rocks. Here's the thing: skipping this prep step leads to rocks shifting and collapsing within months.
🪴 Step 2: Build the Rock Structure with Careful Placement
Arrange your largest rocks first along the perimeter, creating natural-looking tiers. I like to stagger them slightly so no two edges line up—this mimics how rocks settle naturally over time. For a 4-tier design, your largest rocks should form the bottom layer, with each subsequent tier using progressively smaller stones. Leave 12-inch gaps between rocks to accommodate plants later.
As you build upward, tuck smaller rocks into the crevices between larger ones. This creates hidden pockets where moisture collects—perfect for drought-resistant plants. Don't worry about perfect symmetry; nature has curves, not straight lines. If a rock feels unstable, prop it temporarily with smaller stones until the structure settles.
🌱 Step 3: Select and Plant Drought-Tolerant Specimens
Fill the gaps between rocks with a mix of 3 parts potting soil and 1 part perlite to improve drainage. I plant sedum varieties in the sunniest spots—they thrive with almost no water once established. For shadier areas, heuchera and ferns add lush color without demanding moisture. Space plants 6-12 inches apart, depending on their mature size.
Here's what I do: I dig holes just deep enough to accommodate the root ball, then gently firm the soil around each plant. Water immediately after planting to settle the roots, but don't overdo it—rockeries need to dry out between waterings. Watch for plants that wilt quickly; these need to be moved to a sunnier or shadier spot.
✂️ Step 4: Add Finishing Touches for Long-Term Beauty
Spread a 1-inch layer of decorative gravel around plants to suppress weeds and retain moisture. I choose gravel in earthy tones that complement the rocks—nothing too bright, or it competes with the plants. For extra drama, add a few upright ornamental grasses along the edges; they sway beautifully in the breeze and require almost no maintenance.
Finally, step back and assess your rockery. You're looking for a natural, layered look with plants spilling over the edges. If any rocks feel precarious, secure them with a bit of landscape fabric tucked beneath—just enough to hold them in place without being visible. This is where patience pays off; a well-built rockery improves with age as plants mature and fill in the spaces.
Tips & tricks for perfect tiered rockery gardens
A few simple strategies will help you create a rockery that's both stunning and stable—no landscaping degree required.
Foundation is Everything: Don't skip the 6-inch gravel layer in Step 1—this isn't just about drainage, it's about stability. I've seen rockeries collapse within weeks when people skip this step. Use a rubber mallet to firmly tamp the gravel, especially if you're working on a slope. This creates a solid base that won't shift when you add rocks later. For larger rockeries, consider renting a plate compactor for even better results.
Rock Placement Secrets: In Step 2, when arranging your rocks, think about how they'll settle over time. The largest rocks should be at the bottom, but not perfectly centered—leave some space behind them for the inevitable settling. I like to place rocks with their flat sides down when possible, as they're less likely to tip. For extra stability, intersperse some flat stones horizontally between vertical ones to create natural ledges.
Planting Like a Pro: The 3:1 potting soil to perlite mix in Step 3 is crucial for drainage, but here's what nobody tells you: press the soil mixture firmly around each plant's root ball. This eliminates air pockets that could dry out roots. For the 6-12 inch spacing, measure from the plant's mature width—not its current size. Most plant tags include this information, and it'll save you from overcrowding issues later. A good rule of thumb is to space plants about twice as far apart as their current pot size.
Long-Term Maintenance: That final 1-inch decorative gravel layer in Step 4 does more than just look pretty. It helps regulate soil temperature and reduces evaporation. I recommend using gravel that's slightly larger than your typical pea gravel—about 1/4 inch in diameter. This size allows water to penetrate while still suppressing weeds. For extra protection, consider adding a thin layer of landscape fabric under the decorative gravel, especially in high-traffic areas.
Pro Tips for Rockery Garden Ideas
- A few simple strategies will help you create a rockery that's both stunning and stable—no landscaping degree required.
- Foundation is Everything: Don't skip the 6-inch gravel layer in Step 1—this isn't just about drainage, it's about stability.
- Rock Placement Secrets: In Step 2, when arranging your rocks, think about how they'll settle over time.
Frequently asked questions
Got questions about creating your own rockery garden? You’re not alone! Here are some of the most common queries—plus straightforward answers to help you build with confidence.
What’s the best time of year to start a rockery garden?
Aim for spring or early fall when temperatures are mild and rainfall is steady. Avoid winter (frost can damage plants) and peak summer (drought stress). If you’re in a dry climate, start in late fall to let roots establish before summer heat hits.
How much does a rockery garden cost to build?
Costs vary widely! A small DIY project with recycled rocks and native plants may run $50–$200. Larger, professional-grade rockeries with imported stones, irrigation, and drought-resistant plants can exceed $1,000+. Pro tip: Shop for rocks in bulk or salvage them from local quarries to cut costs!
Can I use just any rocks for a rockery, or do they need to be special?
Not all rocks work! Opt for flat, stable stones (like flagstone or river rocks) to prevent erosion. Avoid sharp, crumbly rocks (e.g., limestone) that break down over time. Bonus: Local, unpolished stones blend seamlessly into natural landscapes.
How do I keep weeds from taking over my rockery?
Weeds thrive in tight spaces! Line the base with landscape fabric before adding rocks, and mulch with gravel or coarse sand between stones. Plant low-growing, drought-tolerant ground covers (like sedum or thyme) to outcompete weeds naturally.
Are rockeries really drought-resistant, or do they still need watering?
Once established, rockeries require minimal water—but young plants still need help! Water deeply 2–3 times per week for the first year, then taper to once every 2–3 weeks (or during dry spells). Pro move: Group plants with similar water needs together!
What if my rockery starts looking messy after a few years?
Don’t stress—rockeries evolve! Refresh with a light prune in early spring, add new plants to fill gaps, or rearrange rocks for a fresh look. Over time, moss and lichen (if in a humid climate) can soften the design naturally.
Wrapping up and next steps
Transforming your outdoor space with a rockery garden isn’t just about aesthetics—it’s a smart, sustainable choice that adds texture, depth, and resilience to your landscape.
Whether you’re drawn to the dramatic tiered terraces or the low-maintenance charm of drought-resistant plants, these ideas prove that stunning gardens can thrive with minimal water. 🌿✨
Now that you’re inspired, take the next step: sketch your design, gather your materials, and start building! Even small changes can make a big impact—so grab your gloves and let your creativity flow. Your dream rockery garden is just a shovel’s throw away!**