Landscaping
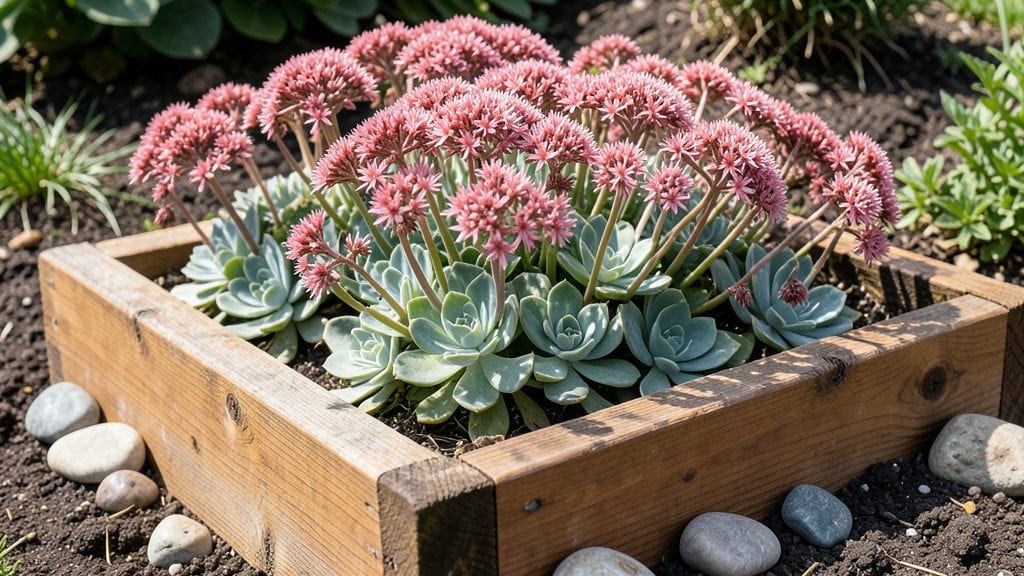
Transforming your tiny yard into a lush, functional oasis starts with small garden landscaping that works with—not against—your space. I turned my 4x6-foot backyard into a thriving retreat by stacking plants vertically, using every inch of wall and fence real estate.
The key isn’t just cramming in more plants; it’s choosing the right layers so your garden feels intentional, not crowded.
Begin with a vertical framework—trellises, wall planters, or even hanging pockets can double your growing space instantly. Pair that with multi-purpose plants like dwarf fruit trees (that bear edible crops and provide shade) or climbing roses (beautiful flowers and living privacy screens).
My favorite combo? A 6-foot tall arbor covered in clematis, with trailing ferns spilling over the sides—it creates drama without stealing square footage.
You’ll end up with a garden that feels shockingly lush for its size, where every plant has a job and no space is wasted. The morning light filters through the vertical layers, casting dappled shadows that make the area feel larger.
Plus, maintenance becomes easier when you’re not constantly weeding between crowded rows—just reach up to prune or water.
This approach works for any small yard, from urban balconies to suburban side patches. The same principles apply whether you’re working with 4 square feet or 400. Let’s get you designing a space that feels expansive, even when it’s not.
📚 In This Guide
- What you need
- Instructions
- Tips and common mistakes
- Wrapping up and next steps
What you need
- ● Vertical Planters: 3–5 wall-mounted or freestanding planters (12"–18" deep, 12"–24" wide). Opt for lightweight materials like fabric grow bags or recycled plastic.
- ● Soil: 5–10 bags (1–2 cubic feet each) of high-quality potting mix (avoid garden soil—it compacts!). Add perlite or vermiculite (1–2 bags) for drainage.
- ● Plants: Trailing plants: 3–5 (e.g., petunias, ferns, or ivy—choose fast-growing, drought-tolerant varieties).
- ● Upright plants: 2–3 (e.g., bromeliads, succulents, or ornamental grasses for height).
- ○ Edible options (optional): Herbs like thyme, basil, or mint in small pots.
- ● Hardware: Wall anchors or L-brackets (4–6, depending on planter weight).
- ● Screws (¼"–½" stainless steel, 2–3" long).
- ● Measuring tape, level, and pencil.
- ○ Decorative Touches (Optional): Solar-powered string lights (1–2 strands).
- ● Small pebbles or mulch (1–2 bags) for drainage layers.
- ● Paint or stain (for wooden planters).
- ● Space Assessment: Measure your walls/fences (height × width) to plan vertical spacing. Aim for 12–18 inches between layers for airflow.
- ● Sunlight Check: Group plants by light needs (e.g., succulents for sun, ferns for shade). Use a light meter app if unsure!
- ● Drainage: Drill holes in planters (if not pre-drilled) and add a 1-inch layer of gravel at the bottom.
- ● Safety First: Use a sturdy ladder for high walls and wear gloves when handling soil or hardware.
Step-by-step instructions for small garden landscaping
A compact yard can still feel lush and intentional with vertical layering. Here’s how to maximize space while creating depth and visual interest.
Assess Your Space and Define Vertical Zones
Begin by measuring your garden’s height and width. Vertical landscaping thrives on three key layers: the ground plane (0-12 inches), the mid-height zone (12-36 inches), and the upper canopy (36+ inches). Sketch a quick layout—this prevents overcrowding and ensures each plant has room to grow without competing for sunlight.
I like to start with the tallest elements first. A 6-foot trellis or sun-loving perennial (like hydrangeas) anchors the upper layer, while 3-foot shrubs or ornamental grasses fill the mid-height. Leave the ground plane for low-spreading plants like creeping thyme or hostas. This structure creates natural flow and prevents the space from feeling cluttered.
Install Structural Supports for Vertical Growth
Before planting, set up your vertical framework. For 4-foot trellises, drive 4-foot metal stakes into the ground at 18-inch intervals along the garden’s perimeter. Secure the trellis with garden twine or zip ties, ensuring it’s sturdy enough to support climbing plants like clematis or morning glories.
If you’re using wall-mounted planters, attach L-brackets to the exterior wall at 12-inch intervals before filling them with soil. For freestanding structures like obelisks or arbors, bury the base 6 inches deep for stability. This step is critical—skipping proper installation leads to wobbly structures that can topple with wind or plant weight.
Layer Plants by Height and Light Needs
Start with the tallest plants at the back or center of your design. For example, a 5-foot tall hydrangea or sunflower belongs in the upper layer, while 3-foot boxwoods or ornamental kale fit the mid-height. Fill the ground plane with 12-inch tall sedum or ajuga to create texture without overwhelming the space.
Group plants with similar sunlight requirements together. A south-facing wall is ideal for sun-lovers like roses or lavender, while shadier corners work for ferns or impatiens. I always plant climbing vines (like jasmine or wisteria) near their trellises last—this ensures they have space to sprawl without smothering other plants.
Add Texture and Seasonal Interest with Accessories
Incorporate 3-inch diameter stones or cobblestones along pathways to define vertical layers visually. For seasonal contrast, place 1-gallon pots of spring bulbs (like tulips) at the base of taller structures, then swap them out for fall mums or winter pansies. This keeps the garden dynamic without requiring major replanting.
Don’t overlook vertical accents like hanging baskets or wall-mounted planters. A 12-inch wide basket filled with trailing petunias adds softness to a hardy wall, while small terracotta pots with herbs like thyme or oregano bring fragrance and utility. These details elevate the design from functional to visually striking.
Maintain Layers for Long-Term Beauty
Prune climbing plants in early spring to encourage new growth, and trim back leggy stems by one-third to maintain shape. For woody shrubs, prune just after flowering to avoid cutting off next year’s blooms. I also mulch annually with 2 inches of shredded bark to retain moisture and suppress weeds—this keeps the ground plane neat and tidy.
Monitor water needs by checking soil moisture at 2-inch depths twice weekly. Drip irrigation systems work best for vertical gardens, delivering water directly to roots without wetting foliage (which reduces disease risk). Adjust your watering schedule seasonally—summer may require daily checks, while spring and fall might only need every other day.
Tips & tricks for perfect small garden landscaping
Creating a visually stunning small garden comes down to strategic layering—and these details make all the difference between a cluttered space and a harmonious retreat.
Layering Strategy: When defining your three vertical zones (ground plane, mid-height, and upper canopy), think about how each layer will evolve seasonally. The 0-12 inch ground plane is perfect for creeping thyme, which stays low all year, while the 12-36 inch mid-height zone can showcase ornamental grasses that sway dramatically in the wind. This layered approach creates visual interest at every height while preventing the space from feeling cramped. I always sketch my design first—it helps visualize how each plant will mature and interact with others.
Structural Stability: The 6-inch deep burial for freestanding structures like obelisks is non-negotiable for stability. I've seen too many wobbly trellises topple after just one strong rainstorm. For wall-mounted planters, use L-brackets at 12-inch intervals—they distribute weight evenly and prevent sagging. Pro tip: If you're working with a brick wall, use masonry screws instead of nails for extra hold. This attention to structural details ensures your vertical elements will last seasons, not just months.
Plant Placement Precision: The 2-inch soil moisture check depth is your best friend for maintaining healthy roots. I recommend using a soil moisture meter for accuracy—it takes the guesswork out of watering. For climbing vines like jasmine, plant them near their trellises last during Step 3. This ensures they have room to sprawl without immediately competing with established plants for sunlight. Also, group sun-lovers together near south-facing walls—they'll thrive with the maximum exposure, while shade-tolerant plants can relax in cooler corners.
Seasonal Adaptability: The 1-gallon pots for seasonal swaps are a game-changer for small gardens. I keep a rotation of spring bulbs, fall mums, and winter pansies ready to go—this way, I can refresh the look without replanting everything. For the upper canopy layer, consider evergreen shrubs like boxwoods that provide year-round structure. They anchor the space visually while giving you a framework to build around with seasonal accents.
Pro Tips for Small Garden Landscaping
- Creating a visually stunning small garden comes down to strategic layering—and these details make all the difference between a cluttered space and a harmonious retreat.
- Layering Strategy: When defining your three vertical zones (ground plane, mid-height, and upper canopy), think about how each layer will evolve seasonally.
- Structural Stability: The 6-inch deep burial for freestanding structures like obelisks is non-negotiable for stability.
Frequently asked questions
Got questions about transforming your small garden into a stunning vertical landscape? Here are some of the most common concerns—and their solutions!
How do I maximize space in a tiny garden without making it look cluttered?
Use vertical gardening to free up floor space! Install trellises, wall-mounted planters, or hanging baskets for flowers, herbs, or vines. Stick to a cohesive color scheme and 3-4 focal points (like a small fountain or sculpture) to keep it clean and intentional. Less is more!
When is the best time to start a small garden landscaping project?
Spring (after the last frost) and early fall are ideal for planting perennials, shrubs, and annuals. If you’re installing hardscapes (like raised beds or pathways), any mild-weather season works—just avoid extreme heat or cold. Pro tip: Start with a sketch to plan your layout before digging!
What’s a budget-friendly way to create a vertical garden?
Repurpose materials like pallets, old ladders, or even PVC pipes as planters. Skip expensive mulch by using gravel, recycled wood chips, or cardboard as ground cover. Thrift stores often have terracotta pots or decorative stones for pennies! Focus on low-maintenance plants like succulents or native wildflowers to cut costs long-term.
How do I prevent my vertical garden from drying out or getting too wet?
Use self-watering planters or wick systems for herbs and veggies. Group plants with similar water needs together (e.g., succulents near drought-tolerant herbs). Mulch heavily to retain moisture, and install a drip irrigation system on a timer for hands-off care. Check soil daily in extreme heat or rain!
What’s the easiest DIY vertical garden project for beginners?
Start with a hanging shoe organizer (poke drainage holes in the pockets!) or a cucumber trellis made from a bamboo stake and twine. For walls, fabric pocket planters (like those from IKEA) are foolproof—just fill, water, and watch greenery grow! Bonus: These projects take under an hour to set up.
Wrapping up and next steps
Transforming a small garden into a lush, functional space is all about creative thinking and smart design—and you’ve got everything you need to make it happen! 🌿 By embracing vertical layers, maximizing space, and choosing the right plants, your compact yard can become a stunning oasis that reflects your personality.
Whether you’re a beginner or a seasoned gardener, every small step—like adding trellises or opting for dwarf varieties—makes a big difference.
Now that you’re inspired, take the next step: sketch a rough layout of your garden, gather your supplies, and start planting! Even tiny changes can yield big rewards, so don’t wait—your perfect small garden is just a few plants and a little patience away. Happy gardening! 🌱