Companion Plants
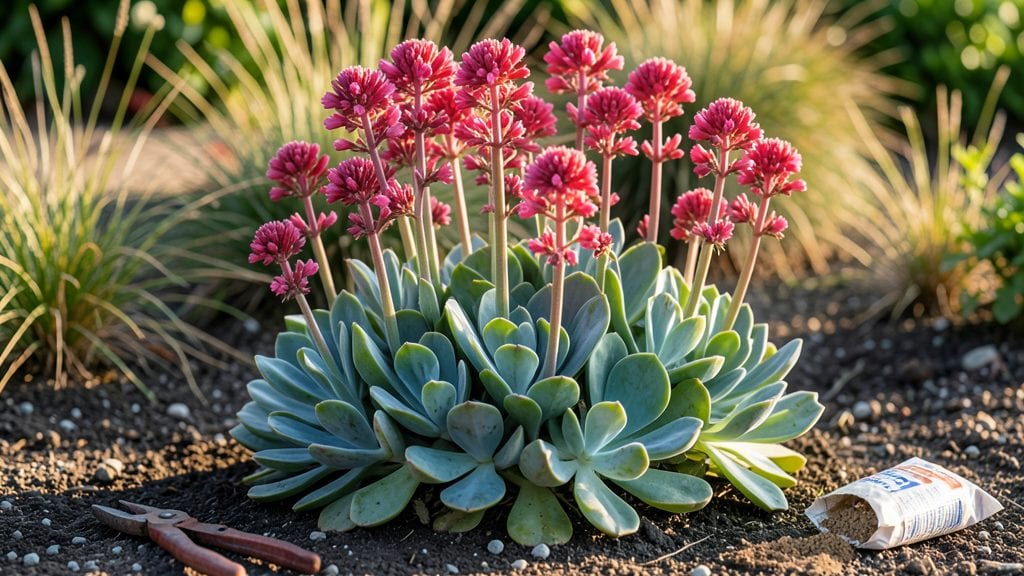
The garden sedum plants I chose turned my dry, sunbaked yard into a vibrant, low-water oasis—these hardy succulents thrive where nothing else will, blooming boldly from spring through frost with almost no fuss.
My first batch of Sedum spectabile took over a rocky slope in just two seasons, requiring only occasional watering and zero fertilizing.
The secret lies in their adaptability—sedum handles full sun, poor soil, and drought like a champ. You’ll need well-draining soil (mix in sand if yours is heavy) and a spot that gets at least six hours of sunlight daily.
Plant them in spring or early fall, spacing them 12-18 inches apart for that lush, carpet-like effect. They spread quickly but stay contained, making them perfect for borders, rock gardens, or even containers.
Once established, these plants practically take care of themselves. Cut back faded foliage in late winter to encourage fresh growth, and watch them rebound with jewel-toned blooms by summer. They’re deer-resistant, pest-free, and even survive light freezes—ideal for busy gardeners who want color without the fuss.
The only real challenge? Keeping your neighbors from asking where you bought them.
For varieties, start with Sedum spurium for low, spreading groundcover or Sedum 'Autumn Joy' for dramatic late-season blooms. Propagate easily by dividing clumps or slipping off leaf cuttings in summer.
The best part? You’ll spend more time admiring them than tending to them. Ready to add some effortless beauty to your garden?
📚 In This Guide
- What you need
- Instructions
- Tips and common mistakes
- Wrapping up and next steps
What you need
- ● Sedum plants: 10–20 plants per 10 sq. ft. (adjust based on desired density and variety, e.g., Sedum spurium, Sedum ‘Autumn Joy’, or Sedum acre)
- ● Check for healthy, vibrant foliage and minimal signs of pests.
- ● Well-draining soil: Native soil amended with compost (1 part compost to 3 parts soil) for improved fertility.
- ● Gravel or sand (1–2 inches mixed into soil) for rocky or clay-heavy areas.
- ● Sunlight access: Full sun (6+ hours/day) for optimal growth and blooms.
- ● Basic gardening tools: Trowel or hand shovel
- ○ Garden gloves (optional but recommended)
- ● Watering can or hose with a gentle spray nozzle
- ● Mulch: Pine straw, shredded bark, or gravel (1–2 inches) to retain moisture and suppress weeds.
- ● Fertilizer: Low-nitrogen, balanced fertilizer (e.g., 5-5-5) applied once in early spring.
- ● Edging materials: Stones, bricks, or metal borders to define planting areas.
- ● Drip irrigation system: For large groundcover areas to automate watering.
- ● Pruners: For trimming spent blooms or shaping plants in spring.
Step-by-Step guide to planting and establishing sedum groundcover
This drought-resistant perennial thrives with minimal effort—here’s how to plant it for lush, low-maintenance coverage.
Choose the Right Location and Prepare the Soil
Sedum thrives in full sun to partial shade, making it ideal for sunny slopes, rock gardens, or even container edges. Test your site first: if the area stays wet for more than 24 hours after rain, amend the soil with 2-3 inches of coarse sand to improve drainage. Sedum roots rot quickly in soggy conditions.
Loosen the top 6 inches of soil with a garden fork, breaking up compacted layers. Work in 1-2 inches of compost (from your materials list) to enrich the soil without adding excessive moisture. Avoid heavy clay—sedum’s shallow roots need air and quick-draining soil to prevent fungal issues.
Space Plants for Optimal Spread and Airflow
Plant sedum 12-18 inches apart for a dense groundcover that fills gaps within 1-2 seasons. Dig holes slightly deeper than the root ball but no wider—this encourages roots to grow downward for stability. Gently tease the roots apart if they’re circling the container.
Place each plant so the top of the root ball sits just below soil level. Press firmly around the edges to eliminate air pockets, then water deeply to settle the soil. Overcrowding leads to competition for water, so resist the urge to plant closer than 12 inches—sedum spreads naturally over time.
Water Deeply and Establish a Drought-Resistant Routine
Water once immediately after planting, then not again for 7-10 days unless your region experiences extreme heat (above 90°F). Sedum stores moisture in its thick leaves, so frequent light watering encourages weak, floppy growth. Instead, give it a deep soak every 2-3 weeks during the first growing season.
After 4-6 weeks, the plants will show signs of root establishment: new rosettes forming at the base and a slight blue-green tint to the leaves. At this stage, reduce watering to once every 3-4 weeks unless your area experiences prolonged dry spells. Mulch with 1 inch of gravel or bark (from your materials) to conserve moisture and suppress weeds.
Prune and Maintain for Year-Round Interest
In early spring, trim back any dead or damaged foliage to 1-2 inches above the soil line. This encourages fresh growth and prevents unsightly brown patches. Sedum rarely needs pruning, but if it spreads too aggressively, cut back one-third of the oldest stems in late summer to rejuvenate the plant.
Fertilizer is rarely needed—sedum grows best in lean soil. If your plants look pale or leggy after 2-3 years, apply a balanced 10-10-10 fertilizer (from your materials) at half strength in early spring. Over-fertilizing leads to soft, floppy growth that’s prone to rot.
Divide and Expand Your Sedum Patch
Every 3-4 years, sedum clumps become congested. In early spring or fall, dig up the entire plant and separate it into 3-4 inch sections, ensuring each piece has 3-5 healthy rosettes. Replant the divisions immediately or store them in a shady, cool spot with lightly moist soil for up to 2 weeks before replanting.
This is also the time to fill in gaps. Sedum spreads slowly but steadily—watch for bare spots and fill them with new divisions or nursery plants spaced 12-18 inches apart. With proper spacing and minimal care, your sedum groundcover will thrive for decades, offering year-round color and zero fuss.
Tips & tricks for perfect sedum groundcover establishment
A few strategic adjustments can transform your sedum from patchy to lush. Here's what I've learned after years of working with this resilient groundcover.
Soil Preparation Secret: In Step 1, when amending your soil, consider adding a layer of perlite or vermiculite mixed with your coarse sand for even better drainage. This creates tiny air pockets that sedum's shallow roots adore, especially in heavy clay soils. I've seen sedum thrive in areas where other plants struggle after adding this extra step—it's worth the minimal effort for long-term success.
Planting Depth Technique: The slight depth adjustment in Step 2—placing the root ball just below soil level—is critical. This positioning encourages roots to spread horizontally for stability while preventing rot from sitting too deep. If you're planting in containers, ensure drainage holes are present and add a layer of gravel at the bottom before adding soil to replicate this ideal depth.
Watering Strategy: The initial 7-10 day drought in Step 3 might seem counterintuitive, but this period allows roots to establish without encouraging surface roots that seek constant moisture. In regions exceeding 90°F, consider installing a simple drip irrigation system on a timer for those first few weeks—just 10 minutes every other day can make all the difference during extreme heat without overwatering.
Pruning Timing: When you perform your early spring pruning in Step 4, look for the first signs of new growth emerging from the base. This is your cue to trim back the previous year's growth to 1-2 inches—you'll notice fresh, vibrant rosettes forming almost immediately. This precise timing prevents cutting into new growth while still removing winter damage.
Pro Tips for Garden Sedum Plants
- A few strategic adjustments can transform your sedum from patchy to lush.
- Soil Preparation Secret: In Step 1, when amending your soil, consider adding a layer of perlite or vermiculite mixed with your coarse sand for even better drainage.
- Planting Depth Technique: The slight depth adjustment in Step 2—placing the root ball just below soil level—is critical.
Frequently asked questions
Got questions about growing garden sedum?
You’re not alone—this hardy groundcover is a favorite, but it’s smart to know the basics before diving in. Below, we’ve rounded up the most common queries to help you grow lush, low-maintenance sedum with confidence.
Can sedum survive in full sun?
Sedum thrives in full sun (6+ hours of direct light daily) and is one of the few plants that actually prefers it. In fact, too much shade can lead to leggy growth or loss of vibrant color. If you’re in a hot climate, ensure the soil drains well to prevent root rot—sedum’s Achilles’ heel!
When is the best time to plant sedum?
Plant sedum in early spring or early fall for the best results. This gives roots time to establish before extreme heat or cold sets in. If you’re using it as a groundcover, space plants 12–18 inches apart to allow for spreading. For container gardening, sedum adapts well to pots with drainage holes!
How often should I water sedum?
Once established, sedum is drought-tolerant—water it only when the top inch of soil is dry. Overwatering is the #1 killer of sedum! During the first growing season, keep soil lightly moist (about once a week), but after that, let nature take over. Rainwater is ideal, but avoid soggy soil at all costs.
Are there any pests or diseases to watch for?
Sedum is generally pest-resistant, but watch for aphids (tiny green bugs) or snails in damp conditions. If you spot them, blast off aphids with a hose or use diatomaceous earth for snails. Root rot is the main disease risk—ensure fast-draining soil to prevent it. Healthy sedum rarely needs intervention!
What are some great sedum varieties for beginners?
Start with these easy-care picks:
- ‘Autumn Joy’: Classic pink blooms in late summer; great for borders.
- ‘Dragon’s Blood’: Deep red foliage that pops in any season.
- ‘Angelina’: Golden-yellow leaves for year-round color.
- ‘Stonecrop’ (Sedum rupestre): Tiny succulent-like leaves, perfect for rock gardens.
Wrapping up and next steps
Garden sedum plants are a fantastic choice for any low-maintenance, drought-resistant landscape—offering year-round color with minimal fuss! Their hardiness, pollinator appeal, and versatility make them a must-have for both beginners and seasoned gardeners.
Whether you’re revamping a rocky slope, brightening a shady corner, or simply adding texture to your yard, sedum delivers effortless beauty with maximum impact.
Ready to transform your garden? Start small—pick a sunny spot, grab a few varieties, and watch your space thrive with lush, resilient greenery. Happy planting! 🌱✨