Tools
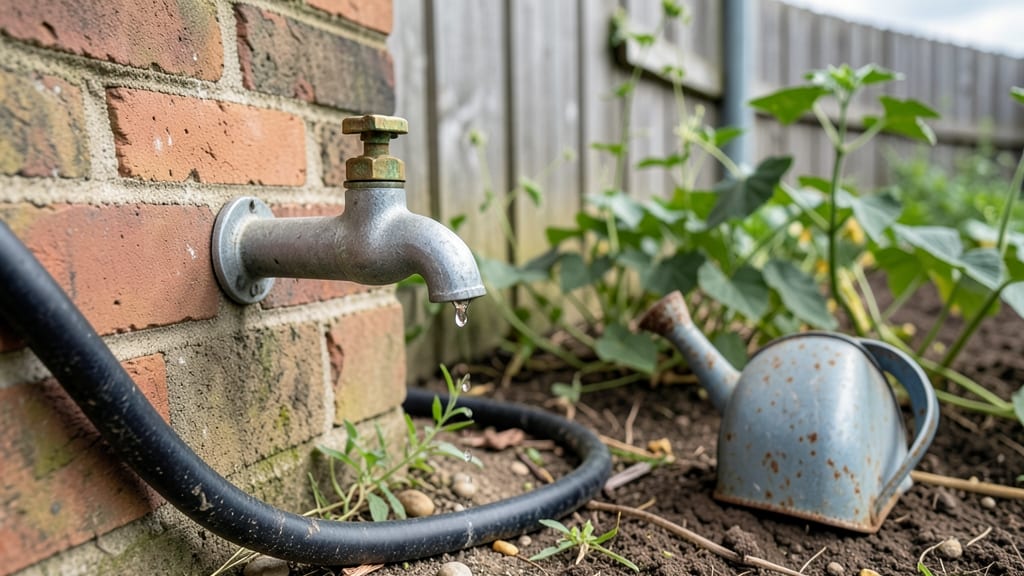
A garden water tap that actually works without constant hose tangles? I’ve wrestled with leaky connections and weak pressure for years—until I figured out how to install one that delivers steady water exactly where I need it.
The right setup means no more wrestling with kinks or watching water spray everywhere.
First, pick a spot with good pressure and easy access—near your garden beds or a central hub. Use a frost-proof valve if you’re in a cold climate, and always check for leaks before attaching lines.
A simple shutoff valve and durable hose bib save headaches later. Most setups take under an hour with basic tools.
Once installed, you’ll never struggle with hose drag again. Drip lines snake effortlessly between plants, delivering water right to the roots without waste. No more soggy leaves or missed spots—just consistent moisture that keeps your garden thriving all season. Ready to ditch the hassle?
Pro tip: Winterize by draining lines and covering taps to avoid frozen pipes. A little prep now means no surprises when spring rolls around. Let’s get that water flowing smoothly!
📚 In This Guide
- What you need
- Instructions
- Tips and common mistakes
- Wrapping up and next steps
What you need
- ● Garden water tap (or hose bib) – Choose a 1/2" or 3/4" brass or plastic tap with a built-in threaded connection for hoses or drip systems.
- ● Drip irrigation kit – Includes: 1x Mainline tubing (1/4" or 1/2" poly tubing), 20–50 ft (depending on garden size).
- ● 1x Pressure regulator (if tap pressure exceeds 40 PSI).
- ● 1x Filter (180-micron mesh) to prevent clogs.
- ● Assorted connectors, tees, and end caps (check kit for quantities).
- ● Hose or tubing adapter – 1/2" male thread to connect to your tap.
- ● Tools for installation: Adjustable wrench or pliers (for securing fittings).
- ● Teflon tape (to seal threads and prevent leaks).
- ● Scissors or tubing cutter (for clean cuts).
- ● Smart irrigation controller – For automated scheduling (e.g., Rain Bird or Orbit).
- ● Fertilizer injector – To add nutrients to your drip system.
- ● Backflow preventer – Required in some regions to protect drinking water.
- ● Extra tubing or emitters – For future expansions.
Step-by-Step guide to installing a garden water tap
Transform your garden into a low-maintenance oasis with this simple setup.
Locate and Prepare the Installation Spot
First, identify where you want your water tap to be. I always choose a spot near your most frequently watered plants—this saves time and prevents tangled hoses. Make sure the location has access to your home’s water supply line, ideally within 6 feet of an existing outdoor faucet or shutoff valve.
Turn off the main water supply to avoid leaks during installation. Use a pipe wrench to carefully disconnect any necessary sections of the existing pipe. If you’re installing near an existing faucet, you may need to cut the pipe with a hacksaw and use a pipe cutter for clean edges. Wear gloves to protect your hands from sharp metal.
Install the Shutoff Valve and Tap Assembly
Attach the shutoff valve to the prepared pipe section first. This valve will control water flow to your new tap, so position it where it’s easily accessible. Use pipe thread sealant on the threads before screwing the valve into place—this prevents leaks. Tighten securely with the wrench, but don’t overtighten or you risk cracking the valve.
Next, install the garden water tap onto the shutoff valve. Most taps come with a compression fitting or threaded connection. If using a threaded tap, apply more sealant to the threads before screwing it on by hand first, then give it a final tighten with the wrench. Test the connection by turning the shutoff valve on briefly—check for drips or leaks around the threads.
Connect to Your Water Source and Test
Reconnect any remaining pipe sections, ensuring all connections are tight and sealed. Turn the main water supply back on slowly and let the pipes pressurize. Open the shutoff valve to your new tap and let it run for 30 seconds to clear out any debris or air from the lines.
Watch for leaks around the valve and tap connections. If you see water dripping, tighten the fittings slightly with the wrench. Once everything is dry, your tap is ready for use. I like to label the shutoff valve with a small tag so I know which plants it controls—this saves confusion later.
Attach Drip Irrigation or Hoses
Now that your tap is installed, you can connect drip irrigation lines or hoses directly. For drip irrigation, attach a drip emitter or soaker hose to the tap’s threaded outlet. If using a hose, screw on a hose adapter first. Make sure all connections are snug to prevent leaks.
Run the irrigation lines or hoses to your plants, adjusting the flow rate as needed. For drip systems, use pressure regulators if your water pressure exceeds 40 psi—this protects the lines from bursting. Test the setup by turning the tap on and checking that water flows evenly to all connected plants.
Maintain and Troubleshoot Over Time
After a few weeks, check the tap and connections for any signs of wear or leaks. If you notice slow water flow, the shutoff valve or tap may need cleaning. Turn off the water, disconnect the tap, and remove any sediment buildup from the screen or outlet using a small brush or needle-nose pliers.
In winter, drain the tap and any attached lines to prevent freezing damage. If you’re in a cold climate, consider insulating exposed pipes or wrapping the tap in foam pipe insulation. This simple step keeps your setup functional year-round without extra hassle.
Tips & tricks for perfect garden water tap installation
A few simple tricks will help you avoid common mistakes and ensure your garden water tap works flawlessly for years.
Location Strategy: When choosing your installation spot in Step 1, avoid placing the tap directly against a wall or fence. Leave at least 6 inches of clearance for easy access to the shutoff valve and connections. I've found that installing near a corner provides the best access while keeping hoses organized. Also, consider future plant growth—don't install where new plants might eventually block access to the valve.
Thread Sealant Application: In Step 2, don't skimp on the pipe thread sealant. Apply a thin, even coat to both male and female threads before assembly—this prevents leaks far more effectively than over-tightening. I like to wrap the sealant around the threads in a spiral pattern, then wipe away any excess. This creates a proper seal without creating a messy situation that attracts dirt and insects.
Pressure Testing: After completing Step 3, perform a thorough pressure test before finalizing connections. Turn on the tap fully and let it run at maximum pressure for 1 minute while watching all connections. This helps identify any weak spots that might only leak under high pressure. If you notice any drips, tighten slightly and test again—don't overtighten, as this can damage the threads.
Winter Preparation: For Step 5 maintenance, I recommend installing a drain valve at the lowest point of your system if you're in a cold climate. This makes winter draining much easier and prevents potential freezing damage. Even with proper insulation, having a dedicated drain point gives you peace of mind during harsh winters. Mark the valve clearly so you remember where it is when spring arrives.
Pro Tips for Garden Water Tap
- A few simple tricks will help you avoid common mistakes and ensure your garden water tap works flawlessly for years.
- Location Strategy: When choosing your installation spot in Step 1, avoid placing the tap directly against a wall or fence.
- Thread Sealant Application: In Step 2, don't skimp on the pipe thread sealant.
Frequently asked questions
Got questions about setting up or using a garden water tap? You’re not alone! Here are some of the most common concerns—and their straightforward solutions.
How deep should I bury the water line for a garden tap?
Bury the line at least 12–18 inches deep to protect it from freezing (in colder climates) and foot traffic. Use a trenching tool or shovel for precision. For extra durability, wrap the pipe in foam insulation or a protective sleeve before backfilling with soil. Pro tip: Mark the location with a bright cap or stake to avoid accidentally digging into it later!
Can I install a garden tap without turning off the main water supply?
Yes, but only if you’re using a shutoff valve on the existing pipe. Turn off the valve closest to your tap location, then attach the new tap. If there’s no valve, you’ll need to shut off the main supply temporarily. Warning: Always test for leaks after installation before restoring water pressure!
What’s the best way to prevent clogs in a garden tap?
Install a mesh screen filter (like a hose bibb screen) to block debris. Also, avoid connecting high-pressure hoses directly—use a pressure regulator if needed. For drip irrigation, add a drip tape filter to keep sediment out of emitters. Flush the system monthly to clear buildup. Bonus: A slow, steady flow reduces clog risks!
What can I do if my garden tap leaks after installation?
First, tighten the connections with a wrench—don’t overtighten! If the leak persists, check for stripped threads or a faulty washer. For stubborn leaks, apply plumber’s tape or replace the washer. If the issue is at the pipe joint, you may need to re-solder or re-couple the connection. Pro move: Use Teflon tape on male threads before assembly!
Is a garden tap worth it if I already have a hose?
A garden tap eliminates hose tangles and delivers consistent pressure for drip systems, sprinklers, or even a DIY irrigation setup. It’s a one-time investment that saves time and water long-term. Plus, it adds value if you ever sell your home. Think of it as a “set-it-and-forget-it” upgrade!
Wrapping up and next steps
A garden water tap is your secret weapon for effortless, efficient irrigation—no tangled hoses or wasted water in sight! 🌱 Whether you’re tending to a sprawling lawn, delicate herbs, or a thriving veggie patch, this simple upgrade transforms your outdoor space into a low-maintenance oasis.
With just a few tools and a little know-how, you’ll be drip-irrigating like a pro.
Ready to take the next step? Start small: Install one tap in your most water-intensive area, test your setup, and expand as you go. Your plants—and your weekends—will thank you! 💧✨