
Landscaping
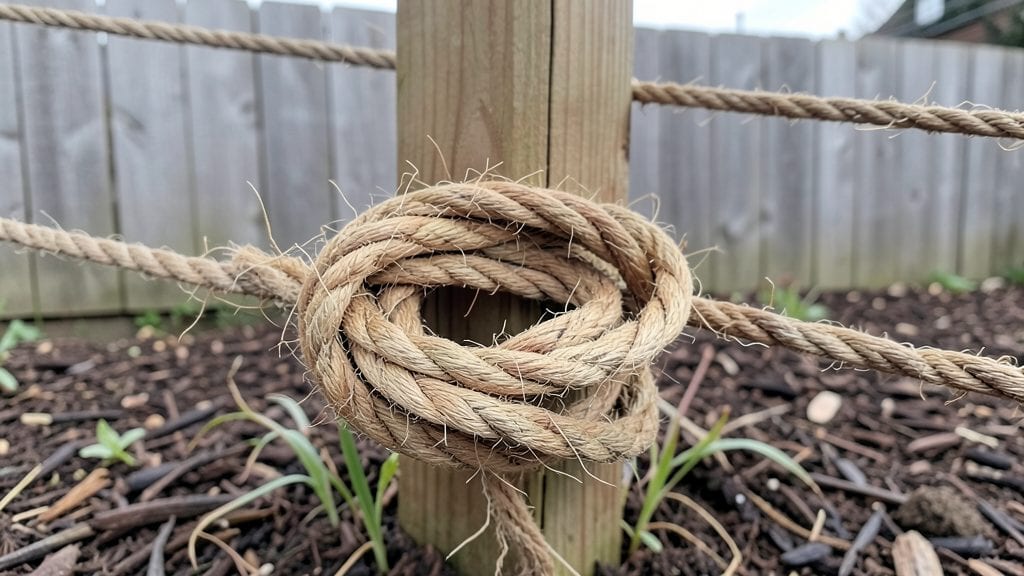
A garden rope fence transforms cramped yards into defined, functional spaces without permanent construction. 🌿 I used one last summer to create a cozy seating nook in my tiny backyard—it took less than an hour to install and instantly made the area feel intentional.
The modular sections let me adjust the layout whenever I wanted, whether for a dinner party or a quiet reading corner.
The best part? No digging or heavy tools required. You can choose from natural jute, durable plastic, or even woven bamboo ropes depending on your style and how long you need it.
For my setup, I picked weather-resistant polypropylene rope that held up through rain and sun without sagging. It’s also lightweight enough to move if I decide to rearrange the garden later.
Imagine a hidden herb garden tucked behind a low rope screen, or a winding path framed by temporary posts and rope. You’ll create privacy where none existed before, while keeping the space open and airy.
The rope blends seamlessly with plants, so it disappears into the landscape instead of standing out.
Perfect for renters, small spaces, or anyone who loves to experiment with layouts. Once you see how easy it is to install, you’ll wonder why you didn’t try it sooner—your garden will feel like a curated retreat in no time.
📚 In This Guide
- What you need
- Instructions
- Tips and common mistakes
- Wrapping up and next steps
What you need
- ● Garden rope fence panels: 1–4 panels (depending on space; standard sizes: 6 ft tall × 8 ft wide or 6 ft tall × 10 ft wide). Choose from polypropylene, nylon, or UV-resistant polyester for durability.
- ● Corner posts or connectors: 2–4 (for securing panel ends; metal or heavy-duty plastic preferred).
- ● T-posts or ground stakes: 4–8 (for anchoring; 2–3 ft long, galvanized for rust resistance).
- ● Bungee cords or zip ties: 10–20 (for temporary adjustments or securing panels to posts).
- ○ Optional: Decorative toppers (e.g., bamboo, wood, or metal caps) to hide rope ends.
- ● Weatherproof sealant (for wooden stakes or connectors).
- ● Reflective tape (for visibility in low-light areas).
- ● Measuring tape (25 ft).
- ● Hammer or mallet (for driving stakes).
- ● Scissors or utility knife (for trimming rope if needed).
- ● Level (to ensure panels are straight).
- ● Staple gun (if attaching rope to a frame or trellis).
- ○ Optional: Drill (for pre-drilling holes in stakes if using screws).
- ● Clear the installation area of debris, rocks, or sharp objects.
- ● Check local regulations for fence height/permit requirements (especially in HOAs or urban areas).
- ● Mark the layout with spray paint or stakes before assembling.
- ● Ensure the ground is stable (avoid soft soil or slopes without reinforcement).
Step-by-Step instructions for building a garden rope fence
Here’s how to create a stylish, modular privacy screen that transforms tight spaces into cozy garden nooks.
🪴 Step 1: Measure and Mark Your Fence Line
Start by measuring the area where you’ll install the rope fence. Use a tape measure to note the total length and mark the starting point with a small stake or spray paint. For a 4-foot section, divide it into 4 equal segments (each about 1 foot wide) to create a modular look. This ensures your ropes won’t sag or overlap awkwardly.
Double-check your measurements—rope fences rely on tension, and uneven spacing will make the final look uneven. If your space is curved, use flexible measuring tape or a garden hose to trace the shape before marking. I like to snap a string line between stakes for a straight guide, especially in windy areas.
🌱 Step 2: Install Sturdy Corner Posts
Drive 4-inch wooden fence posts into the ground at each corner of your marked section, using a post hole digger or auger to create holes 12 inches deep. The posts should stand 3 feet tall—this gives enough height for privacy while keeping the rope taut. Secure each post with concrete mix (about 1 gallon per post) to prevent shifting.
Let the concrete set for 24 hours before adding rope. If you’re working with a temporary setup, you can skip the concrete and instead use stakes with screw-in anchors for easier removal later. Just make sure the posts are plumb (perfectly vertical) before the concrete hardens—tap them gently with a rubber mallet while checking with a level.
💧 Step 3: Attach Rope Between Posts
Cut 4 lengths of 1/4-inch outdoor-rated rope**, each matching the distance between your posts (about 1 foot wide for a 4-foot section). Tie the first rope securely to the top of the left post using a bowline knot, then stretch it tightly to the top of the adjacent post. Use a rope tensioner or a friend to pull it taut before tying off with another bowline knot. Repeat for all 4 ropes, spacing them evenly.
For extra durability, add a second row of rope about 6 inches below the first, creating a crisscross pattern. This not only improves privacy but also prevents small critters from squeezing through. If you’re using privacy mesh fabric (optional), staple it between the ropes for a solid barrier—just leave a little slack for wind movement.
☀️ Step 4: Secure the Base and Add Finishing Touches
To keep the fence stable, tie short lengths of rope (about 6 inches) between the bottom of each post and the ground, creating a low border. This prevents the fence from flapping in breezes and adds a polished look. For a decorative touch, wrap twine or jute around the posts in a spiral pattern, leaving 1 inch between wraps for a natural, rustic feel.
Finally, trim any excess rope with scissors and tuck loose ends neatly. If you’re using clips or hooks, attach them now to hang garden tools, lights, or climbing plants. I like to add solar-powered string lights woven through the ropes for evening ambiance—just avoid overloading the structure.
✂️ Step 5: Maintain and Customize Over Time
Check your fence every 2-3 months to tighten any sagging ropes and replace knots that have loosened. If the rope starts to fade, swap it out for fresh UV-resistant twine to keep it looking vibrant. For a seasonal update, swap out the rope for greenery like ivy or wisteria—just secure the vines with soft plant ties to avoid damaging the stems.
This modular design means you can easily expand or reconfigure the fence as your garden evolves. Need more privacy? Add another post and rope section. Want to change the look? Swap the rope for bamboo stakes or lattice panels** without starting over. The beauty of this fence is its flexibility—adjust it to fit your space year after year.
Tips & tricks for perfect garden rope fence
Here's what I learned after building (and rebuilding) my own modular rope fence—these little details make all the difference between a flimsy DIY project and a sturdy, stylish privacy screen.
The Tension Factor: Don't skimp on pulling those ropes tight! When you're attaching the 1/4-inch outdoor-rated rope in Step 3, use a rope tensioner or recruit a friend to help pull it as taut as possible. The first time I skipped this, my ropes sagged within weeks. Aim for that tight, almost drum-like tension—it's the secret to a professional-looking fence that won't flop in the breeze.
Concrete Cure Time: That 24-hour waiting period for the concrete to set in Step 2 is non-negotiable if you want a fence that stays put. I learned this the hard way when I tried to add rope too soon—my first post wobbled like a jellyfish! If you're impatient, use stakes with screw-in anchors instead, but be prepared to check them more often for stability. Real talk: The extra day of waiting prevents headaches down the road.
Knot Selection: Bowline knots are your best friend for this project, but here's the thing nobody tells you—practice them first! The knots in Step 3 need to hold up to outdoor conditions, so make sure they're tight and secure. I keep a small piece of scrap rope on hand to practice knots before working with my actual fence materials. A loose knot now means a sagging fence later.
Seasonal Swap Strategy: The modular design lets you customize year after year. In Step 5, when you're planning your seasonal updates, consider swapping the rope for climbing plants like ivy or wisteria during growing seasons. Just remember to use soft plant ties to avoid damaging the stems—tight ties will strangle your plants faster than you can say "garden disaster."
Pro Tips for Garden Rope Fence
- Here's what I learned after building (and rebuilding) my own modular rope fence—these little details make all the difference between a flimsy DIY project and a sturdy, stylish privacy screen.
- The Tension Factor: Don't skimp on pulling those ropes tight!
- Concrete Cure Time: That 24-hour waiting period for the concrete to set in Step 2 is non-negotiable if you want a fence that stays put.
Frequently asked questions
Got questions about installing and maintaining a garden rope fence? You’re not alone! Here are answers to the most common concerns to help you get started with confidence.
How long does it take to install a rope fence?
A DIY rope fence typically takes 1-3 hours for a small garden (10x10 ft), depending on your experience. Larger areas or complex designs may require more time. Pro tip: Pre-measure your space and gather tools (stakes, rope, scissors) beforehand to speed up the process!
Can I install a rope fence on uneven ground?
Yes! Rope fences are flexible and adapt well to uneven terrain. Use adjustable stakes or bend the rope slightly to follow the ground’s contours. For steep slopes, consider adding extra tension or securing the base with landscape anchors to prevent sagging.
What’s the best rope material for durability?
For longevity, opt for polypropylene or polyester rope—both resist UV rays, mold, and mildew. Avoid natural fibers like hemp, as they degrade faster. A 3/8” to 1/2” diameter rope balances strength and ease of installation. Pro tip: Choose UV-treated rope to extend its lifespan in sunny climates.
Will a rope fence keep pets or small animals out?
Rope fences create a visual barrier but aren’t escape-proof for determined pets. For pets, bury the bottom 6 inches deep or add a low wooden barrier. For wildlife, combine the rope fence with a chicken wire layer if needed. Test tension regularly to prevent gaps!
How do I maintain my rope fence in heavy rain or wind?
After storms, check for loose stakes or sagging rope and retighten as needed. For windy areas, use heavier stakes (like metal or treated wood) and secure the rope with zip ties or knots every 2-3 feet. Rinse the rope occasionally to remove dirt buildup, which can weaken fibers over time.
Wrapping up and next steps
A garden rope fence is your perfect solution for adding privacy, style, and functionality to small or tight spaces—without the hassle of permanent installations.
Whether you’re shielding your patio from neighbors, creating a cozy nook, or simply elevating your outdoor aesthetic, modular rope screens offer flexibility, durability, and easy customization. With the right materials and a little creativity, you can transform even the most compact garden into a serene retreat.
Ready to get started? Sketch your space, gather your supplies, and take the first step toward a more private and inviting outdoor oasis! 🌿✨