Vegetables
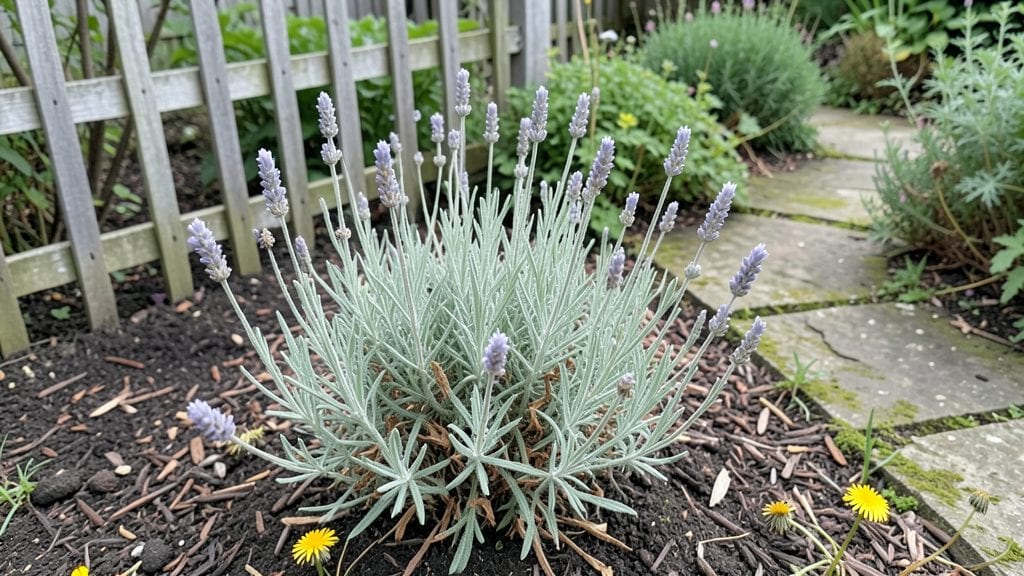
Creating a friendly neighbor garden starts with layers that welcome both people and pollinators—because the best gardens don't just look pretty, they bring neighbors together. 🌿 The key is blending plants that bloom in every season with spaces that invite lingering, like a shared bench or a trellis that frames your front walk.
I learned this the hard way when my first "private" garden became the neighborhood's favorite hangout spot—turns out, beauty and accessibility go hand in hand.
You don’t need a sprawling yard to make it work. Start with pollinator-friendly perennials like coneflowers and milkweed for year-round color, then add climbing roses or clematis to create natural privacy screens.
A simple 2-foot-wide strip of native wildflowers along a fence doubles as a bee highway and a conversation starter. The best part? These plants thrive with minimal fuss once established, so you’ll spend more time enjoying the buzz than weeding.
Imagine stepping outside to find hummingbirds darting between blooms while neighbors stop to admire your sun-dappled seating nook or the way your garden frames their view. That’s the magic of intentional layers—each plant and path designed to say, "Come on in."
The payoff isn’t just aesthetic; it’s the quiet pride of knowing your garden works harder than you do, turning strangers into friends one shared harvest at a time.
Works in any size space, from urban balconies to suburban backyards. The secret? Start small, let nature do the heavy lifting, and watch your garden become the neighborhood’s favorite spot—without you even having to host. Let’s get planting!
📚 In This Guide
- What you need
- Instructions
- Tips and common mistakes
- Wrapping up and next steps
What you need
- ● Native plants (perennials & annuals): Choose 3–5 species like coneflowers, bee balm, or milkweed (1–3 plants per type). Pro tip: 💡 Buy local or from reputable nurseries to ensure species match your climate!
- ● Pollinator-friendly veggies: Add 2–3 plants like basil, squash, or tomatoes (pollinators love these!).
- ● Mulch: 2–3 bags of organic mulch (shredded bark or straw) to retain moisture and suppress weeds.
- ● Compost: 1–2 bags of high-quality compost to enrich soil.
- ○ Drip irrigation or soaker hose: 50–100 ft. for efficient watering (optional but highly recommended!).
- ● Garden gloves (1 pair)
- ● Hand trowel or small shovel
- ● Pruners (for trimming)
- ● Watering can or hose (if not using drip irrigation)
- ● Measuring tape (for spacing plants)
- ● Wheelbarrow or bucket (for hauling materials)
- ● A sunny spot with 6+ hours of sunlight daily (most pollinators thrive here!).
- ● Well-draining soil (amend with compost if needed).
- ● Access to water (or a plan for irrigation).
- ● Neighbor approval (if sharing space—because friendly gardens start with good vibes! 😊).
- ● Birdhouses or bat boxes (to attract more pollinators!).
- ● Colorful garden markers (for a polished look).
- ● Seeds for wildflowers (to scatter for extra blooms).
How to create a pollinator-friendly garden layout
Here's the simple, layered approach I use to design gardens that buzz with life all season long.
🌱 Step 1: Plan Your Four Planting Layers
Start by sketching your space and dividing it into four vertical layers: tall structures (6-12 feet), mid-height plants (3-6 feet), ground covers (under 1 foot), and vertical climbers (trellises/arbors). This creates a natural habitat that attracts bees, butterflies, and hummingbirds at every height.
I always place tall perennials like coneflowers or black-eyed Susans at the back, followed by shrubs like butterfly bush or viburnum in the middle. For ground level, I mix low-growing wildflowers with edible herbs like thyme and oregano—both pollinators and humans benefit. Add a small trellis in one corner for climbing plants like morning glories or honeysuckle.
☀️ Step 2: Choose Native Plants for Each Season
Select plants that bloom consecutively from early spring through late fall. Start with early spring options like crocus or bleeding heart, then add summer bloomers like bee balm and milkweed, and finish with fall favorites like asters and goldenrod. Native plants require less water and support local pollinator species best.
I like to include at least three plants that provide nectar and three that offer pollen in each layer. For example, pair sunflowers (pollen) with lavender (nectar) in the tall layer. This ensures pollinators always have food available. Check your local nursery for region-specific recommendations—they’ll know what thrives in your climate.
💧 Step 3: Add Water and Shelter Elements
Place a shallow birdbath or small pond (even a saucer with pebbles) near the center of your garden. Pollinators need water too! Keep it no deeper than 2 inches so bees and butterflies can drink safely without drowning. Add a few flat stones to give them purchase.
Incorporate natural shelter like a small brush pile or dense shrubs where pollinators can rest overnight. I also leave some bare soil in one corner—ground-nesting bees like it! Avoid pesticides entirely; even "organic" sprays can harm beneficial insects. If you must control pests, use neem oil as a last resort and apply it only at night when pollinators are inactive.
✂️ Step 4: Maintain with Pollinator-Friendly Care
Water deeply once a week (or more in extreme heat) to encourage deep root growth. Most pollinator plants are drought-tolerant once established, but they need consistent moisture during their first growing season. Check soil moisture by pushing your finger 2 inches deep—if it feels dry, water thoroughly.
Leave some seed heads standing through winter for birds and overwintering insects. I cut back only the dead stems of perennials in early spring, leaving the base intact. This provides shelter and food for early pollinators. Mulch lightly with 2-3 inches of shredded leaves in fall to protect roots and retain moisture.
🪴 Step 5: Expand Year After Year
Each spring, add one new pollinator-friendly plant to fill gaps or replace any that didn’t thrive. I rotate a few annuals each year to keep the garden dynamic—try cosmos, zinnias, or marigolds for summer color. Over time, your garden will become a self-sustaining ecosystem that requires less intervention.
Invite neighbors to share cuttings or seeds from their successful plants. I’ve seen entire streets transform when just a few households start pollinator gardens. The more diversity in your area, the better it is for all pollinators. Keep a simple planting journal to track what works best in your microclimate—you’ll become the go-to gardener in your neighborhood!
Tips & tricks for pollinator-friendly garden design
Creating a buzzing garden isn't just about planting flowers—it's about crafting a thriving ecosystem. Here are my go-to strategies to make your pollinator garden truly exceptional.
Layering for Maximum Impact: In Step 1, when planning your four layers, think about creating "pollinator highways" between them. Place your tallest plants near fences or walls where butterflies can perch while feeding, and position ground covers along pathways so bees can easily navigate. I've noticed hummingbirds prefer gardens where they can dart between layers without flying too far—this vertical approach makes your space feel more like a natural habitat.
Plant Pairing Secrets: The key to continuous blooms in Step 2 lies in strategic pairing. When selecting your three nectar and three pollen plants per layer, choose varieties that bloom at slightly different times. For example, pair early blooming lavender with later-blooming bee balm in the same layer. This creates a "bloom cascade" that ensures pollinators always have fresh food sources throughout the season. I've seen gardens where this technique extended the active season by nearly two months!
Water Safety First: For Step 3's water feature, here's a pro tip: add a few small pebbles or marbles to your shallow dish—they create perfect landing spots for bees. I also recommend placing the water source near (but not directly under) your tallest plants, where pollinators naturally gather. This placement reduces the risk of water splashing onto delicate wings during windy days. And remember, the 2-inch depth rule is critical—bees can't escape deeper water!
Seasonal Maintenance Shortcuts: In Step 4, when it's time to mulch with 2-3 inches of shredded leaves, save yourself time by using your lawnmower to shred leaves first. This creates the perfect mulch texture while reducing work. I also keep a small bucket nearby when cutting back dead stems in spring—those cuttings make great brush piles for shelter! The secret is to work in short sessions (20-30 minutes) so you don't get overwhelmed by the garden's scale.
Pro Tips for Friendly Neighbor Gardens
- Creating a buzzing garden isn't just about planting flowers—it's about crafting a thriving ecosystem.
- Layering for Maximum Impact: In Step 1, when planning your four layers, think about creating "pollinator highways" between them.
- Plant Pairing Secrets: The key to continuous blooms in Step 2 lies in strategic pairing.
Frequently asked questions
Got questions about creating a friendly neighbor garden that thrives year-round and supports pollinators? You’re not alone!
Here are answers to the most common queries to help you get started with confidence.
What’s the best time of year to start a pollinator-friendly garden?
The ideal time depends on your climate, but spring (after the last frost) or early fall are the sweet spots. Planting in spring lets you establish perennials and annuals before summer heat, while fall gives roots time to settle before winter. Pro tip: If you’re in a warmer zone, you can plant year-round—just choose heat-tolerant species like Lantana or Milkweed!
How much does it cost to create a pollinator-friendly garden?
Costs vary widely! A budget-friendly garden can start under $50 using native seeds, recycled containers, and free plant cuttings from neighbors. For a more polished look, expect $100–$300 for soil amendments, potted plants, and decorative elements. Money-saving hack: Check local native plant swaps or community gardens for discounted or free plants!
Will my garden really help pollinators if my yard is small?
Absolutely!
Even a 6x6-foot plot can make a difference. Focus on layered planting—tall perennials (like Joe Pye Weed), mid-height shrubs (e.g., Butterfly Bush), and ground covers (e.g., Clover) create a mini ecosystem. Bonus: Urban gardens with window boxes or balcony planters can attract bees and butterflies too!
What if I don’t want to use pesticides? Are there natural alternatives?
Skip synthetic pesticides—pollinators need them. Instead, use neem oil, soapy water sprays, or introduce beneficial insects like ladybugs. Prevention tips:
Winter isn’t the end—it’s a low-maintenance season! Leave seed heads (like Coneflower) for birds and overwintering insects. Add a 3-inch layer of mulch to protect roots, and plant winter-hardy greens (e.g., Kale, Spinach) or evergreen shrubs for year-round color. Winter task: Prune perennials in late winter to shape them for spring blooms!
Remember: Healthy soil = resilient plants that resist pests naturally!
How do I keep my garden thriving in winter?
Wrapping up and next steps
Creating a friendly neighbor garden isn’t just about beauty—it’s about fostering life, connection, and sustainability. By layering pollinator-friendly plants year-round, you’re not only supporting bees, butterflies, and hummingbirds but also building a welcoming space for your community. Start small, dream big, and watch your garden—and neighborhood—thrive together!
Ready to take the next step? Pick one plant or pollinator to focus on this season, then share your progress with neighbors. Who knows? Your garden might just inspire a whole block of blooms! 🌸🐝