
Vegetables
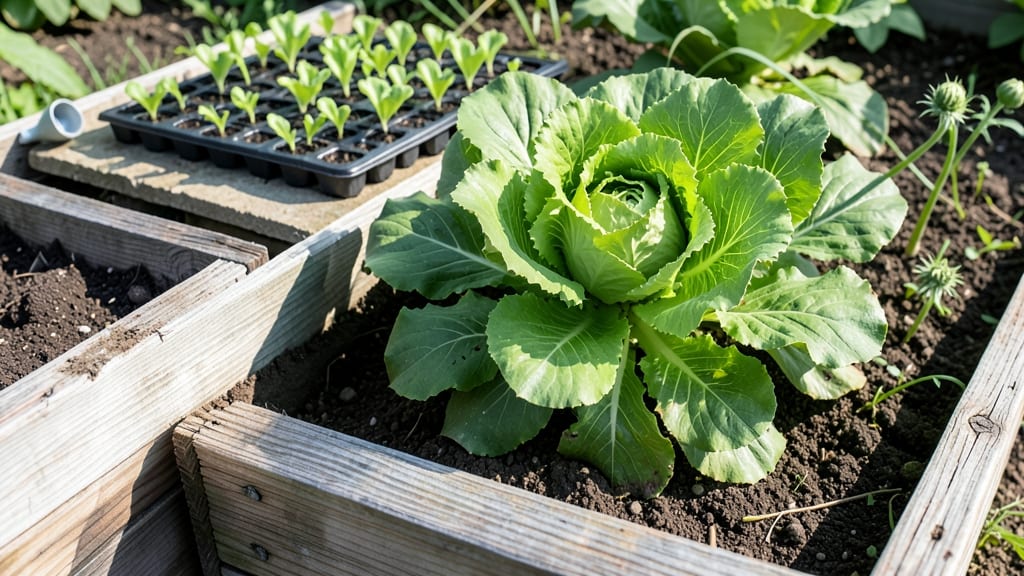
Building community gardens transforms empty lots into thriving green spaces where neighbors grow food, share skills, and reconnect with nature. ✨ I’ve seen these gardens turn abandoned corners into vibrant hubs—places where kids learn where carrots come from and seniors swap heirloom seeds over compost piles.
The key starts with smart planning: dividing space into shared plots, raised beds for accessibility, and dedicated areas for workshops or tool storage. You’ll need volunteers for everything from soil testing to organizing harvest festivals, so build a core team early.
Local parks departments often have zoning resources, and grants from urban agriculture programs can cover supplies.
Layering crops by season keeps the garden productive year-round—cool-weather greens in spring, heat-loving tomatoes in summer, and garlic or kale through winter. The payoff isn’t just food; it’s the stories exchanged over shared harvests and the way these spaces prove that even urban concrete can grow community.
Start small with a single season, then expand based on what works. The best community gardens grow organically—just like the vegetables in them. Let’s get your plot planted with both seeds and neighbors.
📚 In This Guide
- What you need
- Instructions
- Tips and common mistakes
- Wrapping up and next steps
What you need
- ○ Soil: 10–20 cubic yards of high-quality compost or topsoil (test pH levels; aim for 6.0–7.0). Optional: Add worm castings (1–2 bags) for nutrient boost.
- ● Mulch: 1–2 bags of wood chips or straw (3–4 inches deep) to retain moisture and suppress weeds.
- ● Plants/Seeds: Start with 50–100 plants/seeds (e.g., 20 tomato plants, 30 lettuce seedlings, 10 herb starts). Choose heirloom or drought-resistant varieties for urban resilience.
- ○ Optional: Native wildflower seeds (1 lb) for pollinator-friendly borders.
- ● Watering Supplies: 1–2 hose reels with adjustable nozzles (or 5–10 drip irrigation lines for efficiency).
- ● 5–10 watering cans (5-gallon capacity) for seedlings.
- ● Hand Tools (per 5–10 gardeners): 10 trowels (for transplanting).
- ● 5 pruners (bypass for clean cuts).
- ● 3 garden forks (for aerating soil).
- ● 2 wheelbarrows (2-cubic-foot capacity).
- ● Larger Tools (shared): 1 broadfork (for no-till gardening).
- ● 1 shovel (heavy-duty, 12-inch blade).
- ● 1 hoe (stirrup or oscillating for weeds).
- ● Safety Gear: 10 pairs of gloves, 5 sun hats, and 5 knee pads.
- ● Location: Secure a sunny spot (6+ hours of sunlight/day) with accessible water. Check local zoning laws—some cities require permits for permanent structures (e.g., raised beds).
- ● Community Agreements: Define roles (e.g., "watering captain," "harvest coordinator") in a shared doc.
- ● Create a sign-up sheet for tool maintenance and seasonal tasks.
- ○ Funding (Optional but Helpful): Budget for seed grants, tool libraries, or workshop fees (e.g., $500–$2,000 for startups).
Instructions for designing layered community garden beds
Layering plants by function creates a self-sustaining ecosystem that thrives year-round.
🌱 Step 1: Clear and Prepare the Base Layer
Start by removing all existing vegetation, rocks, and debris from your designated area. Use a broadfork to loosen compacted soil to a depth of 12 inches—this improves root penetration and water absorption. If your soil is particularly dense, mix in 2-3 inches of compost from your materials list to introduce beneficial microbes and organic matter.
Here's the thing—don't rush this step. I've seen too many gardens fail because the base layer wasn't properly aerated. Level the ground with a rake, creating a gentle slope if needed to prevent water pooling. Test the moisture by squeezing a handful of soil; it should crumble slightly when pressed but not stick together like clay.
🌿 Step 2: Build the Structural Framework
Construct raised beds or define planting zones using 2x4 lumber or cedar planks from your materials. For a 4-foot-wide bed, assemble frames that are 12-18 inches tall—this height accommodates wheelchairs, reduces bending, and improves drainage. Secure corners with galvanized screws and reinforce with corner braces if needed.
Line the bottom with cardboard or landscape fabric to suppress weeds and prevent soil from spilling into surrounding areas. This is where many gardeners cut corners, but trust me—skipping this step leads to perennial weeds invading your beds. Leave 6-8 inches of space between the frame edges and the fabric to allow for soil expansion.
☀️ Step 3: Layer Soil and Mulch for Nutrient Retention
Fill the frame with a 12-inch layer of topsoil, tamping it down lightly to remove air pockets. Add a 2-inch layer of coarse sand if your soil drains poorly, then top with 3 inches of compost mixed into the top 6 inches of soil. This creates a nutrient-rich zone where roots can access food immediately.
Cover the soil surface with 3-4 inches of wood chips or straw mulch, leaving a 2-inch gap at the frame edges to prevent rot. Mulch regulates temperature, retains moisture, and suppresses weeds—exactly what you want in an urban space where watering isn't always consistent. Water deeply after layering to settle everything in place.
✂️ Step 4: Plant Perennial Foundations and Seasonal Layers
Begin with perennial plants like comfrey, clover, or native grasses along the bed edges. These act as living mulch, crowding out weeds and improving soil fertility over time. In the center, plant edible perennials such as asparagus, rhubarb, or strawberries—these establish roots quickly and provide harvests for years.
For seasonal layers, add fast-growing annuals like lettuce, radishes, or bush beans in spring, then transition to heat-lovers such as okra, sweet potatoes, or Swiss chard as temperatures rise. This rotation keeps the space productive without replanting. Space plants according to their mature size, leaving 12-18 inches between large perennials and 6-12 inches for annuals.
🪴 Step 5: Install Irrigation and Accessibility Features
Run drip irrigation lines along the bed edges, connecting to a 5-gallon watering reservoir with a timer set for 15-30 minutes daily. This ensures consistent moisture without waste. For accessibility, add wooden pathways using 2x6 planks spaced 12 inches apart—this prevents soil compaction from foot traffic while creating walkable areas.
Real talk: Most community gardens fail because watering is inconsistent. The drip system solves this by delivering water slowly at the roots, where plants need it most. Test the setup by running water for 24 hours and checking for leaks or uneven distribution. Adjust emitters so each plant receives 1-2 gallons per week, depending on the season.
Tips & tricks for building community gardens
A few strategic approaches will transform your community garden from a seasonal project into a year-round thriving ecosystem.
Soil Preparation Secret: In Step 1, when you're loosening that 12-inch base layer, don't just stop at the depth—test the soil's texture after aeration. The perfect base should crumble like cake crumbs when squeezed, not stick together like wet sand. If your soil feels dense even after forking, mix in an extra 1 inch of compost beyond the 2-3 inches called for. This creates a sponge-like structure that holds moisture while allowing roots to breathe. I've seen gardens with poorly aerated bases struggle even with perfect planting—don't let that be yours.
Framework Foundation: For Step 2, when building your 12-18 inch tall frames, consider using cedar planks instead of treated lumber if possible—they resist rot better and won't leach chemicals into your soil. Pro tip: Pre-drill screw holes to prevent wood splitting when securing corners. And here's what nobody tells you—leave those 6-8 inches of fabric clearance sacred! I've seen too many gardens where the fabric was tucked too tightly, causing it to tear when soil expands. That small gap makes all the difference in weed suppression.
Layering Logic: In Step 3, when you're adding that 12-inch topsoil layer, think vertically. The bottom 6 inches should be your "foundation layer"—mix in 1 part compost to 3 parts soil here for root development. The top 6 inches can have more compost (1:1 ratio) since that's where most plant activity happens. This vertical stratification mimics natural forest floors and creates a self-fertilizing system over time. Don't just dump soil—stratify it for maximum efficiency.
Irrigation Intelligence: The 24-hour test run in Step 5 isn't just about checking for leaks—it's your chance to calibrate the system. Place empty containers under each emitter during the test to measure output. You want 1-2 gallons per week per plant, so adjust emitters accordingly. Here's my game-changer: Install a rain sensor that automatically pauses the timer during precipitation. I've saved hundreds of gallons of water—and prevented root rot—by implementing this simple upgrade.
Pro Tips for Building Community Gardens
- A few strategic approaches will transform your community garden from a seasonal project into a year-round thriving ecosystem.
- Soil Preparation Secret: In Step 1, when you're loosening that 12-inch base layer, don't just stop at the depth—test the soil's texture after aeration.
- Framework Foundation: For Step 2, when building your 12-18 inch tall frames, consider using cedar planks instead of treated lumber if possible—they resist rot better and won't leach chemicals into your soil.
Frequently asked questions
Got questions about turning your urban space into a thriving community garden?
Here are answers to the most common ones—so you can dig in with confidence!
How do I find a group to start a community garden?
Start by reaching out to local nonprofits, city parks departments, or neighborhood associations. Online platforms like American Community Gardening Association also list active groups. Host a meetup at a nearby park or café to rally interest—small steps lead to big growth!
When’s the best time to start planning?
For spring/summer gardens, begin planning in late winter (Jan–Feb) to secure permits, soil, and volunteers. For year-round layers, start in fall to prep cold-hardy crops (like kale or spinach) and plan winter covers. Pro tip: Check your local frost dates to time it right!
How much does it cost to start a community garden?
Costs vary widely! Basic setups (tools, seeds, soil) may run $500–$2,000 for a small plot, while larger projects (irrigation, fencing) can exceed $5,000. Fundraise via grants, sponsorships, or crowdfunding. Prioritize low-cost swaps, like using recycled materials for raised beds.
What if my area has extreme weather (heat/drought/frost)?
No problem! Use seasonal layers: plant heat-tolerant crops (okra, sweet potatoes) in summer, cold-hardy greens (lettuce, radishes) in winter, and shade cloth for drought-prone areas. Local Extension offices offer tailored advice for your climate zone.
What’s the biggest mistake beginners make?
Skipping soil testing or ignoring permaculture basics (like companion planting). Test soil pH first—most veggies thrive at 6.0–7.0. Also, avoid overcrowding plants; follow spacing guidelines on seed packets. Start small and expand as you learn!
Wrapping up and next steps
Building a community garden is more than just planting seeds—it’s about nurturing connections, sustainability, and shared joy. 🌱 From planning layered crops to fostering collaboration, every step strengthens your urban space and the people who use it.
Whether you’re a seasoned gardener or just starting, your efforts will grow far beyond the plot.
Ready to take the next step? Gather your neighbors, pick a spot, and start small! Even a single raised bed can spark change. What’s one action you’ll take this week to bring your community garden to life?