Tools
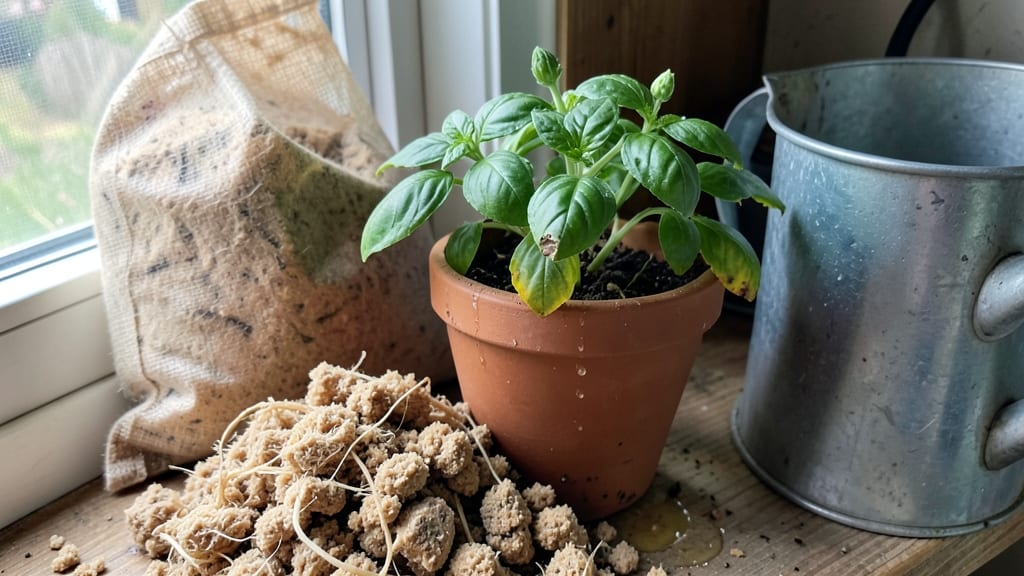
My coco coir garden started with a single 4-cubic-foot brick that transformed my struggling ferns and finicky herbs into lush, thriving plants within weeks. The secret lies in its perfect balance of water retention and air pockets—no more soggy roots or dusty soil that suffocates plant life.
I swapped my old potting mix for coco coir after my snake plants started yellowing from overwatering, and the difference was immediate.
The setup couldn’t be simpler: just hydrate the bricks with water, let them soak for 12 hours, and you’ve got a ready-to-use medium that mimics tropical forest conditions.
No more guessing about drainage or nutrient levels—coco coir holds moisture without drowning roots, and its neutral pH means you won’t have to adjust soil chemistry. For potted plants or raised beds, it’s a game-changer, especially in hot climates where traditional soil dries out too fast.
By the end of your first month, you’ll notice stronger stems, deeper green leaves, and fewer wilting episodes—even with my notorious black thumb. The eco-friendly benefits are a bonus: it’s sustainable, reusable, and breaks down without harming the environment.
Plus, it’s lightweight, so you won’t strain your back hauling heavy bags of soil. Let’s get your plants growing like never before.
Whether you’re a beginner or a seasoned gardener, coco coir adapts to your needs. Use it straight from the brick or mix it with perlite for extra aeration.
The key is keeping it moist but not soggy—think of it like a sponge that never gives up its last drop of water. Your plants will thank you with vibrant growth all season long.
📚 In This Guide
- What you need
- Instructions
- Tips and common mistakes
- Wrapping up and next steps
What you need
- ● Coco coir bricks or blocks – 1-2 bricks (5-10L capacity) per 4 sq. ft. of garden space (e.g., 1 brick for small pots, 2+ for raised beds). Opt for 100% coco coir (no peat or additives) for purity.
- ● Water – Enough to fully hydrate coir bricks (about 1-2 gallons per brick). Use room-temperature, dechlorinated water (let tap water sit for 24 hours or use filtered water).
- ● Garden gloves – 1 pair (nitrile or leather for durability).
- ● Trowel or garden fork – 1 (for mixing and amending soil).
- ○ pH testing kit – Optional but recommended (coco coir is neutral, but plants like blueberries or azaleas need adjustments).
- ● Worm castings or compost – 1 cup per 5L of coir (boosts nutrients naturally).
- ● Perlite or vermiculite – 1 part per 4 parts coir (improves aeration for heavy soils).
- ● Slow-release fertilizer – Follow package rates (e.g., 1 tbsp per sq. ft. for balanced growth).
- ● Spray bottle – For misting seedlings (keeps moisture consistent).
- ● Container or raised bed – If not planting directly in ground (ensure drainage holes!).
- ● Sunlight assessment – Check your garden’s light exposure (coco coir works for full sun to partial shade, but adjust plant choices accordingly).
- ● Drainage plan – Ensure your garden or containers have proper drainage (coco coir retains moisture but hates sogginess).
- ● Plant selection – Research coco coir-friendly plants (e.g., herbs, veggies, succulents, or tropicals like orchids).
Step-by-Step guide to creating a thriving coco coir garden
Transform your garden with this sustainable, moisture-retentive medium that keeps plants happy and healthy.
Prepare Your Coco Coir Mix
Start by hydrating 4 cubic feet of coco coir in a clean container. Add 2 gallons of warm water and let it soak for 12-24 hours until fully expanded—it should resemble damp, fluffy peat moss. Drain excess water through a mesh screen or colander, squeezing gently to remove moisture without compacting the fibers. This process removes excess salts and prepares the medium for optimal plant growth.
Next, blend the hydrated coco coir with 1 gallon of perlite and 1 cup of worm castings (if using). Mix thoroughly to ensure even distribution of nutrients. The perlite improves aeration, while the worm castings provide gentle, organic nutrition. Avoid overworking the mix—just combine until it looks uniformly fluffy and well-integrated.
Choose and Prepare Your Containers
Select containers with drainage holes to prevent waterlogging, which coco coir can retain if not managed properly. For 4 plants, use 4 containers that are at least 6 inches deep and 8 inches wide. Clean them thoroughly with mild soap and water to remove any residue from previous plants or chemicals.
Fill each container three-quarters full with your prepared coco coir mix. Press down lightly to settle the material, but avoid compacting it too firmly. Leave about 1 inch of space at the top for watering and top-dressing with additional mix later. This setup ensures roots have room to expand while maintaining proper moisture levels.
Plant Your Seeds or Transplants
For seeds, plant them ¼ inch deep in the coco coir mix, following the spacing guidelines on the seed packet. Gently cover them with a thin layer of the mix and mist lightly with water to keep the surface moist. If transplanting, dig a hole slightly larger than the root ball, place the plant in, and fill the gap with additional coco coir mix, pressing lightly around the base.
Water immediately after planting to help settle the soil and eliminate air pockets. Use 1 cup of water per container, applied slowly to avoid displacing seeds or young seedlings. Coco coir dries out more slowly than traditional soil, so you’ll need to monitor moisture closely—especially in the first few weeks—to prevent overwatering.
Maintain Moisture and Light Levels
Keep the coco coir mix consistently moist but never soggy. Water when the top inch feels dry to the touch, typically every 2-3 days depending on your climate and container size. Overwatering can lead to root rot, while underwatering causes the mix to dry out too quickly, stressing plants. A moisture meter helps gauge the right balance, but your finger works just as well.
Place your containers in a location with 6-8 hours of sunlight daily, or under grow lights if indoors. Coco coir doesn’t retain heat like soil, so plants may need slightly more light to thrive. Watch for signs of stress—yellowing leaves often indicate overwatering, while slow growth or pale foliage suggests insufficient light. Adjust care as needed based on these visual cues.
Fertilize and Monitor Growth
After 4-6 weeks, begin fertilizing with a diluted liquid fertilizer (half-strength) every 2-3 weeks. Coco coir holds nutrients differently than soil, so plants may show early signs of hunger—such as stunted growth or dull leaves—if not fed regularly. Stick to organic options to avoid salt buildup, which can harm roots over time.
Prune or harvest as needed, always using clean, sharp tools to prevent disease. Coco coir’s sterile nature makes it ideal for propagating cuttings, so you can easily expand your garden by rooting new plants in the same medium. Keep an eye out for pests, though coco coir is naturally resistant—most issues arise from overwatering or poor airflow.
Tips & tricks for perfect coco coir garden setup
Here's what I learned after setting up my own coco coir garden—these tricks will help you avoid common pitfalls and get the best results.
Hydration is Key: When soaking your 4 cubic feet of coco coir for the 12-24 hours, use warm water to speed up the process and help remove more salts. I place my container in a warm spot like near the kitchen sink to ensure even hydration. After draining, give the mix a gentle squeeze—it should feel like a damp sponge, not a dripping wet rag. This step makes all the difference in preventing salt buildup that can harm your plants.
Mixing Matters: In Step 1, when blending the coco coir with perlite and worm castings, I recommend using a large clean hand shovel or your hands to combine everything. The perlite should be evenly distributed—aim for about 1 part perlite to 4 parts coco coir by volume. For the worm castings, sprinkle them lightly over the surface before mixing to prevent clumping. This creates optimal aeration while providing gentle nutrition throughout the medium.
Container Preparation: Before filling your containers in Step 2, I always give them a final rinse with plain water after cleaning to remove any soap residue. This extra step prevents potential chemical buildup that could affect your plants. When pressing down the coco coir mix, use just enough pressure to settle it—think of it like fluffing a pillow. The goal is to create a light, airy medium where roots can easily penetrate without being compacted.
Moisture Monitoring: In Step 4, when maintaining moisture levels, I've found that checking the top inch with your finger works best in the morning. Coco coir can hold moisture differently depending on humidity levels, so adjust your 2-3 day watering schedule based on your climate. If you notice water pooling at the bottom of containers, this is a sign you're overwatering—reduce frequency immediately. A moisture meter is worth the investment for consistent results.
Pro Tips for Coco Coir Garden
- Here's what I learned after setting up my own coco coir garden—these tricks will help you avoid common pitfalls and get the best results.
- Hydration is Key: When soaking your 4 cubic feet of coco coir for the 12-24 hours, use warm water to speed up the process and help remove more salts.
- Mixing Matters: In Step 1, when blending the coco coir with perlite and worm castings, I recommend using a large clean hand shovel or your hands to combine everything.
Frequently asked questions
Got questions about using coco coir in your garden? You’re not alone! Here are some of the most common concerns—and straightforward answers—to help you get started with confidence.
What exactly is coco coir, and how is it different from peat moss?
Coco coir is made from the fibrous husks of coconuts, while peat moss comes from decomposed plant material in bogs. Unlike peat, coco coir is sustainable, renewable, and pH-neutral (around 5.2–6.8), making it a better choice for both plants and the planet. It also holds moisture without compacting like peat, giving roots room to breathe!
How long does coco coir last in the garden before breaking down?
Coco coir is long-lasting—typically 1–3 years in garden beds, depending on conditions. In containers, it may degrade faster (6–12 months). To extend its life, mix it with compost or perlite for better structure. Over time, it enriches soil with organic matter, so don’t worry about replacing it entirely!
Do I need to pre-soak coco coir before using it in my garden?
Yes!
Coco coir is hydrophobic when dry, meaning it repels water. Soak it in water for 10–15 minutes before mixing into soil or filling pots. This activates its moisture-retention properties and prevents clumping. Pro tip: Use lukewarm water for faster hydration.
Can I use coco coir for all types of plants, or are there exceptions?
Coco coir is versatile for most plants—vegetables, herbs, flowers, and even succulents (when mixed with gritty amendments). However, blueberries and azaleas prefer acidic soil (pH 4.5–5.5), so blend coco coir with sulfur or pine fines. Avoid using it alone for heavy feeders like tomatoes; pair it with compost for nutrients.
Will coco coir attract pests or mold if left damp?
Coco coir is resistant to pests like fungus gnats (unlike peat), but overwatering can still cause mold or root rot. Ensure your garden has good drainage and avoid waterlogging. If mold appears, fluff the soil and improve airflow. For containers, use a mix with 30–40% perlite or vermiculite to prevent sogginess.
What’s the best way to reuse or repurpose old coco coir?
Don’t toss it! Decomposed coco coir makes fantastic compost or a soil amendment. Break it down, mix with kitchen scraps, and let it decompose for 2–3 months. You can also use it as mulch around plants to retain moisture. Just avoid reusing it if it’s moldy or pest-ridden—start fresh in that case!
Wrapping up and next steps
Transforming your garden with coco coir isn’t just eco-friendly—it’s a game-changer for plant health and sustainability! 🌱 Whether you’re a seasoned gardener or just starting, this versatile growing medium offers serious benefits like improved drainage, moisture retention, and a chemical-free boost.
Ready to see your plants thrive? Take the next step: start small with a single pot or expand your entire garden—your green thumb (and plants!) will thank you.
- 🌿 Tip: Keep a journal to track plant progress and adjust coco coir mixes as you go!