Tools
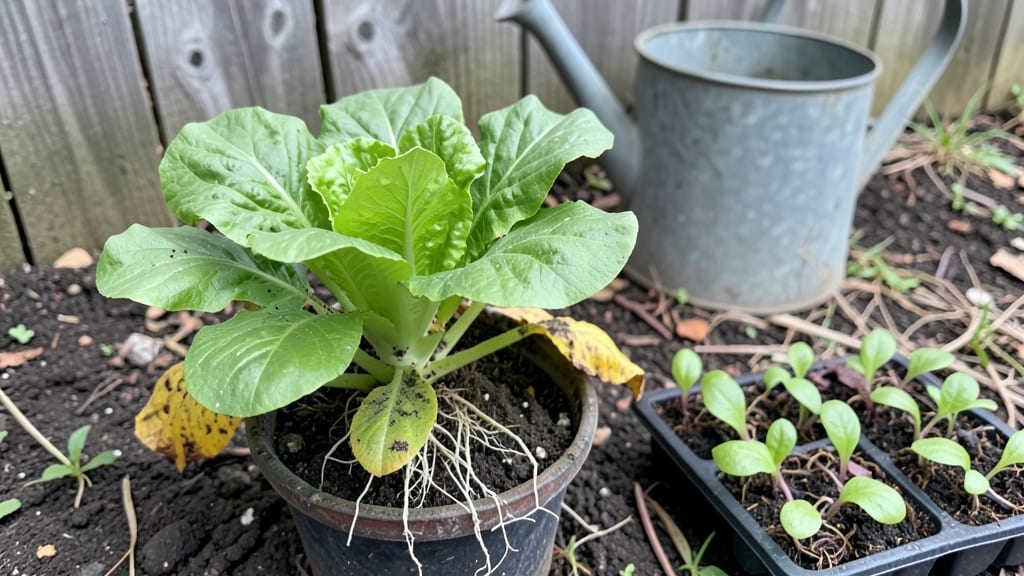
Gardening basics aren’t just about dirt and seeds—they’re the secret to turning your outdoor space into a thriving, year-round oasis that actually works for you.
I’ve spent years learning the hard way (and killing a few plants along the way) that the real magic happens when you nail the fundamentals: soil that breathes, sunlight that fits your schedule, and watering that doesn’t drown or starve your plants.
The core tools you’ll need are simpler than you think: a sturdy trowel, gloves that don’t slip, and a watering can with a spout that gives you control.
Most beginners overlook soil prep—amending with compost or aged manure makes all the difference between wilted stems and plants that practically beg you to harvest them. And yes, you can start small: a single raised bed or even container garden proves you don’t need acres to begin.
What you’ll actually achieve is a garden that keeps giving back—lush greens in spring, vibrant blooms in summer, and crisp harvests in fall. The best part? These basics adapt to any space, from city balconies to backyard plots.
You’ll spot problems early, fix them fast, and watch your confidence (and your plants) grow together. Ready to dig in?
Here’s where it gets interesting—once you master the foundations, you can branch into anything: heirloom tomatoes, fragrant herbs, or even a pollinator-friendly meadow. The tools and techniques you learn now will save you time, money, and frustration down the road. Let’s get those roots growing.
📚 In This Guide
- What you need
- Instructions
- Tips and common mistakes
- Wrapping up and next steps
What you need
- ● Soil: 5+ bags of high-quality potting mix (for containers) or garden soil (for in-ground planting). Look for organic, well-draining blends (e.g., Miracle-Gro or FoxFarm).
- ● Seeds/Seedlings: Choose based on your climate and space. Start with 5–10 easy varieties (e.g., tomatoes, basil, marigolds, or lettuce).
- ● Containers: Pots (5–10 gallon size), raised beds, or window boxes with drainage holes. Opt for durable materials like ceramic, fabric, or plastic.
- ● Watering Tools: A watering can (1–3 gallons) with a rose attachment for gentle watering.
- ● A hose with adjustable nozzle for larger areas.
- ● Basic Hand Tools: 1 pair of gardening gloves (waterproof, breathable).
- ● 1 hand trowel (for digging small holes).
- ● 1 pruners (bypass pruners for clean cuts).
- ● 1 hand fork (for aerating soil).
- ● Sunlight & Space: Confirm your garden’s sun exposure (full sun, partial shade, or full shade) and measure your space. Most veggies need 6+ hours of sunlight/day.
- ● Fertilizers: Organic options like compost, worm castings, or slow-release granules (e.g., Osmocote).
- ● Mulch: Straw, wood chips, or shredded leaves to retain moisture and suppress weeds.
- ● Pest Control: Neem oil, diatomaceous earth, or row covers for organic protection.
- ● Support Structures: Trellises, stakes, or cages for climbing plants (e.g., tomatoes, cucumbers).
- ● Garden Journal: A notebook or app (like Gardenate) to track planting dates, watering schedules, and growth progress.
- ● 🔥 Test your soil! Use a soil pH test kit (available at garden centers) to check acidity/alkalinity. Most veggies thrive in 6.0–7.0 pH.
- ● 🌡️ Start small. Begin with 3–5 plants to avoid overwhelm, then expand as you gain confidence.
- ● ✨ Safety first! Wear gloves and long sleeves when handling soil or tools to protect against scratches and irritants.
Instructions: build a foundation for year-round gardening success
Here’s how I’ve learned to create a resilient garden that thrives through every season—no matter where you live.
Test and Prepare Your Soil
Start by testing your soil’s pH and texture with a simple kit. Most vegetables prefer a neutral pH of 6.0 to 7.0, while acid-loving plants like blueberries thrive at 4.5 to 5.5. If your soil is heavy clay or sandy, mix in 2 to 3 inches of compost to improve drainage and fertility. Work it into the top 6 inches of soil using a garden fork—this loosens roots without disturbing deeper layers.
I always dig a small hole, fill it with water, and watch how quickly it drains. If water pools after 30 minutes, your soil drains poorly and needs more organic matter. Amendments like peat moss or perlite help, but compost is the easiest fix. This step ensures your plants won’t struggle with waterlogged roots or nutrient starvation.
Choose the Right Plants for Your Climate and Season
Select plants suited to your USDA hardiness zone and the current season. Cool-season crops like lettuce and peas grow best in spring and fall, while tomatoes and peppers need warm soil (60°F or above) to thrive. Check seed packets for days to maturity—plant early varieties for spring harvests and late varieties for fall.
I keep a simple chart of my zone’s last frost date and first frost date to plan spacing. For example, in Zone 5, I start cool-season crops 6 weeks before the last frost and warm-season crops 2 weeks after. This prevents bolting (premature flowering) in heat-sensitive plants like spinach or cabbage.
Plan Your Garden Layout for Efficiency
Sketch a rough map of your space, grouping plants with similar water, sun, and care needs together. Tall plants like sunflowers or corn go in the north side of the bed to avoid shading shorter crops. Leave 18 to 24 inches between rows for easy access and airflow, which reduces disease risk.
I always include 3 to 4 inches of mulch (like straw or wood chips) after planting to retain moisture and suppress weeds. Mulch also regulates soil temperature—critical for heat-sensitive plants in summer or frost-prone ones in fall. This layout keeps your garden organized and makes maintenance a breeze.
Water Consistently and Monitor Plant Health
Water deeply once or twice a week, depending on rainfall, to encourage deep root growth. Most plants need 1 to 1.5 inches of water per week, delivered at the soil level (not overhead) to prevent fungal diseases. Use a rain gauge or tuna can to measure—it’s shocking how little water actually reaches the roots during a downpour.
Check for pests and diseases weekly, focusing on the undersides of leaves where aphids and spider mites hide. Yellowing leaves often signal overwatering or nutrient deficiency, while brown edges mean underwatering or salt buildup. Adjust your care routine based on what you observe—this proactive approach saves plants before problems escalate.
Adjust Care for Seasonal Changes
As seasons shift, modify your routine. In spring, focus on weeding and fertilizing to jumpstart growth. In summer, prioritize morning watering to reduce evaporation and protect leaves from scorching. Fall is the time to harvest remaining crops and add compost for next year’s soil prep.
I always extend the season by using row covers in early spring or cold frames in fall. These simple tools add 2 to 4 weeks of growing time without fancy equipment. Even a thick blanket draped over tender plants can protect them from unexpected frosts. Small adjustments like these make year-round gardening achievable.
Tips & tricks for perfect year-round gardening foundations
A resilient garden starts with the right approach—these practical tips will help you avoid common pitfalls and create a thriving space that works for every season.
Soil Testing Accuracy: When testing your soil’s drainage in Step 1, use a clear container to watch how quickly water disappears. If it takes longer than 30 minutes to drain completely, your soil needs more organic matter. I’ve found that adding a mix of compost and coarse sand helps break up clay soils while improving aeration. This simple test saves you from waterlogged roots that can kill plants before they even sprout.
Plant Selection Shortcuts: For Step 2, check your seed packets for "days to maturity" and calculate backward from your last frost date. I keep a calendar where I mark frost dates and shade in the growing window for each season. This visual helps me avoid planting heat-sensitive crops like spinach too early in spring or late varieties too close to frost. The key is matching plant needs with your local climate—not guessing.
Layout Efficiency Hacks: In Step 3, consider using a simple grid system for your garden map. Draw your space to scale, then divide it into squares representing 18-inch planting zones. This makes it easy to visualize how plants will interact and ensures you’re not overcrowding. I’ve also found that adding a small path (even just 6 inches wide) between rows makes weeding and harvesting much easier.
Seasonal Adjustments: The 2 to 4 weeks extension you get from row covers in Step 5 is worth the effort. I’ve used them to grow lettuce in early spring when temperatures hover around 50°F—just make sure to remove them during the day if temperatures rise above 75°F to prevent overheating. A simple thermometer placed under the cover helps monitor conditions.
Pro Tips for Basics Of Gardening
- A resilient garden starts with the right approach—these practical tips will help you avoid common pitfalls and create a thriving space that works for every season.
- Soil Testing Accuracy: When testing your soil’s drainage in Step 1, use a clear container to watch how quickly water disappears.
- Plant Selection Shortcuts: For Step 2, check your seed packets for "days to maturity" and calculate backward from your last frost date.
Frequently asked questions
Got questions about diving into gardening? You’re not alone—every green thumb starts somewhere! Here are answers to the most common queries to help you grow with confidence.
What are the essential tools I need to start a garden?
Begin with basics like a trowel (for planting), pruners (for trimming), and a watering can or hose. A glove set protects your hands, and a garden fork helps aerate soil. For larger plots, consider a wheelbarrow and long-handled tools. Start small—you can expand later!
When is the best time to plant my garden?
Timing depends on your climate and crops! In most regions, spring (after the last frost) and fall (6-8 weeks before frost) are ideal for cool-season veggies like lettuce or spinach. Warm-season plants (tomatoes, peppers) thrive when soil reaches 60°F+. Check your USDA Plant Hardiness Zone for local guidance.
How often should I water my plants?
Watering needs vary by plant and weather. Most gardens need 1–1.5 inches of water per week, including rain. Morning watering (before 10 AM) reduces evaporation and fungal risks. Use drip irrigation or soaker hoses for efficiency. Let soil dry slightly between waterings—overwatering can drown roots!
What do I do if pests or diseases show up?
Act fast! Start with physical removal (handpick bugs) or natural sprays (neem oil, soapy water). For soil-borne issues, improve drainage and rotate crops yearly. Avoid chemicals unless necessary—many pests are harmless or beneficial (like ladybugs!). Monitor plants regularly for early signs.
Can I garden in containers or small spaces?
Containers work great for herbs, lettuce, tomatoes, and strawberries. Use well-draining pots (at least 6–12 inches deep) and lightweight soil mixes. Place containers near sunny spots and rotate them weekly for even growth. Balconies, patios, and even windowsills can host thriving mini-gardens!
How do I protect my garden in extreme heat or cold?
For heat: Mulch soil to retain moisture, water deeply in the morning, and use shade cloth for delicate plants. For cold: Cover tender plants with frost blankets or row covers, and water thoroughly before freezes (hydrated plants resist cold better). Know your plants’ hardiness zones—some (like kale) love cold, while others (like basil) bolt in heat.
Wrapping up and next steps
Gardening is a rewarding journey that blends creativity, patience, and a little bit of science.
By mastering the basics of gardening—like soil prep, sunlight needs, and seasonal planning—you’ve already set yourself up for year-round success. 🌱 Whether you’re growing flowers, veggies, or herbs, remember: every expert gardener started with their first seed or sapling.
Now that you’re armed with knowledge, it’s time to roll up your sleeves! Start small—plant a single container garden or dedicate a corner of your yard—and let your green thumb grow. Happy gardening! 🌿