
Landscaping
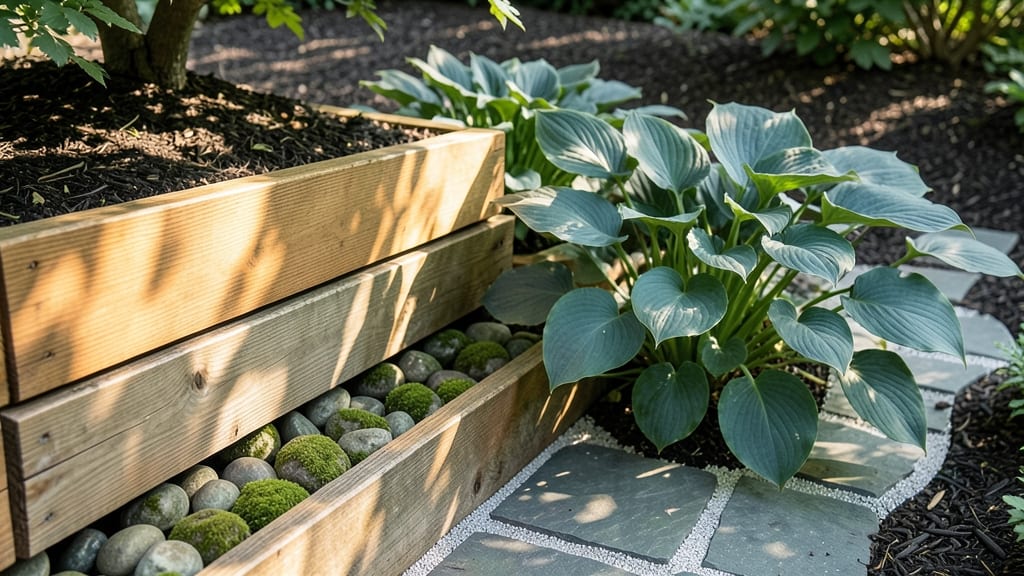
The right tiered garden design can turn a small patio into a lush vertical paradise. 🌿 I transformed my cramped backyard into a layered oasis by stacking planters at different heights—suddenly, what was wasted space became a showstopper that neighbors envy.
The secret lies in balancing drama with function: each level adds depth while solving drainage and accessibility issues.
Think of it like building a stage—tall plants like ornamental grasses or small trees anchor the back, medium shrubs like lavender or boxwood fill the middle, and trailing plants like ferns or petunias spill over edges.
Materials matter too: cedar resists rot, stone adds timeless weight, and metal planters bring modern edge. My favorite combo? A rustic wooden frame with built-in shelves for flexibility.
You’ll end up with a garden that feels like a living sculpture, where every layer tells a story. The tallest tiers catch morning light, while lower levels stay cooler for shade-loving plants.
Plus, the elevated design keeps pests like slugs at bay and makes maintenance a breeze—no more bending over for hours. The payoff? A space that’s both practical and breathtaking, no matter how small your yard.
Whether you’re working with a balcony or a backyard, tiered designs adapt effortlessly. Start with one or two planters to test the look, then expand as your confidence grows. The best part?
Every season reveals new ways to play with color and texture—spring bulbs, summer blooms, and autumn foliage all shine in their own spotlight. Ready to elevate your garden?
📚 In This Guide
- What you need
- Instructions
- Tips and common mistakes
- Wrapping up and next steps
What you need
- ● Planters or Raised Beds: Wooden crates or boxes (cedar or redwood recommended for durability)
- ● Fiberglass or resin planters (lightweight, weather-resistant)
- ● Metal troughs (galvanized steel or copper for a rustic look)
- ● Soil & Drainage: High-quality potting mix (1–2 cubic feet per tier, depending on size)
- ● Gravel or landscape fabric (for drainage layers, ¼"–½" thick)
- ○ Perlite or vermiculite (optional, for aeration)
- ● Plants: Drought-tolerant succulents or herbs (for top tiers)
- ● Medium-height perennials (e.g., ferns, hostas, or ornamental grasses)
- ● Tall shrubs or flowers (e.g., hydrangeas, boxwoods, or sunflowers for lower tiers)
- ● Measuring tape & level (to ensure even tiers)
- ● Drill & screws (or nails + hammer for wooden planters)
- ● Staple gun (for attaching landscape fabric)
- ● Trowel & gloves (for planting and soil work)
- ● Wheelbarrow (to haul soil and materials)
- ○ Optional: Paint or stain (for wooden planters)
- ● Location: Full sun (6+ hours/day) or partial shade (4–6 hours), depending on plants.
- ● Support: Sturdy base (e.g., cinder blocks, bricks, or a deck) if freestanding tiers.
- ● Accessibility: Clear path for watering and maintenance (especially for multi-tiered setups).
- ● Permits: Check local regulations if building permanent structures (e.g., wooden frames over 3 feet tall).
Step-by-Step instructions for creating a tiered garden design
Here's how to build a striking tiered garden that maximizes space and adds depth to your outdoor area.
🪴 Step 1: Plan Your Tier Heights and Layout
Start by sketching your design on paper, marking where each tier will go. I like to use 3-4 tiers for a balanced look—too many can overwhelm small spaces. The tallest tier should face the house or focal point, while the lowest sits closest to the walkway. Measure your space first: a 2-foot height difference between tiers creates a natural flow without looking cluttered.
Place taller plants on upper tiers to draw the eye upward. For example, roses or shrubs work well at the back, while herbs or annuals thrive on lower levels. Leave at least 12 inches of space between tiers for easy maintenance and drainage. If your yard slopes, build the lowest tier uphill to prevent water pooling.
🌱 Step 2: Build or Select Your Tiers
You can buy pre-made tiered planters or DIY with wooden crates, stacked bricks, or concrete blocks. For a sturdy base, I use cinder blocks (stacked in pairs for stability) or cedar planters (lined with landscape fabric to prevent soil erosion). If using bricks, stagger the joints like a wall to avoid weak spots. For wood, treat it with a sealant to resist rot.
Line each tier with landscape fabric before adding soil to block weeds and improve drainage. Drill drainage holes in the bottom of containers—at least 3 holes per square foot—to prevent root rot. Place a 1-inch layer of gravel at the bottom of each tier before adding soil to ensure excess water drains away from roots.
☀️ Step 3: Layer Soil and Choose the Right Plants
Fill each tier with high-quality potting mix (never garden soil—it compacts too much in containers). For 4 tiers, you’ll need about 2-3 gallons per tier, depending on depth. Mix in slow-release fertilizer (follow package rates) to give plants a nutrient boost right away. Avoid heavy mulch on top tiers—it can slide down during rain.
Select plants with varying heights and textures to create visual interest. For example, pair tall ornamental grasses on the highest tier with spiller plants like petunias on the edges. Group plants with similar water needs together—succulents and herbs on upper tiers (they need less moisture) and impatiens or ferns on lower levels (they stay damp longer).
💧 Step 4: Water and Maintain for Long-Term Success
Water each tier deeply 2-3 times per week, checking that the soil feels damp but not soggy 2 inches below the surface. Upper tiers dry out faster, so monitor them first. Use a soaker hose or watering can with a narrow spout to direct moisture evenly—avoid overhead sprinklers, which can wash soil down the tiers.
Fertilize every 4-6 weeks during the growing season with a balanced liquid fertilizer (10-10-10 ratio works well). Prune leggy growth regularly to keep plants compact and encourage bushier habits. In fall, remove annuals and replace them with cold-hardy plants like pansies or ornamental kale for winter color.
✂️ Step 5: Add Finishing Touches for Cohesion
Connect tiers with unified edges—use the same type of planter, brick, or wood trim throughout. Add decorative stones or mulch in matching colors to tie the design together. For a pop of color, place solar-powered lights along the edges or at the base of the tallest tier. This highlights the structure at night and adds ambiance.
Finally, rotate plants quarter-turn weekly to ensure even growth toward the light. You’ll notice stems leaning toward the sun within days—this keeps your tiered garden looking full and intentional. With this setup, your elevated layers will thrive for years while saving space and wowing visitors.
Tips & tricks for perfect tiered garden design
Here's what I wish I knew before creating my first tiered garden—these little details make all the difference in achieving that polished, intentional look.
Design Tip: When sketching your layout in Step 1, consider the "rule of thirds" for visual balance. Place your tallest element (like a shrub) slightly off-center on the tallest tier—this creates more dynamic interest than perfectly centered designs. I learned this the hard way after my first attempt looked too symmetrical and static.
Material Matters: For Step 2, if you're using bricks or blocks, I recommend using mortar mix (not concrete) between layers—it's more flexible and prevents cracking over time. For wooden crates, choose untreated cedar or redwood; they resist rot better than pine. The extra cost upfront saves headaches later when cheaper materials warp or degrade.
Plant Placement Strategy: In Step 3, think vertically when selecting plants for each tier. Place your "thrillers" (tall plants) at the back of upper tiers, "fillers" (medium plants) in the middle, and "spillers" (trailing plants) at the edges. This creates natural layers that draw the eye upward. Pro tip: Use a small mirror or reflective surface near your garden to check how the layers interact with light—you'll spot gaps or clashing textures instantly.
Watering Wisdom: For Step 4, the 2-3 times per week guideline works for most climates, but adjust based on your local weather. I set a reminder on my phone for the first two weeks to ensure consistency—plants in containers dry out much faster than in-ground gardens. A moisture meter (about $10) is worth the investment to avoid over- or under-watering.
Pro Tips for Tiered Garden Design
- Here's what I wish I knew before creating my first tiered garden—these little details make all the difference in achieving that polished, intentional look.
- Design Tip: When sketching your layout in Step 1, consider the "rule of thirds" for visual balance.
- Material Matters: For Step 2, if you're using bricks or blocks, I recommend using mortar mix (not concrete) between layers—it's more flexible and prevents cracking over time.
Frequently asked questions
Got questions about transforming your space with tiered garden design? You’re not alone! Here are some common queries—and their answers—to help you get started with confidence.
What’s the best way to start a tiered garden on a budget?
Begin with repurposed materials like wooden pallets, cinder blocks, or even stacked bricks. Skip expensive planters and focus on vertical space—herbs, succulents, and trailing plants thrive in small areas. Pro tip: Check local buy-nothing groups or Facebook Marketplace for free or low-cost containers!
When is the ideal time to plant in a tiered garden?
For most climates, spring (after the last frost) or early fall is perfect. Cool-season veggies (like lettuce) can go in late summer, while heat-lovers (tomatoes, peppers) need warm soil. Troubleshoot: If planting in summer, water deeply in the evening to retain moisture.
Can I use tiered gardens for vegetables, or are they just for flowers?
Tiered designs work great for veggies, herbs, and strawberries. Just ensure each level has drainage and choose compact varieties (e.g., bush beans, cherry tomatoes). Bonus: Succession planting in tiers maximizes harvests!
How do I prevent soil from spilling out of my tiers?
Line the bottom of each layer with landscape fabric or burlap, then add a 1–2 inch layer of gravel or broken pottery shards for drainage. For wooden tiers, seal gaps with weatherproof caulk. Quick fix: Use coconut coir or moss as a natural barrier.
Do tiered gardens need special care during droughts?
Yes! Mulch heavily (straw or shredded leaves work well) to retain moisture. Group plants with similar water needs together, and consider self-watering systems for higher tiers. Watering hack: Use a drip irrigation line with emitters at each level.
Wrapping up and next steps
A tiered garden design isn’t just about saving space—it’s about transforming your outdoor area into a stunning, functional masterpiece! 🌿 By layering plants, textures, and heights, you create visual drama while maximizing every inch of your garden.
Whether you’re a beginner or a green thumb, this approach lets you play with creativity and practicality.
Ready to elevate your space? Start small—pick one tier or a corner to experiment. Sketch your design, gather your materials, and let your garden grow into something extraordinary! 🌱