Tools
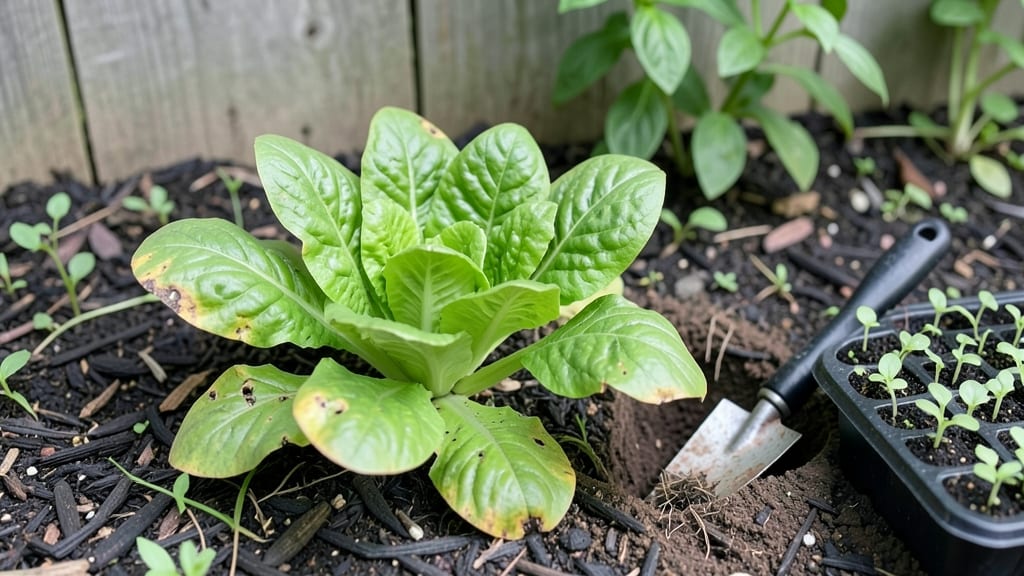
No-till gardening saved my back—and my soil—after years of exhausting spring tilling. 🌱 The moment I stopped turning the earth, my garden’s health transformed: fewer weeds, richer soil, and plants that thrived without the annual struggle.
Traditional tilling disrupts soil life, but no-till preserves it, creating a self-sustaining ecosystem under your feet.
You’ll need just three things to start: a sharp knife or spade for cutting weeds, a layer of organic mulch (straw or leaves work best), and patience—this method builds soil over time, not overnight.
The first year might feel slow, but by year two, you’ll notice worms returning, roots spreading deeper, and plants growing stronger with less effort.
Imagine harvesting crisp lettuce in early spring, tomatoes that ripen without splitting, and carrots that grow straight and sweet. No-till delivers these results by keeping the soil structure intact, locking in moisture, and feeding microbes that break down organic matter naturally.
The payoff? Less work, more bounty, and a garden that gets better every year.
Perfect for beginners and seasoned gardeners alike—no heavy equipment or backbreaking labor required. Whether you’re working with a small raised bed or a full backyard, this approach adapts to any space. Ready to let your soil heal while your plants thrive?
📚 In This Guide
- What you need
- Instructions
- Tips and common mistakes
- Wrapping up and next steps
What you need
- ○ Garden Bed: Raised bed frame (optional but recommended for control) – 4’x8’ or custom size
- ● Cardboard or thick newspaper (for weed suppression) – 1-2 layers per bed
- ● Organic Matter: Compost (homemade or store-bought) – 2-4 inches per layer
- ● Leaf mold or aged manure – 1-2 inches for bulk
- ● Wood chips or straw (for mulch) – 2-3 inches on top
- ● Hand Tools: Garden fork (broadfork) – for loosening soil without tilling
- ● Hand trowel – for planting and small adjustments
- ● Pruners – for trimming plants
- ● Gloves – to keep hands clean and protected
- ○ Optional (But Helpful!) Extras: Soil test kit – to check pH and nutrient levels
- ● Drip irrigation or soaker hose – for efficient watering
- ● Mulch fabric (landscape cloth) – to block weeds long-term
- ● Plant markers – for labeling and organization
Step-by-Step guide to transforming your soil through no-till gardening
Here’s how to build fertile, living soil without the backbreaking work of tilling.
🌱 Step 1: Assess and Prepare Your Existing Soil
Start by walking your garden bed and identifying compacted areas or debris. No-till gardening thrives on undisturbed soil structure, so avoid turning over the top 6 inches—this preserves the delicate fungal networks and microbial life that tilling destroys. Use a broadfork or sturdy trowel to gently loosen only the most hardened spots, focusing on breaking up compaction without flipping the soil.
Look for signs of healthy soil: dark, crumbly texture, earthworm activity, and a faint earthy scent. If your soil feels dense or water pools on the surface, you’ll need to prioritize organic matter addition. Spread a 2-inch layer of compost or well-aged manure over the bed, leaving it exposed to the elements. This top dressing feeds soil life without disturbing the ecosystem below.
🌿 Step 2: Layer Organic Mulch for Soil Protection
Cover the entire bed with a 3-4 inch layer of mulch—this is the backbone of no-till. I use a mix of straw, leaf mold, and shredded hardwood mulch to balance moisture retention and aeration. Avoid fresh wood chips, which can tie up nitrogen as they decompose. Distribute the mulch evenly, ensuring it touches the soil surface to block weeds and regulate temperature.
Leave a 1-inch gap around plant stems to prevent rot. Over time, this mulch layer will break down, adding organic matter directly to the soil surface where microbes can process it. Water lightly after applying mulch to help it settle and begin its protective role. You’ll notice fewer weeds and more consistent moisture—this is your soil learning to self-regulate.
✂️ Step 3: Plant Directly Into Undisturbed Soil
Make small holes or shallow trenches just large enough to accommodate roots, using your fingers or a dandelion digger. No-till gardening relies on minimal disturbance, so avoid digging deep—roots will spread naturally into the loose, aerated soil below. Place transplants or seeds gently into these openings, then cover with a thin layer of compost or soil from the bed itself.
Water deeply right after planting to encourage root growth into the undisturbed layers below. You’ll see stronger, more resilient plants because their roots aren’t shocked by disrupted soil. For seeds, press them lightly into the soil—just enough to ensure good contact without burying too deep. A light mulch layer afterward helps retain moisture and prevents crusting.
💧 Step 4: Maintain with Strategic Watering and Mulch Top-Ups
Water deeply 1-2 times per week, aiming for 1-2 inches of water per session—this encourages roots to grow deeper rather than staying shallow. Use a soaker hose or drip irrigation to deliver water slowly at the base of plants, avoiding wetting the foliage. Check soil moisture by pushing your finger 1-2 inches deep; if it feels dry, it’s time to water.
Every 3-4 months, add another 1-inch layer of mulch to replenish what’s decomposed. This continuous top-dressing mimics nature’s leaf litter cycle, feeding soil life without disruption. You’ll notice fewer pests, healthier plants, and soil that improves with each season—proof that no-till works better than tilling ever could.
☀️ Step 5: Observe and Adjust for Long-Term Soil Health
Pay attention to plant vigor, weed pressure, and soil structure over time. If weeds become problematic, hand-pull them early or smother them with additional mulch before they seed. No-till gardens develop their own balance—you’ll see earthworms, beneficial fungi, and a darker, richer soil surface within a year.
Rotate crops annually to prevent nutrient depletion and disease buildup. Cover crops like clover or winter rye can be planted between seasons to further enrich the soil without tilling. By year three, your soil will be so alive that plants will thrive with minimal intervention—this is the power of no-till gardening.
Tips & tricks for perfect no-till gardening
These game-changing strategies will help you transform your garden into a thriving ecosystem without the backbreaking work of tilling.
Soil Assessment Mastery: When evaluating your soil in Step 1, pay special attention to the top 6 inches—the zone where most root activity occurs. Use a simple screwdriver test: if it penetrates easily, your soil is ready. If it resists, focus your loosening efforts there. The goal is to create channels for roots and water, not turn the entire soil profile. I've found that adding a 1-inch layer of coarse sand to compacted areas can dramatically improve drainage while maintaining structure.
Mulch Composition Secrets: In Step 2, the 3-4 inch mulch layer is your soil's protective blanket, but not all mulches are created equal. Straw provides excellent moisture retention, leaf mold adds nutrients as it breaks down, and hardwood mulch regulates temperature. Pro tip: mix in 10% wood ash from untreated hardwood fires to raise soil pH slightly—just a sprinkle goes a long way. This combination creates an ideal microclimate for beneficial microbes while suppressing weeds.
Planting Technique Refinement: The shallow planting method in Step 3 might feel counterintuitive, but it works because it preserves the soil's natural structure. For seeds, aim to place them at a depth equal to twice their diameter—this ensures good contact with moisture while allowing light penetration for germination. I've had great success with a dandelion digger tool for making precise holes without disturbing surrounding soil. The key is to work gently, almost like you're tucking plants into a nest rather than digging holes.
Watering Strategy Optimization: The 1-2 inch weekly watering guideline in Step 4 is perfect for most climates, but timing matters just as much as quantity. Water in the early morning to allow foliage to dry before evening—this prevents fungal diseases while maintaining consistent moisture. For new gardens, consider using a soil moisture meter to verify when that 1-2 inch deep soil reaches the right moisture level. You'll notice plants develop deeper root systems when watered this way, making them more drought-resistant over time.
Pro Tips for No Tilling Gardening
- These game-changing strategies will help you transform your garden into a thriving ecosystem without the backbreaking work of tilling.
- Soil Assessment Mastery: When evaluating your soil in Step 1, pay special attention to the top 6 inches—the zone where most root activity occurs.
- Mulch Composition Secrets: In Step 2, the 3-4 inch mulch layer is your soil's protective blanket, but not all mulches are created equal.
Frequently asked questions
What’s the best time of year to start no-till gardening?
You can start no-till gardening anytime—spring, summer, or even fall! The key is to prep your soil first by removing weeds, adding compost, and covering bare spots with mulch. If starting in late fall, focus on heavy mulching to protect soil over winter. Pro tip: Avoid tilling after heavy rain to prevent soil compaction.
How do I deal with weeds in a no-till garden?
Weeds are easier to manage than you think! Use cardboard or thick mulch (straw, wood chips, or leaves) to block sunlight and smother them. Hand-pull weeds when young, and consider cover crops like clover to outcompete weeds naturally. Pro tip: A layer of 3–4 inches of mulch keeps weeds at bay with minimal effort.
Can I still use raised beds with no-till gardening?
Raised beds are perfect for no-till because they warm up faster, drain well, and let you layer compost directly into the soil. Just avoid digging—top-dress with compost or mulch instead. Pro tip: Fill raised beds with a mix of 50% compost, 30% topsoil, and 20% organic matter for optimal growth.
Will no-till gardening reduce my vegetable yield?
Not at all! In fact, many gardeners see higher yields over time because no-till preserves soil structure, improves water retention, and boosts microbial life. The key is consistent composting—healthy soil = happy plants. Pro tip: Start with easy no-till crops like lettuce, beans, or herbs to see quick results.
What if my soil is already compacted or poor?
No-till can still work—just give it time! Amend compacted soil with compost, leaf mold, or coco coir before planting. Avoid walking on beds, and use broadforking (gentle soil loosening) once a year if needed. Pro tip: Test your soil’s pH and add lime or sulfur as needed for a balanced growing environment.
Wrapping up and next steps
No-till gardening isn’t just a method—it’s a gentle revolution for your soil and plants. By skipping the plow, you preserve vital microbes, reduce erosion, and create a thriving ecosystem that rewards you with year-round harvests and less work.
Start small, experiment with techniques, and watch your garden flourish with minimal effort.
Ready to dive in? Pick one section of your garden to try no-till this season—your future self (and the soil!) will thank you. 🌱