
Lawn
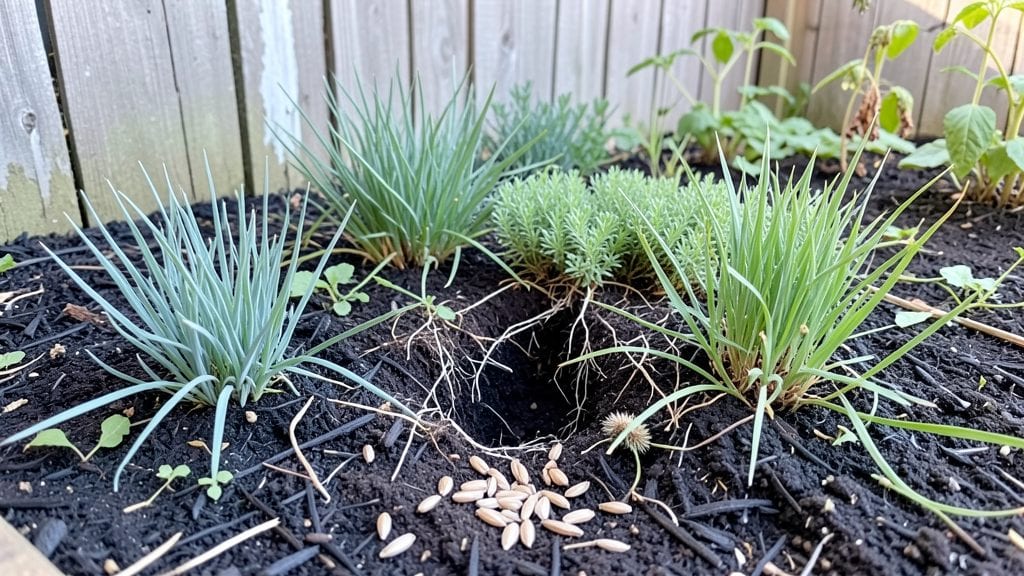
Transforming your lawn into a grass roots gardening oasis starts with ditching the mower and embracing layers of living plants. 🌱 I swapped my high-maintenance turf for a mix of creeping thyme, ornamental grasses, and shrubs that now provide year-round privacy without the upkeep.
The best part? It thrives on its own after the first year.
This approach works in any space—urban backyards, narrow side yards, or even guerrilla plots. You’ll need a mix of slow-growing perennials, medium-height shrubs, and tall ornamental grasses to create depth. The key is choosing plants that self-seed or spread naturally, so they fill in gaps without your help.
By mid-summer, you’ll have a lush, textured screen that hums with bees and butterflies. No more bald patches or endless mowing—just a living tapestry that changes with the seasons. The privacy feels like a hug, and the ecosystem thrives without extra work.
Perfect for eco-conscious gardeners, small-space dwellers, or anyone tired of fighting weeds and water bills. Let’s turn that lawn into a low-maintenance paradise that works as hard as you do.
📚 In This Guide
- What you need
- Instructions
- Tips and common mistakes
- Wrapping up and next steps
What you need
- ● Soil: Topsoil (2–3 cubic yards for a 10’ x 10’ area)
- ● Compost (1–2 bags or homemade mix to enrich soil)
- ○ Optional: Mulch (3–4 bags of shredded bark or pine straw for moisture retention)
- ● Plants (Layered for Privacy): Tall Layer (6–10 ft): 3–5 evergreen shrubs (e.g., Bamboo, Arborvitae, or Holly)
- ● Mid-Layer (3–6 ft): 5–7 deciduous or semi-evergreen shrubs (e.g., Hydrangeas, Camellias, or Boxwood)
- ● Low Layer (1–3 ft): 7–10 perennials or ground covers (e.g., Hostas, Ferns, or Creeping Thyme)
- ○ Vines (Optional):** 2–3 climbing plants (e.g., Clematis, Jasmine, or Ivy) for vertical coverage
- ● Tools: Garden shovel (1)
- ● Pruners (1 pair, bypass for clean cuts)
- ● Gloves (1 pair, heavy-duty for thorny plants)
- ● Wheelbarrow (1, for hauling soil/mulch)
- ○ Optional: Hose with nozzle (for watering) or a watering can (for delicate plants)
- ● Sunlight assessment: Note how much sun/shade your space gets (most layers thrive in partial shade).
- ● Moisture check: Ensure good drainage (avoid soggy spots!).
- ● Local climate knowledge: Pick plants suited to your hardiness zone (check the USDA Plant Hardiness Zone Map).
- ○ Optional: Soil test kit (to check pH/nutrients before planting).
Step-by-Step instructions for designing a year-round privacy screen
Here’s how to create a lush, evergreen privacy barrier that thrives with minimal effort.
🌱 Step 1: Select and Layer Fast-Growing Privacy Plants
Start with a mixed-species approach for year-round coverage. I recommend evergreen shrubs like leucothoe (for height and texture) and inkberry holly (for dense, glossy foliage) as your backbone. Add deciduous fillers like fothergilla for spring blooms and sumac for fiery fall color—these provide seasonal interest while the evergreens maintain privacy.
Space plants 3-6 feet apart, depending on their mature size. Larger shrubs (like leucothoe) go at the back, while smaller ones (like inkberry) fill gaps. This layered structure ensures no bare spots, even as seasons shift. Real talk: Skimping on spacing leads to overcrowding and disease—trust the mature size tags!
🪴 Step 2: Prepare the Soil and Plant for Longevity
Dig a hole twice as wide as the root ball but only as deep. Amend the native soil with 2-3 inches of compost and a handful of slow-release fertilizer (like osmocote) to fuel early growth. This isn’t just about planting—it’s about setting roots up for decades of low-maintenance performance. I swear by a mycorrhizal inoculant to boost root systems in heavy clay soils.
Place the plant so the top of the root ball sits 1 inch below grade—this prevents stem rot from surface water. Backfill with native soil (no need for potting mix here), then water deeply to eliminate air pockets. Tap the soil gently as you fill to avoid gaps. Pro tip: A mulch ring of 3 inches of shredded bark keeps moisture in and weeds out.
☀️ Step 3: Water Deeply and Establish a Routine
Water once a week for the first month, then taper to every 10-14 days once established (unless it’s a drought). The goal is deep, infrequent watering—think 1-2 gallons per plant at each session. You’ll know you’re doing it right when the soil feels moist 6 inches down and the mulch stays slightly damp but not soggy.
After planting, avoid fertilizing for 6-8 weeks. New roots need time to establish before they can handle nutrients. Instead, focus on consistent moisture—this is the #1 factor in preventing transplant shock. If leaves yellow, it’s usually overwatering, not underwatering.
✂️ Step 4: Prune Strategically for Density and Health
Prune once a year in late winter or early spring before new growth starts. Remove dead, crossing, or leggy branches first—this opens the canopy for airflow and sunlight penetration. Then, lightly shear the outer edges to encourage bushier growth. I use clean, sharp shears (sterilized with rubbing alcohol) to avoid spreading disease.
Never cut into old wood—look for green stems when pruning evergreens. If you’re unsure, wait until spring when growth is obvious. Over-pruning stresses plants, so aim for no more than 25% of the foliage in any single session. You’ll see fuller growth within 4-6 weeks of proper pruning.
🌿 Step 5: Maintain Year-Round with Minimal Effort
Top up mulch annually in early spring to replenish organic matter and suppress weeds. In late fall, apply a thin layer of compost over the mulch to feed roots as they prepare for dormancy. This no-dig approach keeps the soil structure intact while feeding the ecosystem below.
Watch for pests like spider mites (tiny webs on leaves) or disease signs (black spots, wilting). Treat early with neem oil or horticultural oil—prevention is easier than cure. With this routine, your privacy screen will thicken naturally each year, requiring less effort over time. Here’s the thing—consistency beats intensity in low-maintenance gardening.
Tips & tricks for perfect year-round privacy screens
Creating a lush, low-maintenance privacy screen takes thoughtful planning—and these insider tips will help you avoid common pitfalls while maximizing your design's potential.
Layering for Seasonal Harmony: The key to year-round coverage lies in balancing evergreens and deciduous plants. In Step 1, when selecting leucothoe and inkberry holly as your backbone, consider adding evergreen ground covers like creeping juniper between them—this fills gaps at the base while maintaining privacy. I've found that spacing these ground covers 18-24 inches apart creates a seamless transition between layers, preventing light gaps that reveal your yard. The texture contrast between tall shrubs and low growers also adds visual interest.
Soil Prep That Pays Off: In Step 2, don't skip the mycorrhizal inoculant—it's worth the small investment for heavy clay soils. I've seen plants in untreated clay struggle for years, while inoculated plants thrive. For Step 2's soil amendment, mix the 2-3 inches of compost directly into the native soil rather than creating a separate layer. This ensures even distribution of nutrients throughout the root zone. Another pro move: Test your soil's pH before planting. Most evergreens prefer acidic soil (pH 4.5-6.0), while fothergilla and sumac tolerate slightly alkaline conditions.
Watering Wisdom: The deep, infrequent watering routine in Step 3 is crucial, but timing matters just as much. Water in the early morning (before 9 AM) to reduce evaporation and fungal risks. When checking soil moisture in Step 3, insert your finger 6 inches down—this is where roots actively seek water. If you're using drip irrigation, place emitters at the drip line (edge of the plant's canopy) rather than at the base, which encourages deeper root growth. This method also reduces surface evaporation.
Pruning Like a Pro: In Step 4, when you're pruning evergreens, focus on creating an open vase shape—this allows sunlight to penetrate to lower branches, preventing the "holly jolly" look of dense tops with bare bottoms. For inkberry holly specifically, prune just above a leaf bud rather than cutting flush with the stem. This encourages bushier growth. And here's a trick I learned the hard way: Always prune after a rain shower. The fresh growth is more visible, making it easier to see where you're cutting.
Pro Tips for Grass Roots Gardening
- Creating a lush, low-maintenance privacy screen takes thoughtful planning—and these insider tips will help you avoid common pitfalls while maximizing your design's potential.
- Layering for Seasonal Harmony: The key to year-round coverage lies in balancing evergreens and deciduous plants.
- Soil Prep That Pays Off: In Step 2, don't skip the mycorrhizal inoculant—it's worth the small investment for heavy clay soils.
Frequently asked questions
Got questions about grass roots gardening?
Here are answers to the most common ones—so you can dive in with confidence!
What’s the best time of year to start a grass roots garden?
For most climates, spring or early fall is ideal—when soil is workable and temperatures are mild. Cool-season grasses (like fescue) thrive in early spring, while warm-season types (like Bermuda) do best in late spring. Pro tip: Avoid planting in extreme heat or frost!
How much does it cost to set up a grass roots garden?
Costs vary! A basic setup with seed, soil amendments, and mulch can run $50–$200, depending on size. Reuse materials (like compost or recycled wood chips) to cut costs. Budget hack: Buy seeds in bulk or swap plants with neighbors!
What’s the easiest way to keep pests out of my grass roots garden?
Prevention is key! Use natural barriers like mulch or companion plants (e.g., marigolds). For stubborn pests, try neem oil or insecticidal soap. Quick fix: Handpick pests early to avoid infestations.
Do grass roots gardens need frequent watering?
Not necessarily! Once established, deep, infrequent watering (1–2 inches per week) encourages strong roots. Use drip irrigation or soaker hoses to save time. Watering tip: Early morning is best to reduce evaporation.
Can I use grass roots gardening in small spaces?
Vertical gardens, raised beds, or container setups work perfectly for patios or balconies. Choose compact, low-maintenance plants like creeping thyme or dwarf mondo grass for year-round greenery.
Wrapping up and next steps
Grass roots gardening isn’t just about growing plants—it’s about crafting a thriving, low-maintenance oasis that blooms year-round while keeping your space private and serene. By layering evergreens, perennials, and seasonal shrubs, you create a living screen that’s both beautiful and effortless.
The best part? Every step you take is an investment in long-term beauty and sustainability—no green thumb required!
Ready to transform your yard? Start small—pick one corner or a single plant this weekend. Before you know it, you’ll have a lush, private retreat that feels like a labor of love (but with way less work!). 🌱✨