
Fertilization
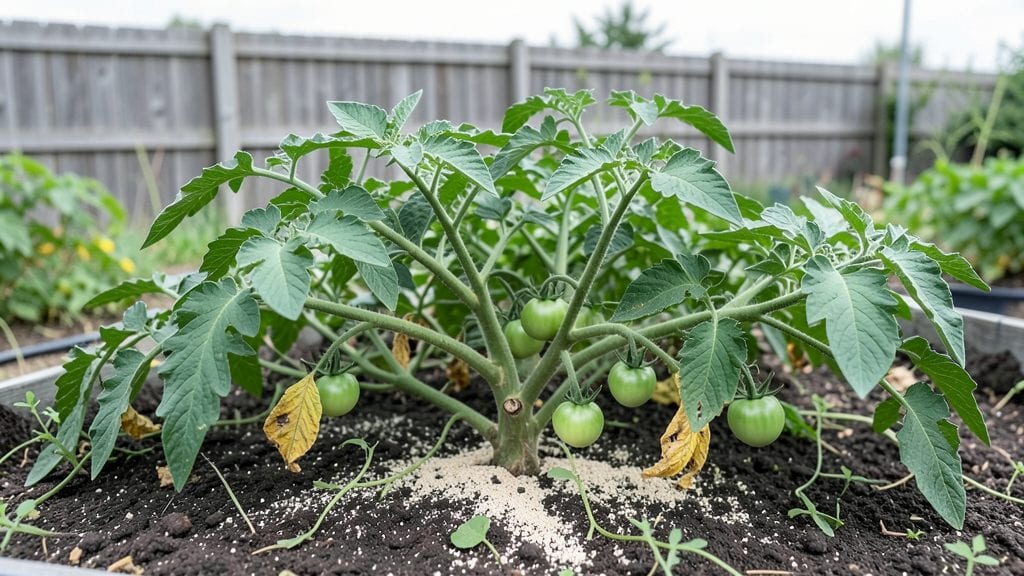
Fertilizing garden plants isn't just about throwing down bags of magic powder—it's about feeding your soil so your tomatoes taste like sunshine and your flowers bloom like they're in a postcard. 🌿 I learned the hard way that too much, too soon turns lush into limp, and too little leaves you scratching your head wondering why your zucchini stays the size of a golf ball.
The secret lies in matching fertilizer to the season: a light dose of compost in spring, a mid-season boost with fish emulsion or worm castings, and a final top-dressing of organic matter before winter.
You'll need a basic soil test kit (about $20) to know what your plants are actually hungry for—most gardeners overdo nitrogen and starve their plants of phosphorus or potassium.
By summer's end, you'll have plants that look shockingly vibrant, with deep green leaves and fruit that practically glows. The key is consistency: feed when they need it, not on a calendar, and always water it in so roots get the party started.
Over-fertilizing? Yellow leaves and burnt tips are your warning signs—back off immediately.
This works for vegetables, flowers, and even lawns, though the ratios change. Whether you're growing in raised beds or straight in the ground, the same principles apply. Let's get those roots feasting the right way.
📚 In This Guide
- What you need
- Instructions
- Tips and common mistakes
- Wrapping up and next steps
What you need
- ● Organic Fertilizers: Compost (2–3 gallons per 10 sq. ft.) – Homemade or store-bought
- ● Worm castings (1–2 cups per plant) – Rich in nutrients and microbes
- ● Fish emulsion (1–2 tbsp per gallon of water) – Quick nitrogen boost
- ● Bone meal (1–2 tbsp per plant) – For phosphorus-rich blooms
- ● Kelp meal (1 tbsp per sq. ft.) – Packed with micronutrients
- ● Soil Amendments: Peat moss or coconut coir (1–2 inches mixed into soil) – Improves drainage
- ○ Biochar (1 cup per sq. ft.) – Enhances soil structure (optional but highly recommended)
- ● Mulch: Straw or wood chips (2–3 inches thick) – Retains moisture and suppresses weeds
- ● Garden fork or trowel – For mixing amendments into soil
- ● Watering can or hose with spray nozzle – For diluting liquid fertilizers
- ● Measuring cups/spoons – Precision matters! (1 tbsp = ~15 mL, 1 cup = ~240 mL)
- ● Gloves – Protect your hands from compost and soil
- ○ pH test kit (optional) – Ensures soil is in the ideal 6.0–7.0 range
- ○ Compost thermometer (optional) – For DIY composters (aim for 130–160°F)
- ● Know your plants’ needs – Check seed packets or research light, water, and nutrient requirements.
- ● Test your soil – A basic soil test (kit or lab) reveals deficiencies before fertilizing.
- ● Water your plants first – Hydrated roots absorb nutrients better! (1–2 inches of water 24 hours prior).
- ● Choose the right season – Avoid fertilizing in extreme heat or drought.
Step-by-step guide for fertilizing garden plants
Here’s how to keep your garden thriving all season with organic nutrition.
🌱 Step 1: Test Soil and Choose the Right Organic Fertilizer
Start by testing your soil’s pH and nutrient levels—most garden centers sell affordable home test kits. I like to do this in early spring so I can adjust before planting. Organic fertilizers like compost, worm castings, or fish emulsion provide balanced nutrition without harsh chemicals. For heavy feeders like tomatoes and peppers, I mix in 2-3 inches of compost at planting time.
If your soil is sandy, add 1-2 cups of aged manure per square foot to improve moisture retention. For clay-heavy soil, incorporate 1 part perlite to the existing mix for better drainage. The key is matching the fertilizer to your plants’ needs—leafy greens need more nitrogen, while flowering plants benefit from phosphorus-heavy options.
💧 Step 2: Apply Fertilizer at Key Growth Stages
Timing matters most. For vegetables, I fertilize once at planting, then again 4-6 weeks later when new growth appears. For perennials and shrubs, split applications into early spring, mid-summer, and fall. Always water the soil 1-2 inches deep before applying fertilizer to prevent root burn.
Use a broadfork to loosen the top 6 inches of soil before adding fertilizer—this helps roots access nutrients. For liquid fertilizers like fish emulsion, dilute to half-strength and water deeply after application. Avoid fertilizing during extreme heat or drought; plants waste energy trying to absorb nutrients instead of growing.
☀️ Step 3: Monitor Plant Health and Adjust as Needed
Watch for signs of deficiency—yellowing leaves often mean nitrogen is low, while purple stems signal phosphorus needs. I adjust by adding 1 tablespoon of Epsom salt (for magnesium) or bone meal (for phosphorus) directly to the soil. Organic fertilizers break down slowly, so I reapply every 6-8 weeks during the growing season.
Over-fertilizing is just as harmful as under-fertilizing. If leaves turn crispy or brown, flush the soil with 4-6 inches of water to leach excess salts. Mulch with 2-3 inches of straw or wood chips after fertilizing to lock in moisture and prevent nutrient runoff.
✂️ Step 4: Finish the Season with a Nutrient Boost
In late summer, I switch to a low-nitrogen, high-phosphorus fertilizer to encourage root development and flower production. For annuals, I add 1 cup of compost around each plant and water thoroughly. Perennials and shrubs get a light top-dressing of compost to rebuild soil health for next year.
Don’t skip fall fertilization—roots keep growing until frost, and a strong start in spring depends on nutrients stored now. I also collect fallen leaves and shred them into the soil; they break down into a free, nutrient-rich mulch. This simple step saves money and reduces waste while keeping your garden productive year after year.
Tips & tricks for perfect garden fertilizing
Keeping your garden thriving takes more than just throwing fertilizer on the soil—these pro tips will help you get the most out of every application.
Soil Prep Makes All the Difference: Before adding any fertilizer, take 10 minutes to loosen the top 6 inches of soil with a broadfork. This simple step creates air pockets that help roots access nutrients more efficiently. If your soil is compacted, roots can't grow properly, no matter how much fertilizer you use. Think of it like fluffing a pillow—your plants will thank you!
Timing is Everything for Vegetable Growth: The instructions mention fertilizing vegetables twice—once at planting and again at 4-6 weeks—but here's what nobody tells you: the second application should happen when you see new growth, not just at 6 weeks. Plants grow at different rates depending on weather, so check for fresh leaves or stems before adding fertilizer. This ensures you're feeding them when they actually need it.
Liquid Fertilizers Need Special Care: When using liquid fertilizers like fish emulsion, always dilute to half-strength as instructed. But here's the trick: water the soil first to a depth of 1-2 inches before applying. This prevents fertilizer burn and helps nutrients penetrate deeper. I like to use a watering can with a gentle spray to avoid disturbing the soil surface too much.
Fall Fertilization is a Game-Changer: Don't skip the late-summer nutrient boost! Roots keep growing until frost, and what you add now will give your plants a head start next spring. For perennials, I mix a light top-dressing of compost with a handful of bone meal (about 1 tablespoon per plant) to encourage strong root development over winter. This simple step often makes the difference between a struggling garden and one that thrives year after year.
Pro Tips for Fertilizing Garden Plants
- Keeping your garden thriving takes more than just throwing fertilizer on the soil—these pro tips will help you get the most out of every application.
- Soil Prep Makes All the Difference: Before adding any fertilizer, take 10 minutes to loosen the top 6 inches of soil with a broadfork.
- Plants grow at different rates depending on weather, so check for fresh leaves or stems before adding fertilizer.
Frequently asked questions
When is the best time to fertilize garden plants?
The ideal timing depends on your plants! For spring/summer bloomers (like tomatoes or marigolds), fertilize when you plant and again mid-season. Fall/winter crops (e.g., kale or garlic) benefit from a light feeding in early spring and again after harvest. Pro tip: Avoid fertilizing right before a heavy rain—it’ll wash away nutrients!
How often should I fertilize my garden?
Most garden plants thrive with every 4–6 weeks during the growing season (spring to fall). Slow-release organics (like compost or worm castings) may need less frequent top-ups, while fast-acting fertilizers (like fish emulsion) can be used more often. Watch your plants: Yellowing leaves or stunted growth? They’re hungry!
What’s a good organic fertilizer alternative if I don’t have compost?
No compost? No problem! Try these easy swaps:
- Worm castings (aka "black gold") – Rich in nutrients and microbes.
- Fish emulsion – Fast-acting liquid for a quick nutrient boost.
- Banana peels – Bury chopped peels near plants for potassium.
- Eggshells – Crush and sprinkle for calcium (great for tomatoes!).
Bonus: Coffee grounds add nitrogen—just use sparingly!
Why are my plants burning after fertilizing?
Fertilizer burn happens when roots get too much salt or concentration. Fix it fast:
- Flush the soil with water to dilute excess salts.
- Reduce fertilizer strength (mix with more water).
- Use organic fertilizers—they release nutrients slower.
Prevent it: Always follow label rates and water before applying!
Can I over-fertilize my garden plants?
Over-fertilizing leads to burned roots, leaf scorch, or even weedy growth (plants focus on leaves, not flowers/fruit). Signs you’ve overdone it:
- Brown leaf edges.
- White crust on soil.
- Excessive, fast growth (but no blooms).
Rule of thumb: When in doubt, under-fertilize—you can always add more later!
Wrapping up and next steps
Fertilizing your garden plants with organic boosts isn’t just about immediate results—it’s about nurturing long-term health and vitality for your green space. 🌱 From compost teas to worm castings, the right organic fertilizers can unlock season-long lushness while supporting the environment.
Whether you’re a beginner or a seasoned gardener, the key is consistency, observation, and a little patience.
Now that you’re armed with knowledge, roll up your sleeves and get growing! Start small—pick one plant or section of your garden—and experiment with organic fertilizers. Track your progress, adjust as needed, and watch your garden thrive. Happy gardening! 🌿