Planting
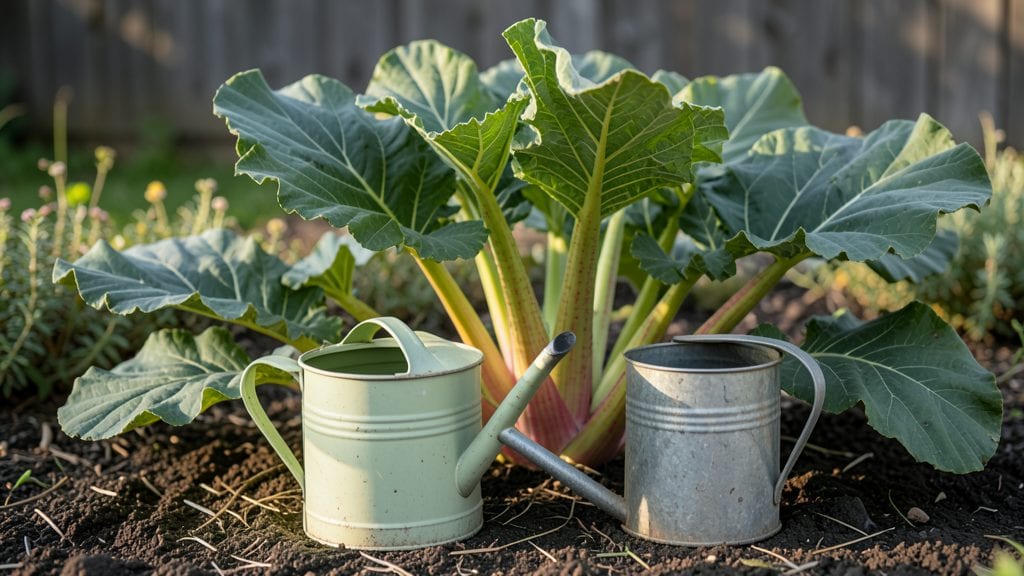
Here are some rhubarb gardening tips to get you started: once planted, this cold-hardy perennial spreads like crazy, giving you a self-sustaining harvest for decades—I’ve watched mine multiply from one crown to a thicket in just five years. bright red stalks become the star of pies, jams, and smoothies by late spring.
The secret starts with rich, well-draining soil and a spot where it gets full sun to partial shade—rhubarb hates soggy roots but thrives in cool climates. Plant the crowns in early spring or fall, about 12 inches apart, and water deeply after planting.
Most beginners overwater or crowd the plants, but rhubarb is forgiving if you give it space and consistent moisture during dry spells.
📚 In This Guide
- What you need
- Instructions
- Tips and common mistakes
- Wrapping up and next steps
What you need
- ● Rhubarb crowns: 1–3 healthy, disease-free crowns (choose varieties like ‘Victoria’ or ‘Strawberry’ for beginners).
- ● Well-draining soil: A mix of loamy soil with a pH of 6.0–6.8 (add compost or aged manure to improve fertility).
- ● Sunlight: A spot with full sun to partial shade (6+ hours of sunlight daily, but tolerates light shade in hot climates).
- ● Watering system: Drip irrigation or a watering can (rhubarb needs 1–1.5 inches of water per week).
- ● Mulch: 2–3 inches of organic mulch (straw, wood chips, or leaves) to retain moisture and suppress weeds.
- ○ Garden fork or tiller: For loosening soil before planting (optional but helpful in compacted soil).
- ● Garden gloves: To protect your hands while handling roots or mulch.
- ● Pruners or sharp shears: For trimming leaves and stems (sterilize with rubbing alcohol between uses).
- ● Measuring tape or ruler: To space plants 3–4 feet apart (rhubarb spreads over time!).
- ○ Fertilizer (optional): Balanced 10-10-10 or compost tea in early spring to boost growth.
- ● 🌡️ Test your soil: A simple soil test kit ensures your pH and nutrients are ideal before planting.
- ● ✨ Choose a permanent spot: Rhubarb hates being transplanted—pick a location where it can thrive for 10+ years!
- ● 🔥 Avoid fresh manure: It can burn rhubarb roots; opt for composted organic matter instead.
Step-by-Step guide to planting and maintaining rhubarb
Rhubarb thrives with minimal fuss once established—here’s how to set it up for decades of harvests.
Choose the Right Location and Prepare the Soil
Rhubarb demands full sun—at least 6 hours daily—but tolerates light shade in hot climates. I always pick a spot sheltered from strong winds, which can damage the large, brittle leaves. The soil should be well-draining yet rich in organic matter, with a pH between 6.0 and 6.8. Work in 3-4 inches of compost into the top 12 inches of soil to encourage deep root growth.
Rhubarb’s crowns (the thick, fleshy base) sit just below the soil surface, so avoid heavy clay. If your soil is dense, amend it with sand or perlite to improve aeration. Test drainage by digging a 6-inch hole, filling it with water, and checking if it drains within 30 minutes. Slow drainage means you’ll need to raise beds or add gravel.
Plant Crowns at the Correct Depth and Spacing
Plant rhubarb crowns in early spring or fall, spacing them 3-4 feet apart in all directions. The crown should sit 2 inches below the soil surface, with the buds (small, tight clusters) facing upward. I use a shovel to create a shallow trench, place the crown inside, and backfill with soil, pressing gently to eliminate air pockets.
Mulch immediately with 3-4 inches of straw or shredded leaves to retain moisture and suppress weeds. Avoid wood chips, which can compact and smother the crown over time. Water deeply after planting to settle the soil, then maintain 1 inch of water weekly during the first growing season. Overwatering now leads to weak stems and disease susceptibility later.
Protect Young Plants and Encourage Establishment
For the first 2 years, focus on root development rather than harvests. Remove any flower stalks that appear—they drain energy from the plant. I use row covers in late winter to shield emerging shoots from late frosts, which can blacken tender leaves. Rhubarb is cold-hardy down to -30°F, but young plants benefit from extra protection until established.
Fertilize lightly in early spring with a balanced 10-10-10 formula, applying ½ pound per 100 square feet. Too much nitrogen produces lush foliage but weak stalks. Monitor for Japanese beetles or slugs, which target young leaves. Handpick beetles in the morning or set out beer traps for slugs. Avoid chemical sprays, as they can linger in the edible stalks.
Harvest and Maintain for Long-Term Productivity
Wait until year 3 before harvesting stalks, and then only take 2-3 stalks per plant in early spring. Cut at the base with a clean knife, leaving the leaf attached to protect the crown. Never harvest more than 25% of the plant in a single season, or you’ll stunt future growth. I mark harvested stalks with a toothpick to track yield and avoid over-picking.
After harvest, side-dress with compost and water deeply. In fall, apply a 3-inch layer of mulch to insulate roots through winter. Divide mature crowns every 4-5 years to prevent overcrowding. Dig up the entire plant, separate the crowns with a sharp knife, and replant the strongest sections. This rejuvenates growth and shares plants with neighbors—rhubarb spreads easily!
Tips & tricks for perfect rhubarb planting and maintenance
These essential strategies will help you cultivate thriving rhubarb plants that reward you with abundant harvests for years to come.
Soil Preparation Strategy: When amending your soil with 3-4 inches of compost into the top 12 inches, consider adding a handful of bone meal to the mix. This provides phosphorus for strong root development without overloading nitrogen, which can weaken the stalks. The 30-minute drainage test is crucial—if water pools after that time, you'll need to create raised beds or incorporate more sand to prevent root rot, especially since rhubarb crowns sit just below the surface.
Planting Depth Technique: The 2-inch planting depth for rhubarb crowns might seem shallow, but it's intentional. Crowns need to stay cool and moist, which this depth provides. I've found that using a shovel to create a shallow trench helps maintain consistent depth across multiple plants. Pressing the soil gently around the crown eliminates air pockets that could cause rot, particularly important given rhubarb's sensitivity to overwatering during establishment.
Seasonal Care Insight: In Step 3, when protecting young plants, remember that row covers should be removed during the day to allow light penetration, especially in cooler climates where temperatures might reach the rhubarb's -30°F cold tolerance. The 2-year focus on root development is non-negotiable—flower stalks should be removed immediately as they appear, even if it means sacrificing a few leaves, because they divert energy from stalk production.
Harvesting Precision: The early spring harvest window in year 3 is critical for quality. Wait until the stalks are at least 10 inches tall and have reached their full color before cutting. I've noticed that harvesting in the morning, when stalks are crisp and full of moisture, yields the best texture. The toothpick marking system I use helps me visualize how much I've taken—never exceeding 25% of the plant's stalks in any single season prevents long-term decline.
Pro Tips for Rhubarb Gardening Tips
- These essential strategies will help you cultivate thriving rhubarb plants that reward you with abundant harvests for...
- Soil Preparation Strategy: When amending your soil with 3-4 inches of compost into the top 12 inches, consider adding...
- Planting Depth Technique: The 2-inch planting depth for rhubarb crowns might seem shallow, but it's intentional. Crow...
Frequently asked questions
Got questions about growing rhubarb? You’re not alone—this cold-hardy perennial is full of surprises! Here are answers to the most common queries to help you cultivate a thriving patch.
When is the best time to plant rhubarb?
Plant rhubarb in early spring or fall (4–6 weeks before the first frost). This gives roots time to establish before extreme temperatures hit. Avoid planting in summer heat, as it stresses young plants. If using bare-root crowns, get them in the ground as soon as possible—they dry out fast!
How long does it take for rhubarb to produce stalks?
Patience is key! Rhubarb crowns take 2–3 years to mature and yield edible stalks. In the first year, focus on root growth—don’t harvest anything. By year two, you’ll see a few stalks, and by year three, you’ll have a bountiful crop. Pro tip: Avoid harvesting in the first year to encourage robust growth!
Can I eat rhubarb leaves? (They’re toxic, right?)
Yes, the leaves are toxic due to oxalic acid and shouldn’t be eaten. Only the stalks are safe and delicious! If you’re composting, avoid adding leaves to edible gardens—they can harm other plants. Stick to harvesting the vibrant red, green, or pink stalks for pies, jams, and sauces.
What pests or diseases should I watch for?
Rhubarb is generally low-maintenance, but keep an eye out for Japanese beetles (they chew leaves) and crown rot (from overwatering). For beetles, handpick them or use neem oil. To prevent rot, ensure well-draining soil and avoid soggy conditions. Pro tip: Mulch around plants to deter weeds and retain moisture without overwatering!
How do I divide rhubarb to multiply my plants?
Divide rhubarb every 3–4 years to rejuvenate growth. In early spring, dig up the crown, separate the stalks into smaller sections (each with an "eye" or bud), and replant them 12–18 inches apart. This keeps your patch productive and prevents overcrowding. Bonus: Share divisions with friends—they’ll love you for it!
Wrapping up and next steps
Growing rhubarb is a rewarding journey—just imagine harvesting your own crisp, tangy stalks year after year with minimal effort! With the right location, soil prep, and patience, this cold-hardy perennial will thrive and multiply, gifting you fresh produce for decades.
Whether you’re a beginner or a seasoned gardener, embrace the process—soon, you’ll be sharing jars of homemade rhubarb compote or pie with neighbors!
Ready to dive in? Start by sketching your garden layout or researching local climate zones to pick the perfect spot. Then, grab those gloves and get planting—your future harvest is waiting! 🌱✨