
Landscaping
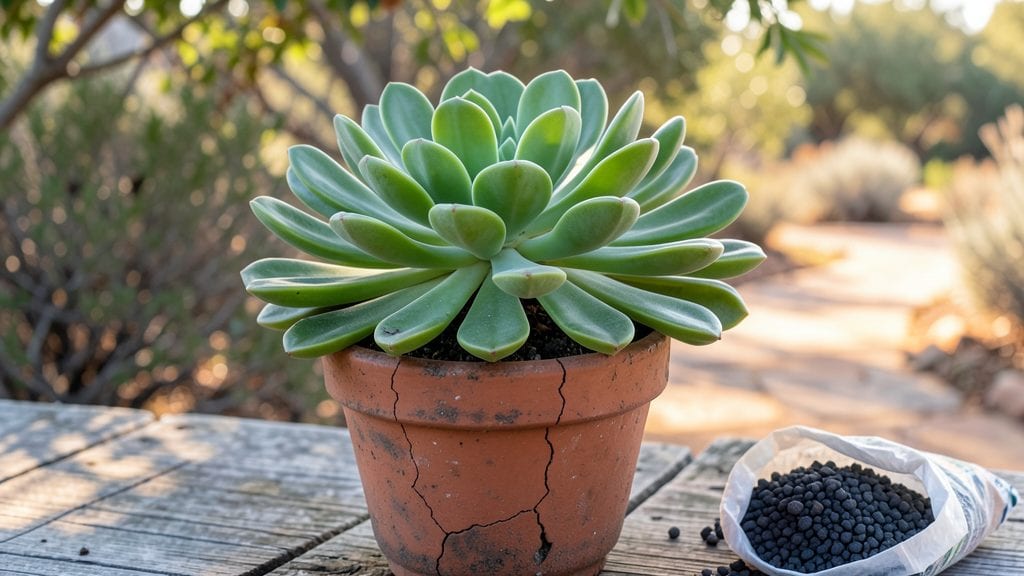
Creating a lava rock garden transforms any space into a striking desert oasis that thrives on minimal water. I first fell for this look when I saw how it turned a dull corner of my yard into a sunbaked masterpiece—now I can’t imagine designing without it.
The sharp edges and warm tones instantly elevate any landscape, whether you're going full Southwest or just adding a modern touch.
The real magic happens beneath the surface: lava rock drains water like a dream while locking in heat, making it perfect for drought-prone areas. Pair it with succulents, ornamental grasses, or even drought-tolerant perennials, and you get a low-maintenance garden that stays lush even when summer bakes the neighborhood.
My favorite part? The way it reflects sunlight at dusk, turning ordinary spaces into golden-hour focal points.
You’ll start with a base layer of landscape fabric to prevent weeds, then build up with 2-3 inches of lava rock—just enough to create that signature texture without burying your plants.
The arrangement doesn’t have to be perfect; let the rocks spill naturally around your chosen plants for that effortless, high-end look. Once established, this garden becomes a self-sustaining desert retreat that requires almost no upkeep.
Works beautifully in modern courtyards, Zen-inspired gardens, or even as a striking border for pathways. The key is playing with height and spacing—taller rocks in back, smaller ones up front—to create depth and movement. Ready to turn your yard into a sun-drenched sanctuary? Let’s get designing.
📚 In This Guide
- What you need
- Instructions
- Tips and common mistakes
- Wrapping up and next steps
What you need
- ● Lava rocks: 1–2 tons (depending on garden size; 1–3" diameter for best texture).
- ● Landscape fabric: 1 roll (3'–4' wide, heavy-duty to block weeds).
- ● Gravel or crushed rock: 1/2"–1" size, 1–2 bags (for drainage layer).
- ● Native desert plants: Succulents, cacti, or drought-resistant shrubs (check local climate suitability).
- ○ Soil (optional for planting): Cactus/succulent mix (if not using gravel-only base).
- ● Shovel or spade (for digging).
- ● Wheelbarrow (for moving rocks/soil).
- ● Rake (for leveling).
- ● Garden gloves (to protect hands from sharp edges).
- ● Measuring tape (for layout planning).
- ● Safety glasses (if handling large rocks).
- ● Outdoor lighting (solar-powered or low-voltage for ambiance).
- ● Decorative stones or sand (for contrast or borders).
- ● Drip irrigation kit (for low-water plant care).
- ● Mulch (to retain minimal moisture).
Step-by-Step guide to creating a lava rock garden
Transform your outdoor space with a striking desert-inspired design that thrives on minimal water.
Choose and Prepare Your Garden Space
Select a sunny location with at least 6 hours of direct sunlight daily—lava rock gardens shine in full sun. Clear the area of grass, weeds, and debris, then mark the design with landscape paint or stakes. I like to sketch a rough layout first, especially if I'm incorporating curves or focal points like boulders or succulents.
For a 4-foot by 4-foot garden, you'll want a flat base to prevent rocks from shifting over time. Use a shovel to level the ground, removing any rocks or roots that could disrupt drainage. Compact the soil lightly with a hand tamper to create a stable foundation. This step ensures your lava rock stays in place and doesn’t create uneven surfaces that trip visitors.
Lay Down a Weed Barrier and Base Layer
Spread a landscape fabric over the prepared area to suppress weeds and prevent grass from growing between the rocks. Secure the edges with landscape staples or rocks. Next, add a 2-inch layer of coarse sand or small gravel over the fabric. This layer improves drainage and prevents soil from mixing with the lava rock, which can lead to erosion or unwanted plant growth.
I always use sharp-edged sand because it locks together better than smooth varieties, keeping the base stable. Rake the sand evenly to create a smooth, level surface. This layer is critical—without it, your lava rock will sink into the soil over time, ruining the clean, desert look you’re aiming for.
Add Larger Rocks for Structure and Depth
Start by placing the largest lava rocks first, arranging them in a way that creates visual interest and mimics natural desert formations. I like to cluster them in odd numbers—three or five rocks work better than symmetrical pairs. Leave gaps of about 1-2 inches between rocks to allow for smaller stones and plants later.
For a 4-foot garden, you’ll need roughly 2-3 cubic feet of larger lava rocks (about 12-18 inches in diameter). Press them gently into the sand layer so they sit securely but aren’t forced down too deeply. This step sets the foundation for the rest of your design, so take your time to create a balanced, eye-catching arrangement.
Fill in With Smaller Lava Rock and Plants
Once the larger rocks are in place, fill the remaining spaces with smaller lava rocks, ranging from ½ inch to 2 inches in diameter. Use a rake or your hands to distribute them evenly, ensuring no gaps are left exposed. This creates a seamless, textured surface that mimics a natural desert floor.
If you’re incorporating drought-resistant plants like succulents, cacti, or ornamental grasses, place them now in the gaps between rocks. Water them lightly before adding the final layer of lava rock to help them settle into the soil. For a 4-foot garden, you’ll need about 3-4 cubic feet of smaller lava rocks to complete the look.
Final Touches and Maintenance Tips
Give your garden a final inspection, ensuring all rocks are stable and no sharp edges are pointing upward where they could be hazardous. Add a few more small rocks or adjust any that feel unstable. Once everything is set, water the plants lightly to encourage root growth, but avoid overwatering—lava rock gardens thrive on minimal moisture.
To keep your garden looking its best, remove any weeds that pop up through the rocks and top off the lava rock layer as needed. Every few months, check the drainage by feeling the soil beneath the rocks—it should stay dry and crumbly. If it feels compacted or soggy, add a thin layer of sand to improve drainage. With minimal upkeep, your lava rock garden will stay stunning for years.
Tips & tricks for perfect lava rock gardens
Creating a stunning lava rock garden takes more than just placing rocks—it’s about understanding the subtle details that make the design stand out. Here are the key strategies I’ve learned to ensure your desert-inspired landscape thrives for years.
Sunlight Strategy: The 6 hours of direct sunlight mentioned in Step 1 is non-negotiable for lava rock gardens. If your location gets less sun, consider positioning the garden where it receives the most sunlight during the day. Southern exposures work best in the Northern Hemisphere, while northern exposures are ideal in the Southern Hemisphere. I’ve seen gardens fail when placed in shady spots—trust me, the rocks will stay dull and plants won’t thrive.
Base Layer Precision: When adding the 2-inch layer of coarse sand in Step 2, don’t skimp on the thickness. A thinner layer will compact over time and cause rocks to sink. For extra stability, I like to mix in a small amount of gravel with the sand—this creates better drainage and prevents erosion. Rake the surface until it’s completely level before placing any rocks, as even slight unevenness will show once the garden is complete.
Rock Arrangement Technique: In Step 3, the 1-2 inch gaps between larger rocks might seem small, but they’re crucial for both aesthetics and functionality. These spaces allow water to drain properly and create room for smaller rocks or plants. I’ve found that arranging rocks in odd-numbered clusters—three or five—creates a more natural, balanced look. For a 4-foot garden, start with your largest rocks first, then fill in with medium-sized ones before adding the smaller stones in Step 4.
Plant Placement Insight: If you’re adding drought-resistant plants like succulents or cacti, place them in the gaps during Step 4 after you’ve lightly watered them. The moisture helps them settle into the soil before you add the final layer of smaller lava rocks. I’ve learned that planting too early can cause rocks to shift when you walk on them, potentially damaging delicate plants. Water them sparingly after planting—these plants thrive on neglect, not attention.
Pro Tips for Lava Rock Gardens
- Creating a stunning lava rock garden takes more than just placing rocks—it’s about understanding the subtle details that make the design stand out.
- Sunlight Strategy: The 6 hours of direct sunlight mentioned in Step 1 is non-negotiable for lava rock gardens.
- Base Layer Precision: When adding the 2-inch layer of coarse sand in Step 2, don’t skimp on the thickness.
Frequently asked questions
Got questions about transforming your space with lava rock gardens?
Here are answers to the most common inquiries to help you plan with confidence.
How long does it take for lava rock to settle and look "finished"?
Lava rock typically settles within 24–48 hours after installation, but the full "finished" look—with rocks evenly distributed and plants rooted—may take 2–4 weeks. Raking lightly after placement speeds up the process. Avoid walking on it until settled to prevent shifting.
Do lava rock gardens need irrigation, or are they truly drought-resistant?
While lava rock reduces water needs, it’s not completely drought-proof. Native, succulent plants thrive with minimal water, but established gardens may need irrigation every 2–3 weeks during dry spells. Mulch (like gravel or decomposed granite) helps retain moisture for roots.
Can I install lava rock myself, or should I hire a pro?
DIY installation is totally doable for small areas! Rent a plate compactor and follow these steps:
- Level the base (remove weeds/rocks).
- Add a 2–3 inch layer of landscape fabric.
- Spread lava rock 3–4 inches deep (adjust for aesthetics).
- Rake and compact lightly.
What plants thrive in lava rock gardens, and which to avoid?
Best picks:
Succulents (aloe, sedum), cacti, lavender, and ornamental grasses. Avoid: Heavy feeders like roses or ferns—they’ll struggle in the rocky, fast-draining soil. Pair plants with similar water needs for harmony!
Will lava rock attract pests like ants or rodents?
Lava rock itself doesn’t attract pests, but organic debris (leaves, mulch) can. Keep the area clean, and use diatomaceous earth or pest-repellent plants (like marigolds) if needed. Rodents may dig near edges—install a 12-inch deep gravel border to deter them.
How much does lava rock cost compared to other mulches?
| Material | Cost per Cubic Yard | Lifespan |
|---|---|---|
| Lava Rock | $30–$60 | 10+ years |
| Mulch (Wood) | $2–$5 | 1–3 years |
| Decomposed Granite | $40–$80 | 5–10 years |
Wrapping up and next steps
Transforming your outdoor space into a stunning, drought-resistant lava rock garden is easier—and more rewarding—than you think! 🌵✨ With the right materials, a little creativity, and some patience, you’ll create a low-maintenance, visually striking landscape that thrives in even the driest conditions.
Whether you’re a seasoned gardener or a beginner, this project is the perfect way to embrace desert-inspired beauty while saving water and effort.
Ready to take the next step? Start small—pick a corner of your yard, gather your supplies, and let your imagination run wild. Before you know it, your lava rock garden will be the envy of the neighborhood! 🌟