
Landscaping
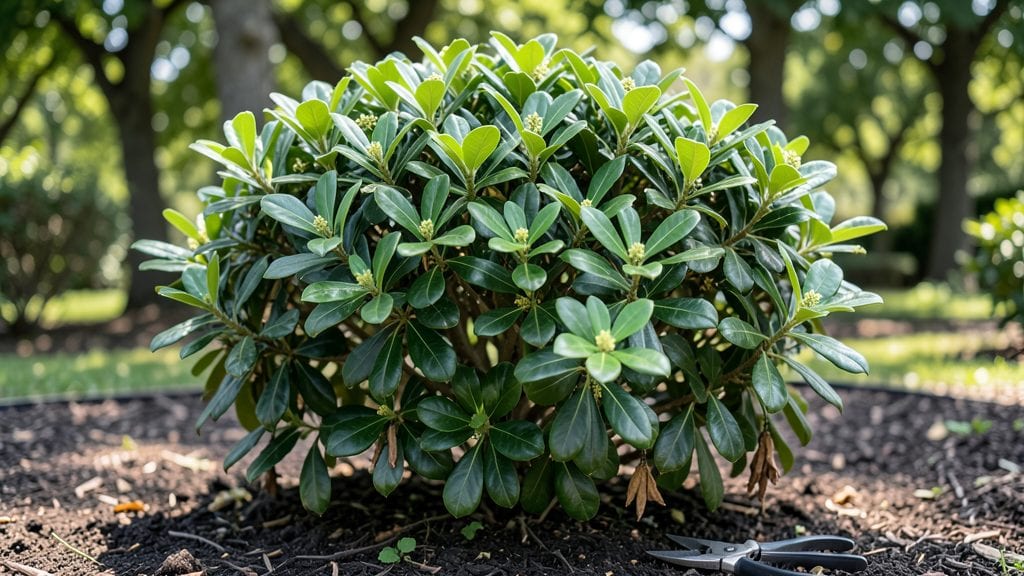
Laurel’s garden design turns any yard into a fragrant privacy screen, and I’ve crafted several living walls myself—starting with cherry laurel for height, bay laurel for... structure, and fragrant climbers like jasmine to weave through. The result? A screen that’s both functional and intoxicatingly scented all year.
This isn’t about rigid rows or expensive materials—just smart plant placement and minimal pruning. Laurel thrives in most climates, so you can plant it as a hedge, trellis, or even a mixed border.
Pair it with climbing roses or clematis for extra fragrance, and you’ll have a screen that blooms, hides neighbors, and smells like a Mediterranean garden. The best part? It stays green even in winter.
By summer, you’ll have a wall of glossy leaves and delicate blossoms that hum with bees and butterflies. The texture alone—thick, waxy foliage against soft climbers—creates a striking contrast. Plus, the scent lingers on the breeze, turning your backyard into a private sanctuary. Ready to design your own?
Works for formal gardens, cottage-style plots, or even small urban spaces. The layout adapts to your needs—whether you want a tall hedge, a trellis, or a layered border. Let’s get growing!
📚 In This Guide
- What you need
- Instructions
- Tips and common mistakes
- Wrapping up and next steps
What you need
- ● Laurel plants (Prunus laurocerasus) – 6-10 healthy, 2-3 ft tall shrubs (depending on desired height and spacing)
- ● Fragrant climbers (e.g., Jasmine, Clematis, or Honeysuckle) – 2-4 vines per screen (choose evergreen or semi-evergreen varieties)
- ○ Soil amendments – Compost (1-2 bags), peat moss (optional for sandy soil), and slow-release fertilizer (10-10-10)
- ● Mulch – 3-4 cubic feet of shredded bark or wood chips (to retain moisture and suppress weeds)
- ● Trellis or lattice panels – 6-8 ft tall, 4-6 ft wide (adjust based on screen length)
- ● Stakes or posts – 4-6 wooden or metal stakes (4-6 ft tall) for structural support
- ● Garden twine or zip ties – For securing climbers to the trellis
- ● Shovel or spade
- ● Garden trowel
- ● Pruners or shears (sterilized)
- ● Measuring tape
- ● Wheelbarrow (for soil amendments)
- ● Gloves and knee pads
- ● Drip irrigation system – For consistent moisture (especially in dry climates)
- ● Edging material – Landscape fabric or bricks to define the screen’s base
- ● Slow-release plant food – For extra nourishment during the first growing season
- ● Decorative stakes or labels – To mark plant varieties (if you’re a plant nerd like us!)
Step-by-Step instructions for creating a year-round privacy screen
Here's how to build a lush, fragrant privacy screen that thrives in every season.
Plan Your Layout and Choose the Right Location
Start by measuring your space and sketching a rough design. A 6-foot-tall privacy screen works best for most residential areas, but adjust based on your property size. Look for a location with at least 6 hours of sunlight daily, though some climbers tolerate partial shade. I always mark the sunniest spots with stakes to visualize where plants will cast shadows throughout the day.
Consider existing structures like fences or trellises as your base. If starting from scratch, install a sturdy wooden lattice or metal grid—this will support the weight of mature vines. Space supports 8 feet apart for a seamless look, allowing vines to weave together naturally. Avoid placing the screen too close to sidewalks or driveways, as roots and vines can spread aggressively.
Prepare the Soil and Plant Your Foundation Plants
Dig a 12-inch-deep trench along your planned layout, loosening the soil to encourage root growth. Amend the soil with 3 gallons of compost per 4-foot section to improve drainage and fertility. Laurel’s design thrives with well-draining soil, so avoid compacted or clay-heavy areas unless you mix in sand or perlite to lighten the texture.
Plant 4-6 evergreen shrubs—like boxwood or holly—along the base of your screen. These act as a living foundation, providing year-round structure while the climbers grow. Space them 3-4 feet apart and water deeply after planting. Mulch around the base with 2 inches of wood chips to retain moisture and suppress weeds. This layer also protects roots from temperature swings in winter.
Install Climbing Vines for Seasonal Interest
Choose a mix of deciduous and evergreen climbers to ensure year-round coverage. Plant clematis, jasmine, or star jasmine for fragrant blooms in spring and summer, while ivy or climbing hydrangea provide lush greenery in fall and winter. Dig holes twice as wide as the root ball and as deep as the container, then place each vine gently into the soil, backfilling with native dirt.
Train vines to climb immediately by tying them to the lattice with soft plant ties or twine. Avoid metal staples—they can damage stems as plants grow. Water each vine deeply once a week for the first month to encourage root establishment. Here’s the thing—mulch again around the base after planting to lock in moisture and keep roots cool in summer.
Provide Support and Prune for Growth
As vines mature, they’ll need occasional pruning to control their shape and encourage bushier growth. Trim back overly long stems in early spring before new growth begins, cutting just above a leaf node. This redirects energy to produce more flowers and foliage. I always prune after the first flush of blooms to maintain a neat appearance while allowing enough time for new flowers to set.
Check your lattice or trellis annually for stability, especially after heavy rains or storms. Replace any damaged sections immediately—weak supports can’t handle the weight of mature vines. Fertilize lightly in early spring with a balanced, slow-release fertilizer to support vigorous growth without burning tender roots.
Maintain Year-Round Beauty and Health
Water deeply once a week during the first growing season, then taper to every 2 weeks once established, depending on rainfall. Laurel’s design relies on deep roots, so always water at the base rather than overhead to prevent fungal diseases. In winter, add a 2-inch layer of mulch to insulate roots and protect against freezing temperatures.
Monitor for pests like aphids or spider mites, which love tender new growth. Spray affected areas with neem oil or insecticidal soap as needed, focusing on the undersides of leaves where pests hide. With proper care, your privacy screen will mature into a fragrant, dense barrier within 3-5 years, offering both beauty and seclusion.
Tips & tricks for perfect year-round privacy screens
These practical tips will help you create a thriving, fragrant privacy screen that stands the test of seasons—no green thumb required.
The Sunlight Factor: That 6-hour sunlight minimum is crucial for most climbers, but don't panic if your spot gets less. Star jasmine and ivy are the most shade-tolerant options from the instructions, making them ideal for partial shade areas. If your location gets less than 4 hours of sun, consider adding a few more evergreen shrubs to fill gaps until the vines mature.
Soil Prep Secret: When amending your 12-inch-deep trench with 3 gallons of compost per 4-foot section, mix in a handful of sand or perlite for every 2 gallons of compost. This creates tiny air pockets that prevent compaction—especially important if your native soil is heavy clay. I learned this the hard way after watching roots struggle in dense soil that wouldn't drain properly.
Vine Training Technique: For the soft plant ties mentioned in Step 3, use old T-shirts or cotton strips instead of store-bought ties—they're gentler on stems and won't cut as the vines thicken. I've found that tying vines in a figure-eight pattern around the lattice gives them extra support without restricting growth. Check these ties every 2 weeks during the first growing season as stems grow rapidly.
Pruning Pro Tip: When pruning in early spring, look for those leaf nodes—they're the little bumps where leaves attach. Cutting just above one ensures new growth will sprout from that point. For a fuller look, prune back to the third or fourth node from the base of the stem. This technique creates bushier growth while maintaining that neat appearance mentioned in Step 4.
Pro Tips for Laurel'S Garden Design
- These practical tips will help you create a thriving, fragrant privacy screen that stands the test of seasons—no green thumb required.
- The Sunlight Factor: That 6-hour sunlight minimum is crucial for most climbers, but don't panic if your spot gets less.
- Soil Prep Secret: When amending your 12-inch-deep trench with 3 gallons of compost per 4-foot section, mix in a handful of sand or perlite for every 2 gallons of compost.
Frequently asked questions
What’s the best time of year to plant fragrant climbers like laurel?
For Laurel’s Garden Design, aim for early spring or fall when temperatures are mild. This gives roots time to establish before extreme heat or cold. Avoid planting in summer—young plants can struggle with drought stress, and winter planting may leave them vulnerable to frost damage.
How long does it take for a laurel privacy screen to become fully dense?
With proper care, a laurel hedge can reach full privacy (8–10 feet tall) in 3–5 years. Prune regularly to encourage bushiness, and expect faster growth in well-drained, sunny spots. Pro tip: Use a mix of laurel varieties (like Prunus laurocerasus and Viburnum tinus) for layered fragrance and density!
Can I prune laurel plants year-round, or are there restrictions?
Prune lightly in spring (to shape) and heavily in late summer/early fall (to promote new growth). Avoid pruning in winter—it stresses the plant—and skip hard cuts in peak summer (heat can slow recovery). Always use sharp, sterilized tools to prevent disease.
What’s the best way to troubleshoot yellowing leaves on my laurel?
Yellow leaves often signal overwatering, nutrient deficiency, or fungal issues. Check soil moisture (laurel prefers it evenly moist but not soggy), and fertilize in spring with a balanced, slow-release formula. If spots appear, treat with neem oil—a natural fungicide. Warning: Yellowing can also mean iron deficiency; amend soil with chelated iron if needed.
Are there fragrant alternatives to laurel for a privacy screen?
Try these scented, fast-growing options:
- Jasmine (Jasminum spp.) – Sweet night-blooming fragrance; needs trellising.
- Star Jasmine (Trachelospermum jasminoides) – Hardy, evergreen, and highly aromatic.
- Climbing Roses (Rosa spp.) – Petal-perfumed blooms (choose disease-resistant varieties).
- Sweet Bay Magnolia (Magnolia virginiana) – Citrusy leaves and glossy foliage.
Pair these with laurel for a multi-sensory screen!
Wrapping up and next steps
Creating a year-round privacy screen with fragrant climbers is a game-changer for your outdoor space—adding beauty, scent, and seclusion without the fuss! Laurel’s Garden Design proves that privacy can be lush, low-maintenance, and delightfully aromatic all year long.
Whether you’re a seasoned gardener or just starting, this project is your chance to transform a dull corner into a serene, sensory-rich retreat.
Ready to bloom? Start by sketching your design, gathering supplies, and reaching out to local nurseries for expert advice. Then, roll up your sleeves—your fragrant, private oasis awaits! 🌿✨