Landscaping
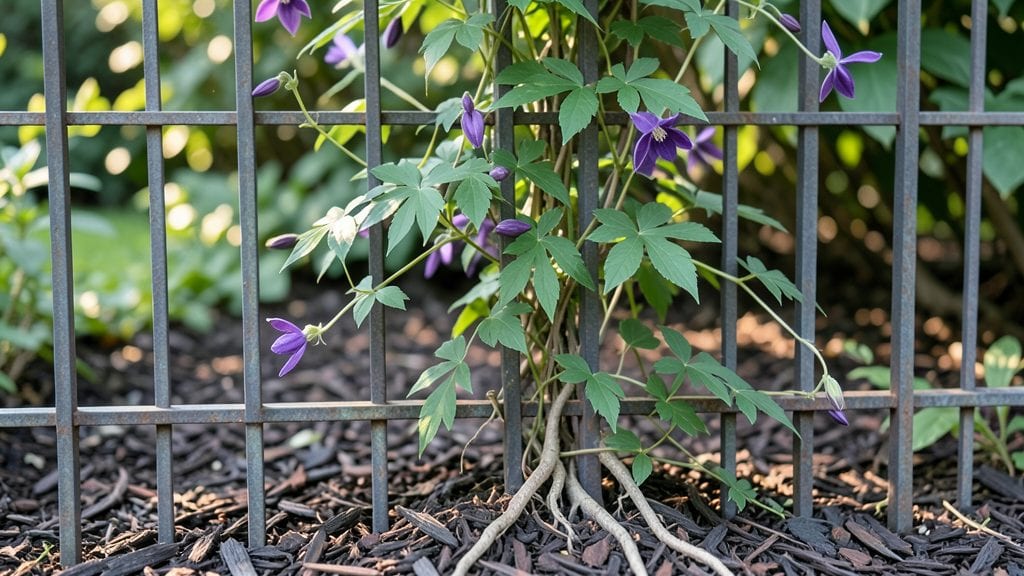
An iron garden fence transforms your yard into a private sanctuary with that timeless, slightly weathered look. 🌿 I’ve seen how a well-placed iron fence turns a simple backyard into a cozy retreat—its vertical lines add height and drama while keeping prying eyes out.
The best part? It’s sturdy enough to last decades with minimal upkeep, yet light enough to avoid feeling like a fortress.
You’ll need basic tools—a tape measure, post-hole digger, and concrete mix—and maybe a friend to help lift those panels. The installation isn’t rocket science, but it does require patience: marking post locations precisely and setting them deep enough to handle wind or accidental bumps.
Once up, the rustic charm of iron—whether painted or left to age naturally—creates a backdrop that makes gardens look intentional, not just functional.
Imagine stepping into a space where your veggie patches, flower beds, or even a quiet seating area feel protected yet open to the sky. Iron fences pair beautifully with climbing roses, wisteria, or even ivy, turning them into living works of art.
The metal’s durability means no sagging lattice or rotting wood, so your garden’s privacy stays intact for years.
For small spaces, consider semi-private designs with decorative cutouts, while larger yards can benefit from full-height panels paired with lattice tops for extra height. The key is balancing structure with softness—let the plants do the talking once the fence is in place.
Ready to add some old-world charm to your outdoor space?
📚 In This Guide
- What you need
- Instructions
- Tips and common mistakes
- Wrapping up and next steps
What you need
- ● Iron fence panels: Pre-assembled or custom-cut sections (measure your space first!). Standard height: 6–8 feet (adjust for privacy needs).
- ● Length: Custom-cut to fit your yard’s perimeter (e.g., 6–10 ft sections for easier handling).
- ● Quantity: Calculate based on your fence’s total linear footage (e.g., 10 panels for a 50-ft fence at 5 ft per panel).
- ● Concrete footings: 6–8 bags (60 lb each) for stability (check local codes for depth/spacing).
- ○ Post caps: 2–4 decorative iron caps (optional but adds rustic flair!).
- ○ Gate hardware: 1–2 sets (hinges, latch, and optional self-closing mechanism).
- ● Paint or sealant: 1–2 gallons of rust-resistant paint (e.g., spray or brush-on).
- ● Essential: Post hole digger or auger.
- ● Level (4-ft for panels, torpedo for posts).
- ● Measuring tape (25+ ft).
- ● Cement mixer or wheelbarrow (for footings).
- ● Wrench set (adjustable and socket).
- ● Drill/driver (for assembling panels).
- ● Safety gear: gloves, goggles, ear protection.
- ○ Optional (but helpful): Circular saw (for cutting iron—if not pre-cut).
- ● Clamps (for securing panels during assembly).
- ● Paint sprayer (for faster sealing).
- ● Check local building codes for height, setback, and permit requirements (iron fences often need approval!).
- ● Clear the fence line: Remove vegetation, rocks, or debris (aim for a 2–3 ft workspace).
- ● Mark post locations with stakes and string for a straight, professional look.
- ● Call 811 to check for underground utilities before digging! ⚠️
Step-by-Step instructions for installing an iron garden fence
Let’s build a sturdy, stylish iron fence that adds privacy and curb appeal to your yard.
🪴 Step 1: Measure and Mark Your Layout
Start by measuring the area where you’ll install the fence. Use a tape measure to mark the exact length and corners with wooden stakes and string. For a 4-foot-tall fence, plan on 8-foot-long sections (standard iron fence panel height). Adjust for curves or gate placement now—it’s easier to fix mistakes before digging.
Check for underground utilities with a call-811 before digging. Mark any pipes or wires with flags so you avoid them entirely. Dig post holes 12 inches deep and 12 inches wider than the post diameter—this gives concrete room to set properly without shifting. Space posts 6 feet apart for a standard iron fence; closer spacing prevents sagging over time.
🌱 Step 2: Set Concrete Footings for Posts
Mix quick-setting concrete (or regular concrete if you have time) in a wheelbarrow, following the bag instructions for water ratios. Pour the concrete into the post holes, leaving 2 inches of space at the top for the post base. Tap the post gently into the wet concrete until it’s level (use a carpenter’s level to check both sides).
Fill the remaining space around the post with more concrete, tamping it down firmly to remove air pockets. Leave the posts undisturbed for 24 hours—this ensures the concrete cures fully and holds the fence upright. Pro tip: Wrap the post bases in plastic sheeting before pouring to prevent moisture from seeping into the iron and causing rust later.
☀️ Step 3: Attach the Iron Panels to Posts
Place the first iron fence panel between two posts, aligning the bottom edge with the ground. Use galvanized lag screws (included with most fence kits) to secure the panel to the post. Start at the top and bottom of the panel, then add screws at 12-inch intervals along the sides. Tighten screws evenly to avoid warping the iron.
For a seamless look, overlap the ends of adjacent panels slightly (about ½ inch). Use J-bolts or strapping brackets to connect panels together, ensuring they’re flush and level. Check for gaps—if you see light shining through, adjust the screws until the panel sits snugly against the post. A 4-foot-tall fence should have no more than ¼-inch gap at the top for wind resistance.
✂️ Step 4: Install Gates and Hardware
Measure the gate opening carefully—most iron gates are 36 inches wide for single doors or 72 inches for double doors. Cut the gate frame to fit if needed, using a metal cutter or angle grinder (wear safety goggles!). Attach hinges to the gate and post, then secure with heavy-duty screws. Leave 3-4 inches of clearance on the hinge side for smooth opening.
Add a latch or deadbolt on the active side of the gate, ensuring it aligns with the post when closed. For extra security, install a ground anchor on the hinge side to prevent lifting. Test the gate by opening and closing it a few times—if it sticks, sand any rough edges or adjust the hinges slightly. A well-installed gate should open and close silently with minimal effort.
💧 Step 5: Finish and Maintain for Longevity
Once the fence is up, clean off any dust or debris with a wire brush and a damp cloth. Apply a clear metal sealant (like Rust-Oleum) to protect the iron from moisture and rust. Reapply every 2-3 years or after heavy rain. Avoid pressure washing—it can strip the sealant and leave the metal vulnerable.
Check for loose screws or sagging panels seasonally, especially after storms. Tighten any loose hardware immediately to prevent damage. If you notice rust spots, scrub them with vinegar and steel wool, then reseal the area. With proper care, your iron fence will last 20+ years while keeping your garden private and stylish.
Tips & tricks for perfect iron garden fence installation
A few key strategies will help you avoid common pitfalls and achieve a fence that's both sturdy and stylish. Between us, these tips saved me from having to redo sections after the concrete cured.
Precision in Step 1: When marking your layout, use a laser level instead of just a string line for perfectly straight sections. I learned this the hard way after realizing my first attempt had a subtle curve that became obvious when I attached the panels. For curves, use a flexible hose filled with water as a makeshift level—it'll show you exactly where to adjust your stakes. The 6-foot spacing between posts is critical; measure between the center of each post, not the edges, to maintain consistent gaps.
Concrete Curing Strategy: The 24-hour curing time for concrete is non-negotiable, but you can speed up the process slightly by keeping the posts moist with a spray bottle during those first few hours. This prevents cracking as the concrete sets. I also recommend mixing in a concrete sealant (like a waterproofing additive) when pouring—it creates a moisture barrier that prevents rust from forming at the post base later. Just follow the package instructions for the right ratio.
Panel Alignment Secret: Before attaching any panels, lay them out on the ground first to check for consistency in height and design. I've seen where panels from different boxes vary slightly in height, which creates unsightly gaps. If you notice variations, use shims (thin wooden strips) behind the panels to bring them all to the same level before screwing them in. That ¼-inch gap at the top? Use a spacer block between panels to maintain it consistently—just a small piece of wood or PVC pipe works perfectly.
Gate Installation Pro Tip: When cutting gate frames, mark your measurements twice—once on the metal and once on a scrap piece of wood you'll attach temporarily. This gives you a visual reference to check against while cutting. For the hinge side clearance, I use a featherboard (a thin strip of wood) as a spacer when attaching hinges—it ensures that exact 3-4 inch gap every time. And don't forget to test the gate swing with the latch installed; you might need to file down sharp edges on the gate frame to prevent it from catching.
Pro Tips for Iron Garden Fence
- A few key strategies will help you avoid common pitfalls and achieve a fence that's both sturdy and stylish. Between ...
- Precision in Step 1: When marking your layout, use a laser level instead of just a string line for perfectly straight...
- Concrete Curing Strategy: The 24-hour curing time for concrete is non-negotiable, but you can speed up the process sl...
Frequently asked questions
Got questions about installing or styling an iron garden fence?
You’re not alone! Here are answers to the most common concerns—from maintenance to aesthetics—to help you make the best choice for your outdoor space.
How do I prevent my iron fence from rusting?
Iron fences are durable but require a little TLC to resist rust. Start with a galvanized or powder-coated finish (like zinc or epoxy), then apply a weatherproof sealant every 1–2 years. Avoid pooling water by ensuring proper drainage, and touch up chipped spots immediately with rust converter. Pro tip: Store spare paint for touch-ups to save time later!
Is an iron fence more expensive than wood or vinyl?
Yes, iron fences typically cost $20–$50 per linear foot installed, compared to $10–$30 for wood or $15–$40 for vinyl. However, the longevity (50+ years with care) and timeless aesthetic often justify the investment. Budget hack: Opt for shorter heights or simpler designs to cut costs without sacrificing style.
Can I install an iron fence myself, or do I need a pro?
DIY is possible for small, flat sections with basic tools (post hole digger, welder, level), but pros recommend hiring a contractor for uneven terrain, gates, or heavy-duty designs. If you’re handy, watch tutorials on concrete footing and welding techniques—just prioritize safety with gloves and goggles! Warning: Local permits may apply for fences over 6 feet.
How can I customize an iron fence for a unique look?
Get creative with engravings, scrollwork, or mixed metals (like copper accents). Paint it matte black, antique white, or bold colors for a modern twist, or leave it raw for a rustic vibe. Add lighting (solar-powered LEDs) or climbing plants like roses or ivy to soften the look. Design tip: Sketch your fence layout first to visualize spacing and details!
What’s the best way to repair a damaged iron fence?
For small dents or scratches, sand and repaint the area. If a section is bent or broken, cut it out and weld in a new piece (or use bolts for a temporary fix). Rusted spots need wire brushing, rust converter, and fresh paint. For loose posts, dig around the base, add gravel for drainage, and secure with concrete. Remember: Tighten bolts annually to prevent shifting!
Wrapping up and next steps
An iron garden fence isn’t just a boundary—it’s a statement of style and security that blends rustic charm with modern durability. Whether you’re drawn to its timeless elegance, robust privacy, or low-maintenance appeal, this choice elevates both your outdoor space and your home’s curb appeal. 🌿✨
Ready to transform your yard? Start by sketching your design, gathering materials, and reaching out to local experts for installation tips. With the right plan, your iron fence will stand strong—and stunning—for years to come!