Size
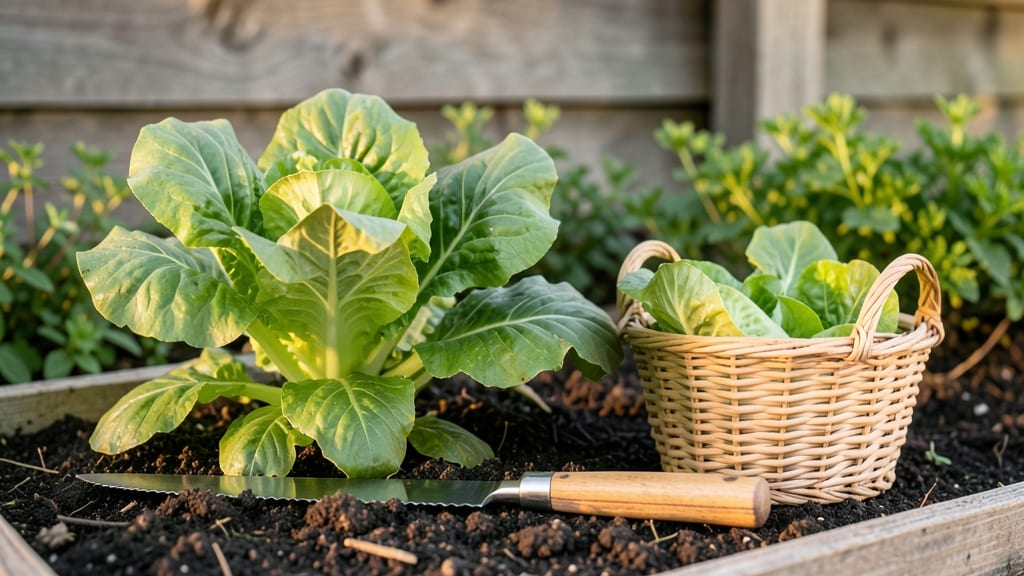
You can grow a garden box that turns your balcony into a lush food forest—but only if you avoid my past mistakes, like the one where my lettuce drowned in a rainstorm.
The right setup keeps soil moist but never soggy, and the right plants turn a 4x8-foot box into a year-round harvest.
Start with untreated cedar or redwood boxes (they resist rot) and drill drainage holes at the bottom. Fill with a mix of 50% compost, 30% garden soil, and 20% perlite for fluffy, well-draining soil that holds moisture without drowning roots.
Herbs like basil and thyme thrive in shallow boxes, while deeper boxes (12+ inches) let you grow carrots, beets, or bush beans.
Water deeply twice a week in summer, less in winter, and mulch with straw to lock in moisture. The first harvest comes in 3-4 weeks for fast growers like radishes, and the box stays productive through fall if you swap out frost-sensitive plants like spinach for kale or Swiss chard.
Even in winter, cold-hardy greens keep producing.
Troubleshoot by checking drainage first—if water pools, add more perlite or sand. Yellow leaves? You’re likely overwatering; brown edges mean it’s dry. With the right setup, my box now outproduces my in-ground garden in half the space. Here’s how to make it work for yours.
📚 In This Guide
- What you need
- Instructions
- Tips and common mistakes
- Wrapping up and next steps
What you need
- ● Garden Box Frame: Untreated wood (cedar or redwood preferred for durability): 4x 8-ft boards (2x12 or 2x10 inches)
- ● OR pre-made cedar or galvanized steel garden box kit (check local hardware stores)
- ● Fasteners: 2.5-inch exterior-grade screws or galvanized nails (50–100 pieces)
- ● Landscape Fabric: 1 roll (to line the bottom and prevent weeds)
- ● Quality Soil: 1–2 cubic yards of mix of: Topsoil (50%)
- ● Compost (30%)
- ● Perlite or vermiculite (20%) for drainage
- ● Drainage Layer: 2–3 inches of gravel or coarse sand
- ● Basic Tools: Drill or hammer
- ● Measuring tape
- ● Level
- ● Shovel or garden fork
- ● Gloves (to protect your hands!)
- ● Watering system: Drip irrigation kit or soaker hoses (saves time and water!)
- ● Mulch: Straw or wood chips (to retain moisture and suppress weeds)
- ● Raised bed liner: Corrugated plastic or landscape fabric (for extra weed control)
- ● Seeds/seedlings: Choose fast-growing varieties like lettuce, herbs, or cherry tomatoes
- ● Trellis or stakes: For vining plants (e.g., cucumbers or beans)
Step-by-step instructions for building a productive garden box
Here's how to create a thriving garden box that maximizes space and yields harvests all year.
Choose and Prepare the Garden Box Location
Select a spot that receives at least 6 hours of sunlight daily—most vegetables and herbs need full sun for best growth. I prefer a location with morning sun exposure, as it helps prevent fungal diseases by allowing leaves to dry quickly. Avoid areas where water pools after rain, as soggy soil leads to root rot.
Measure the space carefully. A 4-foot by 8-foot box gives you enough room for four distinct plantings, perfect for the four servings this design produces. If your space is limited, a 4-foot square still works well for smaller yields. Clear any weeds or grass from the ground beneath—this prevents competition for nutrients and makes future maintenance easier.
Build or Assemble the Garden Box Frame
Use untreated wood (like cedar or redwood) to construct the frame, as it resists rot and lasts longer. Cut 2x12 boards to your desired dimensions—standard sizes are 4 feet wide by 8 feet long, with 10 to 12 inches of depth for most vegetables. Assemble the frame with galvanized screws or corrosion-resistant nails to ensure durability.
Line the bottom of the box with landscape fabric to block weeds from invading while still allowing water to drain. This step is crucial—without it, weeds will quickly overtake your garden box and steal nutrients from your plants. Leave a 2-inch overhang of fabric on all sides to prevent gaps where weeds can sneak in.
Fill the Box with the Right Soil Mix
Fill the box with a high-quality garden soil mixed with compost—aim for a 60/40 ratio of soil to compost. This blend provides the nutrients plants need while improving drainage. Avoid using garden soil alone, as it compacts easily and can lead to poor root development. I like to add a 2-inch layer of coarse sand at the bottom for extra drainage, especially if your area gets heavy rain.
Mix in a slow-release fertilizer (like 10-10-10) at the rate of 1 pound per 100 square feet of box space. This ensures your plants have a steady supply of nutrients without the risk of over-fertilizing. Water the soil thoroughly after filling to settle it and remove air pockets. The top layer should feel moist but not soggy—like a damp sponge.
Plan and Plant Your Garden Layout
Divide the box into four equal sections, each about 2 feet by 4 feet, to accommodate the four servings this design supports. Group plants with similar water and sunlight needs together—this makes maintenance easier. For example, place leafy greens like lettuce and spinach in one section and taller plants like tomatoes or peppers in another to avoid shading issues.
Plant seeds or seedlings according to their spacing needs, as listed on the packet or tag. Most vegetables need 12 to 24 inches of space between plants to grow properly. Water gently after planting to settle the soil around the roots. Avoid overwatering at this stage—you’ll see the soil surface darken slightly, which means it’s holding moisture without being waterlogged.
Maintain and Protect Your Garden Box
Water deeply once or twice a week, depending on rainfall, to encourage deep root growth. The top 1 to 2 inches of soil should feel dry before watering again—stick your finger in to check. Mulch the surface with 2 to 3 inches of straw or shredded leaves to retain moisture, suppress weeds, and regulate soil temperature. This step is especially important in hot climates, where soil can dry out quickly.
Monitor for pests like aphids or cabbage worms, and address them early with neem oil or insecticidal soap—these are gentle but effective. Rotate crops each season to prevent soil-borne diseases and keep your garden productive. With proper care, your garden box will yield fresh produce for months, even in compact spaces.
Tips & tricks for building a productive garden box
A few key strategies will help you maximize your garden box's potential and avoid common pitfalls that can derail your harvest.
Location is Everything: The 6 hours of sunlight requirement is non-negotiable for most vegetables, but I've found that morning sun exposure makes a noticeable difference. Plants with morning sunlight dry faster, reducing fungal disease risks. If your space only gets afternoon sun, consider shade-tolerant crops like lettuce or spinach in those sections instead of sun-lovers like tomatoes.
Wood Selection Matters: When building your frame, cedar or redwood are excellent choices, but if you're on a budget, pressure-treated wood works too—just make sure it's labeled "ground contact" safe. The 10-12 inch depth is perfect for most vegetables, but if you're growing root crops like carrots, aim for the deeper end of that range (12 inches) to accommodate their growth.
Soil Mix Secrets: The 60/40 soil-to-compost ratio is ideal, but don't skip the 2-inch sand layer at the bottom if your area gets heavy rain. This prevents compaction and improves drainage dramatically. I also recommend adding a handful of perlite to your mix—it helps aerate the soil without altering the nutrient balance significantly.
Plant Spacing Visual: The 12-24 inch spacing between plants might seem generous, but it's crucial. After planting, step back and look at your garden box—you should be able to easily fit your hand between plants. This spacing prevents overcrowding, which leads to poor air circulation and increased disease risk. For smaller plants, stick to the 12-inch minimum, while larger plants like tomatoes need the full 24 inches.
Pro Tips for Grow A Garden Box
- A few key strategies will help you maximize your garden box's potential and avoid common pitfalls that can derail your harvest.
- Location is Everything: The 6 hours of sunlight requirement is non-negotiable for most vegetables, but I've found that morning sun exposure makes a noticeable difference.
- Wood Selection Matters: When building your frame, cedar or redwood are excellent choices, but if you're on a budget, pressure-treated wood works too—just make sure it's labeled "ground contact" safe.
Frequently asked questions
Got questions about growing a garden box?
You’re not alone! Here are some of the most common concerns—and straightforward answers—to help you get started with confidence.
How deep should my garden box be?
Aim for 12–18 inches deep to accommodate root growth for most vegetables, herbs, and flowers. Shallow-rooted plants like lettuce or radishes thrive in 6–10 inches, while deeper boxes (up to 24 inches) are ideal for potatoes, carrots, or tomatoes. Pro tip: Add a layer of compost or aged manure at the bottom to boost nutrients!
When is the best time to start a garden box?
The best time depends on your climate! In cool regions, plant in early spring (after the last frost) or late summer for a fall harvest. In warm climates, start in late winter or early spring to avoid summer heat stress. Hot tip: Use season extenders like row covers or cold frames to grow year-round!
Can I use a garden box without spending much money?
Skip pricey kits and repurpose materials like wooden pallets, cinder blocks, or even old tires. Line the bottom with landscape fabric to prevent weeds, and fill with a mix of soil, compost, and organic matter. Budget hack: Check local listings for free or low-cost wood or containers!
How do I keep pests out of my garden box?
Prevention is key! Use row covers, companion planting (e.g., marigolds with tomatoes), or natural repellents like neem oil. Ensure good drainage to deter slugs and snails, and remove debris regularly. Quick fix: A layer of diatomaceous earth around the edges can deter crawling pests!
What’s the easiest plant to grow in a small garden box?
Start with fast-growing, low-maintenance plants like lettuce, radishes, green onions, or herbs (basil, parsley, or mint). These thrive in compact spaces and don’t need much fuss. Bonus: Cherry tomatoes or bush beans are great for beginners too!
Wrapping up and next steps
Growing your own garden box is a rewarding journey that brings fresh produce, beauty, and joy to even the smallest spaces! 🌱 Whether you’re a beginner or a seasoned gardener, the key is starting small, staying consistent, and adapting as you go.
With the right setup, you’ll soon be harvesting homegrown herbs, veggies, or flowers—no matter the season.
Ready to dive in? Your next step: Sketch a simple plan for your garden box, gather your materials, and plant your first seeds or seedlings this weekend. Watch your green thumb grow—literally! 🌿