
Landscaping
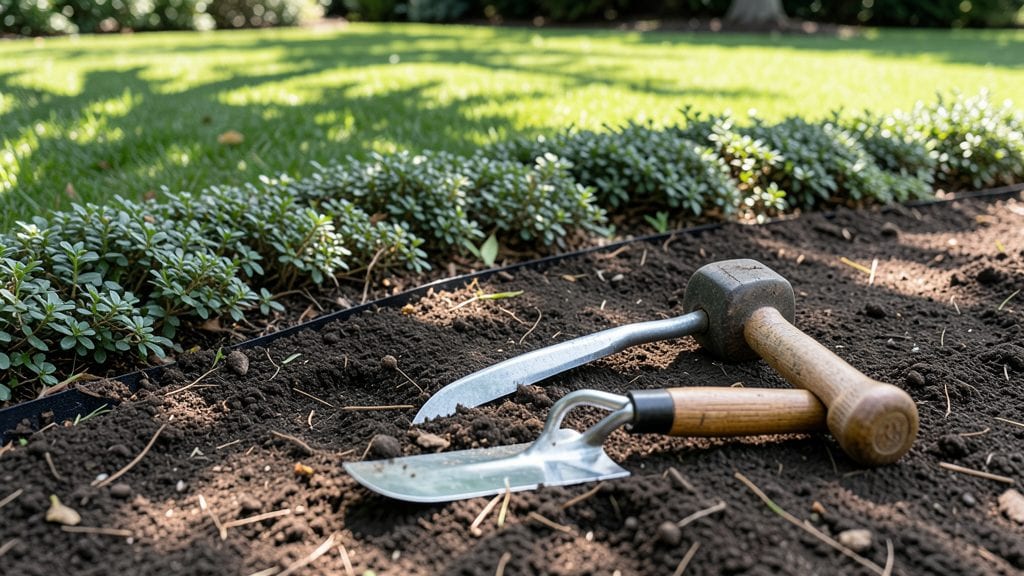
Precision garden borders transform cluttered beds into sharp, intentional spaces—gardening edging tools are the secret weapon for achieving that polished look without the backbreaking work.
I remember the first time I ran a metal edger along my vegetable patch: weeds vanished overnight, and the rows suddenly looked like they belonged in a catalog. The right tool makes all the difference between a messy transition and a crisp, professional finish.
You don’t need a full workshop to get started—just three essential tools: a sturdy metal edger for deep cuts, a rubber mallet to set plastic or stone, and a level to keep everything straight.
For small beds, a handheld plastic edger works perfectly; larger projects benefit from a long, heavy-duty metal blade that glides through soil like butter. The key is choosing materials that match your garden’s style: rustic stone for cottage gardens, sleek metal for modern spaces, or durable plastic for low-maintenance pathways.
With the right edging, you’ll spend less time weeding and more time admiring your garden’s newfound structure. Imagine the satisfaction of running your fingers along a perfectly straight border—no more grass creeping into flower beds or mulch spilling onto the lawn.
These tools aren’t just for show; they extend the life of your garden beds by keeping soil contained and roots where they belong. Let’s get those borders looking sharp.
Whether you’re outlining a formal herb spiral or a wildflower meadow, edging tools adapt to every style. The trick is starting small—pick one bed to practice, then expand as your confidence grows.
Before you know it, your garden will have the kind of clean lines that make neighbors pause and ask, “How’d you do that?”—and you’ll have the tools to tell them exactly how.
📚 In This Guide
- What you need
- Instructions
- Tips and common mistakes
- Wrapping up and next steps
What you need
- ● Edging Tool: 1 x Metal or plastic edging spade (e.g., Fiskars or Radial Edge—choose 18"–24" for versatility).
- ○ Optional: A vibrating edger (battery-powered or corded) for large projects.
- ● Measuring & Marking: 1 x 100-foot tape measure (for precision).
- ● 1 box stakes + twine (or a laser level for pro results).
- ● 1 x chalk line (for straight, long edges).
- ● Digging & Prep: 1 x flat-head shovel (for trenching).
- ● 1 x garden hoe (to remove weeds/grass).
- ○ Optional: Knee pads (if kneeling for long periods).
- ● Edging Material (Choose One): Metal: 10–20 ft. aluminum or galvanized steel edging (½"–¾" width).
- ● Plastic: 10–20 ft. polypropylene or PVC edging (flexible for curves).
- ● Natural: Stone, brick, or wood (cut to size with a masonry saw).
- ● 1 x Post-hole digger (for securing stakes).
- ● 1 tube concrete mix (if setting permanent edging).
- ● 1 x gloves (garden or work gloves for grip).
- ● 1 x wheelbarrow (for hauling materials).
Step-by-step guide to using gardening edging tools
Clean, defined borders make any garden look intentional and polished. Here’s how to use the right tools for sharp, professional-looking edges.
Choose the Right Tool for Your Edging Material
Different materials require different tools. For hard surfaces like concrete or brick, a masonry chisel or bolster chisel works best—these tools let you cut cleanly without chipping. For softer materials like soil or mulch, a half-moon edger or oscillating tool with a metal blade gives precise control. I always start by testing the tool on a small section to see how it handles the material before committing to the full border.
If you’re working with grass or weeds, a handheld edger or rotary edger will trim cleanly without damaging nearby plants. For curved edges, an oscillating tool with a flexible shaft is ideal—it follows the contour of your design effortlessly. Always check the manufacturer’s recommendations for your specific tool to avoid damaging the blade or the edging material.
Mark Your Edging Line for Precision
Before making any cuts, mark your edging line with spray paint or a garden hose for a temporary guide. Lay the hose along the border and walk around the garden to visualize the finished look. If you’re using spray paint, apply it lightly in a thin line—too much paint can stain the soil or mulch. I like to step back and check the line from different angles to ensure it’s straight and even.
For curved edges, use a flexible garden hose or a string line stretched between stakes. This helps maintain consistent curves without freehanding, which can lead to uneven results. Once you’re satisfied with the line, double-check measurements with a tape measure to ensure the border is the correct width from the garden bed or pathway.
Cut Along the Marked Line with Controlled Pressure
Start cutting along your marked line, applying firm but even pressure to avoid wobbling. For handheld tools like a half-moon edger, keep the blade at a 45-degree angle to the ground for a clean, sharp edge. If you’re using an oscillating tool, move it slowly along the line—rushing can cause uneven cuts or kickback. I always work in small sections, about 12 inches at a time, to maintain precision.
Pay attention to the depth of your cut. For soil or mulch, aim for about ½ inch deep—this prevents weeds from creeping into the garden bed while keeping the edge neat. If you’re edging concrete or pavers, go deeper to create a clean break, but avoid forcing the tool, which can damage the blade. Pause occasionally to wipe away debris from the blade to ensure smooth, uninterrupted cuts.
Refine the Edge for a Polished Finish
After the initial cut, inspect the edge for rough spots or uneven sections. Use a handheld edger or file to smooth out any jagged areas. For curved edges, a sandpaper block wrapped around a dowel can help blend transitions seamlessly. I always run my fingers along the edge to feel for any high or low spots—this tactile check ensures the border looks and feels uniform.
If you’re working with mulch, use a metal rake to push the mulch away from the edge, creating a clean break. For stone or concrete, a chisel can help refine the line further. Once satisfied, sweep away any debris to reveal the crisp, finished border. This final step makes all the difference in how polished your garden looks.
Maintain Your Edges for Long-Lasting Results
Edging isn’t a one-time task—regular maintenance keeps your garden looking sharp. For soil or mulch edges, re-cut every 4-6 weeks or whenever weeds start encroaching. Use a weed trimmer with a fine blade to touch up edges between deeper cuts. I set a reminder in my gardening journal to check edges after rain, as moisture can soften the soil and make it easier for weeds to invade.
For hard materials like concrete or pavers, inspect the edges annually for cracks or chips. Seal any damaged areas with concrete patch compound to prevent further deterioration. Store your edging tools in a dry place to prolong their life—rust on metal blades can make future cuts messy and uneven. With consistent care, your garden borders will stay crisp and professional all season long.
Tips & tricks for perfect garden edging
A few simple strategies will help you achieve professional-quality garden borders with ease. These tips will save you time, prevent common mistakes, and ensure your edges look crisp and intentional.
Tool Selection Tip: If you're working with multiple materials in your garden, consider investing in a versatile oscillating tool with interchangeable blades. This single tool can handle everything from soil and mulch to concrete and pavers, making it a worthwhile addition to your gardening arsenal. For delicate plants near the edge, I always switch to a handheld edger to avoid accidental damage from larger tools.
Precision Marking Strategy: When using spray paint to mark your edging line, opt for a water-based formula that won't leave residue on your soil or mulch. I've found that a thin line works best—too much paint can create a messy finish and may stain your garden bed. For large projects, consider using a chalk line instead; it's temporary, won't stain, and provides a straight, visible guide without the mess.
Cutting Technique: The 45-degree angle mentioned in Step 3 is crucial for clean edges, but don't forget to adjust your technique based on the tool you're using. For handheld tools like half-moon edgers, maintain that angle consistently throughout the cut. With oscillating tools, you'll need to make slight adjustments as you follow the curve—practice on scrap material first if you're new to this technique. Remember to work in those 12-inch sections to maintain control and precision.
Maintenance Insight: The 4-6 week re-cutting schedule works well for most gardens, but I've found that edges near high-traffic areas or in sunny spots may need more frequent attention. Keep a small handheld edger or weed trimmer handy for quick touch-ups. After rain, I always check my edges within 24 hours—the softened soil makes it easier for weeds to establish themselves, and a quick trim prevents future headaches.
Pro Tips for Gardening Edging Tools
- A few simple strategies will help you achieve professional-quality garden borders with ease.
- Tool Selection Tip: If you're working with multiple materials in your garden, consider investing in a versatile oscillating tool with interchangeable blades.
- Precision Marking Strategy: When using spray paint to mark your edging line, opt for a water-based formula that won't leave residue on your soil or mulch.
Frequently asked questions
Got questions about gardening edging tools?
You’re not alone! Here are answers to the most common queries to help you choose and use the right tool for crisp, professional-looking garden borders.
What’s the best material for edging tools?
It depends on your project! Metal edgers (like steel or aluminum) are durable for heavy-duty work, while plastic or rubber tools are lightweight and great for delicate plants. For long-term use, stainless steel resists rust and corrosion—perfect for wet climates or frequent use.
When is the best time to use edging tools?
Edge your garden before planting for clean lines, or after weeds sprout to prevent them from encroaching. Spring or early fall are ideal—soil is softer, making cuts easier. Avoid edging when the ground is frozen or waterlogged for best results.
Are there affordable alternatives to expensive edging tools?
A sharp spade or half-moon edger works in a pinch, or repurpose a serrated knife for small, precise cuts. DIY options like bricks, pavers, or wooden planks can also create borders without tools—just dig a trench first!
How do I fix uneven or jagged edges after using a tool?
Start by skimming the top layer with a level to smooth out high spots. For jagged edges, use a hand saw or pruning shears to trim excess. Pro tip: Pack the soil firmly afterward to prevent erosion and keep your border sharp.
Can I use edging tools on grass or just flower beds?
Edging tools work on both! Use them to define lawn edges, create clean transitions between grass and mulch, or outline vegetable gardens. For grass, a metal or plastic edger glides smoothly, while heavy-duty tools handle tougher soil in flower beds.
Wrapping up and next steps
Choosing the right gardening edging tools can transform your yard from chaotic to curated—one clean line at a time! 🌿 Whether you’re defining flower beds, pathways, or lawn borders, precision edging adds polish and makes maintenance a breeze.
Start small, experiment with different tools, and soon you’ll master the art of crisp, professional-looking edges.
Ready to elevate your garden? Grab your favorite tool and get edging—your future garden will thank you! For extra flair, explore complementary landscaping tips or share your progress with fellow green thumbs. Happy gardening! 🌱