
Lawn
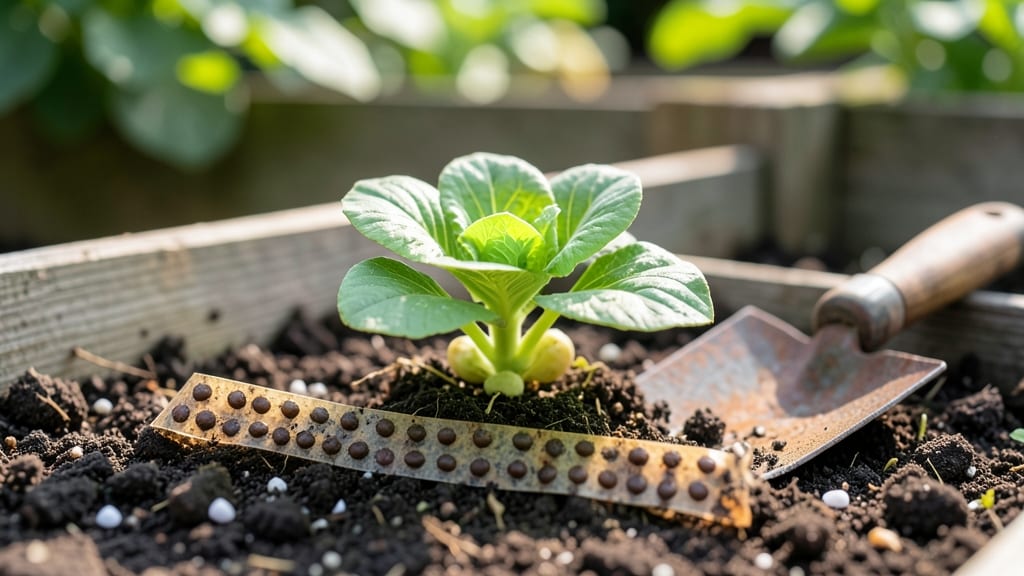
Precision planting just got easier with garden seed tape—no more guessing spacing or lining up seeds by hand. 🌱 I used to struggle with uneven rows until I discovered this game-changer, and now my carrots and radishes grow in perfectly straight lines every time.
The tape itself is simple: biodegradable paper strips with seeds glued at exact intervals, so you just lay it down and cover it. You’ll need a sunny spot, loose soil, and a gentle watering can—no fancy tools required. It’s perfect for beginners or anyone tired of patchy germination.
By the time your seeds sprout, you’ll see rows so neat they’ll make your neighbors jealous. The tape dissolves naturally, leaving no mess, and you’ll harvest more consistently than ever before. Best for small seeds like carrots, beets, or lettuce.
Works in any garden bed or container, and saves time for larger plots too. Here’s how to make it work for you—no more seed-sowing headaches!
📚 In This Guide
- What you need
- Instructions
- Tips and common mistakes
- Wrapping up and next steps
What you need
- ● Garden seed tape – Choose the variety that matches your plants (e.g., tomatoes, carrots, or herbs). A standard roll (100–200 ft) is ideal for most small to medium gardens.
- ● Garden soil or potting mix – 2–5 gallons, depending on the size of your planting area. Ensure it’s well-draining and enriched with compost.
- ● Watering can or hose with a gentle spray nozzle – For hydrating seeds post-planting. A 1-gallon watering can works well for small gardens.
- ● Gloves – A pair of gardening gloves to protect your hands from dirt and thorns.
- ● Measuring tape or ruler – To mark planting depths and spacing (if not pre-marked on the seed tape).
- ○ Garden twine or string (optional but helpful) – For creating a guide grid if your rows need extra precision.
- ● Mulch or straw – To retain moisture and suppress weeds after planting.
- ● Plant labels or markers – If you’re mixing multiple seed tapes, labels help track varieties.
- ● Knee pad or small stool – For comfort during longer planting sessions.
- ● Sun hat or umbrella – Because even precision planting deserves a little shade!
Step-by-step instructions for using garden seed tape
This method turns messy planting into perfectly straight rows with zero guesswork.
🌱 Step 1: Prepare Your Planting Area
Start by clearing the soil of rocks and debris in your designated planting area. Use a hoe or rake to create a smooth, level surface—bumpy ground makes seed tape hard to lay straight. I like to mark my rows with a garden twine stretched between stakes at the correct spacing for my plants (usually 12-18 inches apart for most vegetables). This gives me a visual guide before I even handle the seed tape.
For larger gardens, use a measuring tape to ensure consistent spacing between rows. The key here is patience—rushing leads to crooked rows. Take your time to create clean, straight furrows where the seed tape will sit. If working in clay soil, lightly scratch the surface with a trowel to create a shallow groove for better seed-to-soil contact.
💧 Step 2: Moisten the Soil and Seed Tape
Water the planting area thoroughly 24 hours before using seed tape. The soil should be moist but not soggy—think of a wrung-out sponge. This prevents the tape from sticking too aggressively to dry soil or falling apart in mud. I like to mist the seed tape itself lightly with water before handling it, which makes it easier to unroll without tearing.
Here's the thing—if the soil is too dry, the tape may not adhere properly, and seeds could fall out during planting. If it's too wet, the tape might stick to everything, including your fingers. Test by pressing your finger into the soil about 1 inch deep—if it leaves a slight indentation but doesn't crumble, you're good to go.
☀️ Step 3: Lay and Press the Seed Tape
Unroll the seed tape along your marked row, keeping it taut but not stretched. For best results, I work in 12-18 inch sections at a time—longer pieces are harder to control. Press the tape gently but firmly into the moist soil, using your thumb or a small board to create a shallow furrow that holds the tape in place. The seeds should face downward toward the soil.
Don't press too hard—you want the seeds embedded just enough to stay put but not buried deeper than recommended on the tape packaging. I like to use a small garden roller or even the bottom of a water bottle to smooth the tape into the soil without disturbing the seed placement. This ensures even soil contact for consistent germination.
✂️ Step 4: Cover and Water Gently
Once the tape is laid, cover it with ¼ inch of soil using a fine-mesh rake or your fingers. This protects the seeds from drying out and predators while keeping them at the ideal depth. I like to sift the soil through my fingers to avoid disturbing the tape's placement. Water the area gently with a fine spray nozzle to settle the soil without dislodging the seeds.
Here's where many people go wrong—they water too hard and wash away the tape. Use a gentle mist until the soil looks uniformly damp. You'll know you've done it right when the soil surface looks slightly darker but not glistening. Avoid walking on the freshly planted rows until you see signs of germination to prevent disturbing the seed tape.
⏰ Step 5: Monitor and Maintain Until Germination
Keep the planting area consistently moist by watering lightly every 2-3 days until you see the first signs of sprouts. Most seed tapes will germinate within 7-14 days, depending on the plant type and weather conditions. I like to check daily by looking for tiny green shoots pushing through the soil—this is your signal that everything is working.
Once germination begins, reduce watering slightly but maintain even moisture. Avoid overhead watering, which can dislodge young seedlings or cause disease. Instead, use a soaker hose or drip irrigation to deliver water directly to the soil. Within 3-4 weeks, your seedlings will be strong enough to thin if necessary, but properly spaced seed tape usually eliminates this step entirely.
Tips & tricks for perfect garden seed tape planting
These simple tricks will help you achieve flawless, straight rows every time—no gardening experience required.
The Soil Test: Before planting, press your finger about 1 inch deep into the soil. If it leaves a slight indentation but doesn't crumble, you've got the perfect moisture level for seed tape adhesion. The 24-hour pre-watering is non-negotiable—it prevents the tape from sticking too aggressively or falling apart when you handle it. I've ruined three batches by skipping this step, so trust me on this!
Section Control: Working in 12-18 inch sections at a time gives you better control over the tape's placement. Longer pieces tend to twist or kink, especially if you're working alone. Pro tip: Use your non-dominant hand to hold the tape taut while your dominant hand presses it into the soil. This two-handed approach keeps everything straight and prevents curling at the edges.
Gentle Pressure: When pressing the seed tape into the soil, think "light but firm"—you want the seeds embedded just enough to stay put without being buried deeper than recommended. I use a small wooden board (like a chopstick flattened out) to create a shallow furrow first. This gives the tape something to nestle into while keeping the seeds at the perfect depth for germination.
Watering Wisdom: That gentle misting in Step 4 is crucial—overhead watering can wash away the tape or dislodge seeds. I've found that using a fine spray nozzle set to its lowest setting works best. Aim for a soil surface that looks uniformly damp but not glistening. This subtle difference prevents waterlogging while keeping seeds hydrated. And remember: no walking on freshly planted rows until you see those first green shoots!
Pro Tips for Garden Seed Tape
- These simple tricks will help you achieve flawless, straight rows every time—no gardening experience required.
- The Soil Test: Before planting, press your finger about 1 inch deep into the soil.
- Section Control: Working in 12-18 inch sections at a time gives you better control over the tape's placement.
Frequently asked questions
Got questions about garden seed tape? You’re not alone! Here are answers to the most common queries to help you plant with confidence.
What is garden seed tape made of, and is it biodegradable?
Garden seed tape is typically made from biodegradable paper or plant-based fibers, often infused with a water-soluble adhesive to hold seeds in place. Most brands break down naturally in soil over time, so you won’t need to remove it after planting. Always check the product label for specifics—some may include compostable certifications for eco-friendly options.
When is the best time to plant using seed tape?
The ideal timing depends on your climate and crops, but seed tape works best when soil temperatures and conditions align with your plants’ needs. For cool-season veggies (like lettuce or peas), plant in early spring or fall. Warm-season crops (tomatoes, basil) thrive when soil is at least 60°F (15°C). Follow your seed tape’s instructions—some are designed for direct sowing, while others may need a starter tray.
Can I use seed tape for flowers or just vegetables?
While seed tape is popular for vegetables (carrots, radishes, herbs), it’s also perfect for flowers (marigolds, pansies, nasturtiums) and even small fruits (strawberries, melons). The key is choosing tape with seeds that fit your spacing needs—some brands offer customizable tapes for mixed gardens. Just avoid heavy seeds (like beans) that may not adhere well.
What should I do if my seed tape won’t stay flat in the soil?
If your tape curls or floats, try these fixes:
- Moisten the tape before planting—dampen it slightly with water to activate the adhesive.
- Use a lightweight soil mix (like compost-amended dirt) to prevent it from sinking unevenly.
- Lay the tape on firm, slightly packed soil and press gently with your fingers or a board.
- For stubborn tapes, pin the edges with toothpicks or small stakes until roots anchor the seeds.
Is seed tape more expensive than regular seeds, and is it worth it?
Seed tape can cost 2–3x more per seed than bulk seeds, but it pays off for:
- Precision planting—no more overcrowding or thinning.
- Time savings—ideal for beginners or busy gardeners.
- Higher germination rates (seeds stay in place and hydrated).
Wrapping up and next steps
Garden seed tape is your secret weapon for effortless, professional-looking rows—no more guessing or uneven spacing! With just a few simple steps, you’ll transform your planting game, saving time and boosting your garden’s success.
Whether you’re a beginner or a seasoned green thumb, this tool makes precision planting fun and foolproof.
Ready to elevate your garden? Grab your seed tape, pick your first project, and get planting! Start small—try a row of marigolds or lettuce—then expand as your confidence grows. Happy gardening! 🌱✨