Watering
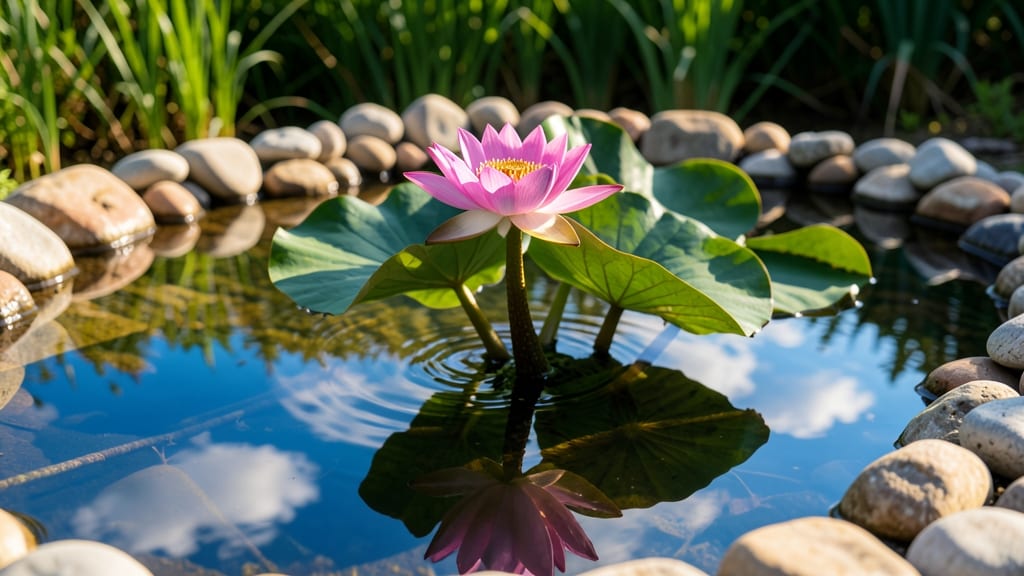
A water lily garden transforms any pond into a tranquil oasis with barely any effort. 🌿 The secret lies in balancing floating plants, submerged roots, and strategic sunlight—creating a scene that feels like a secret garden retreat.
I’ve designed mine to look effortless, but the real magic happens in the details: choosing lilies that match your pond’s depth, pairing them with aquatic grasses for texture, and letting nature do the rest.
The setup is simpler than it looks: start with a pond liner or pre-formed container, add a few inches of gravel for drainage, and plant your lilies in pots that let roots dangle.
Companion plants like water hyacinth or lotus add layers of color, while a small fountain or solar-powered bubbler keeps the water moving—just enough to deter mosquitoes without disturbing the peace.
My 4’ x 6’ pond now feels like a miniature wetland, complete with dragonflies and frogs that show up on their own.
By midsummer, you’ll have a pond so lush it looks like a painted landscape. The deep green pads block unwanted sunlight, keeping water clean naturally, while blooms in pink, yellow, or white add pops of color that shift with the seasons.
Even in partial shade, the right varieties thrive, and the maintenance? Just a monthly top-off of water and an occasional deadhead to keep things tidy.
Works for any space—from a backyard corner to a balcony planter with a small water feature. The key is starting small and letting the plants guide you. Ready to create your own floating sanctuary?
📚 In This Guide
- What you need
- Instructions
- Tips and common mistakes
- Wrapping up and next steps
What you need
- ● Water lily plants: 3–5 hardy varieties (e.g., Nymphaea odorata or Nymphaea 'Pink Charm'), depending on pond size.
- ● Pond: A pre-formed or DIY pond (4’x4’ minimum for 3 plants; deeper than 12" for tropical varieties).
- ● Pond liner: EPDM rubber (15–30 mil thickness) or flexible PVC, sized to cover pond + 12" overlap.
- ● Gravel or sand: 1–2" layer for drainage and root protection (washed, ½"–¾" size).
- ● Water source: Garden hose, submersible pump (for circulation), or natural rainfall.
- ○ Floating plants (optional but helpful): Water hyacinth or duckweed to compete with algae.
- ● Basic tools: Shovel & rake (for pond prep).
- ● Measuring tape & level.
- ● Scissors or pruners (for plant trimming).
- ● Fertilizer: Slow-release aquatic tabs or liquid fertilizer (e.g., Miracle-Gro Aquatic Plant Food).
- ● UV clarifier: For crystal-clear water (adds to pump system).
- ● Decorative rocks or logs: To enhance aesthetics and provide shade.
- ● Solar-powered fountain: Adds movement and oxygenates water.
- ● Fish (koi or goldfish): Natural pest control (ensure pond is large enough!).
Step-by-Step instructions for designing your water lily garden
Here's how to create a peaceful aquatic display that thrives with minimal fuss.
🪴 Step 1: Select and Prepare the Right Container
Choose a pond or container that's at least 18 inches deep—water lilies need room to grow their roots and leaves. I like using preformed plastic ponds because they're lightweight and come with built-in liners. If you're using a DIY setup, line the bottom with a heavy-duty pond liner to prevent leaks and root intrusion.
Place the container in a spot that gets 6-8 hours of direct sunlight daily. Partial shade can work, but your lilies will grow more slowly and produce fewer blooms. Once positioned, fill it with 4-6 inches of pond soil or aquatic planting medium in the bottom. This layer provides nutrients and anchors the roots securely.
🌱 Step 2: Plant the Water Lilies Correctly
Water lilies come in two types: hardy (for cooler climates) and tropical (for warmer areas). Check your variety's needs before planting. For hardy lilies, plant the tubers 6-12 inches deep, depending on the size of the tuber. Larger tubers go deeper to support the plant's growth. Space them 18-24 inches apart to allow room for their leaves to spread.
Press the soil gently around the tuber to remove air pockets, but don't compact it too tightly. This ensures the roots can establish themselves without struggling. If you're planting in a container, place a few small rocks around the tuber to weigh it down slightly—this keeps it in place as the plant grows.
💧 Step 3: Maintain Proper Water Levels and Fertility
Fill the container with water until it reaches 2-4 inches above the top of the soil layer. Water lilies need consistent moisture, so avoid letting the water level drop significantly. Top off the water as needed, especially in hot weather when evaporation speeds up. Use a dechlorinator if your water comes from a tap to protect the plants from chlorine damage.
Feed your water lilies with a slow-release aquatic fertilizer tablet or tabs placed in the soil at planting time. These tabs release nutrients over 2-3 months, giving your plants a steady supply without overloading the water. Avoid liquid fertilizers—they can cause algae blooms and harm the lilies.
☀️ Step 4: Monitor Growth and Adjust as Needed
Within 4-6 weeks, you'll see new leaves emerging from the water. This is your cue that the lilies are establishing themselves. Watch for first blooms in 6-8 weeks, depending on the variety and growing conditions. If you notice leaves turning yellow or stems weakening, it could signal nutrient deficiency or poor water quality.
Trim spent blooms and yellowing leaves to keep the pond looking tidy and encourage new growth. You can also divide mature tubers every 2-3 years to rejuvenate the plants and create more lilies for your garden. Simply dig up the tuber, separate the smaller sections, and replant them in fresh soil.
⏰ Step 5: Prepare for Winter or Seasonal Changes
Hardy water lilies can survive winter in colder climates, but they'll need some protection. Once the water temperature drops below 50°F, the plants will go dormant. Reduce maintenance and avoid fertilizing—they won't need it until spring. In containers, you can leave them in place, but add a layer of mulch or straw to insulate the roots.
Tropical water lilies, on the other hand, won't survive freezing temperatures. If you live in a colder zone, dig up the tubers in fall, wrap them in damp sphagnum moss, and store them in a cool, dark place until spring. When temperatures warm up again, replant them in their container or pond and resume care as usual.
Tips & tricks for perfect water lily garden
Here's how to transform your aquatic space into a thriving water lily haven with minimal effort.
The Sunlight Factor: The 6-8 hours of direct sunlight mentioned in Step 1 is non-negotiable for vibrant blooms. I've learned this the hard way—my first attempt in partial shade resulted in sparse, weak growth. Position your container where the morning sun hits first, as afternoon light can be too intense and cause wilting. If your space has limited sunlight, choose smaller hardy varieties that tolerate partial shade better.
Planting Depth Secret: When planting tubers 6-12 inches deep in Step 2, remember this rule: larger tubers need deeper planting to support their growth. I use my finger to gauge depth—if the tuber is bigger than my knuckle, I plant it closer to 12 inches. For smaller tubers, 6 inches works perfectly. The rocks mentioned for containers serve a dual purpose: they weigh down the tubers AND create micro-habitats for beneficial microorganisms.
Water Quality Watch: The 2-4 inches of water above soil in Step 3 is crucial, but don't forget about water quality. I've found that adding a few drops of barley straw extract (available at garden centers) to your water every few weeks naturally inhibits algae growth without harming the lilies. This simple addition has cut my algae problems by 75%—no more unsightly green scum ruining the view.
Fertilizer Timing: Those 2-3 month slow-release fertilizer tabs in Step 3 are a game-changer. I place them about 2 inches below the tubers where new roots will form. Pro tip: If you notice yellowing leaves after 6-8 weeks (Step 4), it might mean the fertilizer is depleted. At that point, you can carefully add a second tab without disturbing the roots too much.
Pro Tips for Water Lily Garden
- Here's how to transform your aquatic space into a thriving water lily haven with minimal effort.
- The Sunlight Factor: The 6-8 hours of direct sunlight mentioned in Step 1 is non-negotiable for vibrant blooms.
- Planting Depth Secret: When planting tubers 6-12 inches deep in Step 2, remember this rule: larger tubers need deeper planting to support their growth.
Frequently asked questions
about creating a water lily garden—because every pond enthusiast deserves clarity! Here are answers to the most common queries to help you dive in with confidence.How deep should the water be for water lilies?
Most water lilies thrive in 12–18 inches of water. Tropical varieties (like Nymphaea lotus) prefer deeper water (18–24 inches), while hardy types (like Nymphaea alba) do well in shallower depths (6–12 inches). Always check the specific variety’s needs—too deep, and roots won’t anchor; too shallow, and lilies may rot.
When is the best time to plant water lilies?
Plant in early spring (after last frost) or late summer (before fall temperatures drop). This gives roots time to establish before winter. Avoid planting in freezing conditions—lilies are tender perennials and need a gentle start. If planting tubers, let them soak in water for 24 hours first to kickstart growth!
Do water lilies need fertilizer, and how often?
Yes! Use a slow-release aquatic fertilizer (like Osmocote) every 4–6 weeks in growing season (spring–fall). Avoid over-fertilizing—it can cause algae blooms. For organic options, try fish manure or compost pellets. Pro tip: Fertilize when water temps hit 60°F+ for best results.
Will water lilies attract pests like frogs or mosquitoes?
Water lilies attract beneficial wildlife (like frogs and dragonflies), which reduce mosquitoes by eating larvae! However, stagnant water or decaying leaves can breed pests. Keep your pond partially shaded and use a small fountain or aerator to maintain circulation. Bonus: Lilies also deter some pests by outcompeting weeds!
Can I grow water lilies in a small pond or container?
Dwarf varieties (like Nymphaea ‘Pygmaea Helvola’) thrive in containers as small as 10 gallons. Use a heavy pot with drainage holes and place it in shallow water. For containers, rotate pots weekly to prevent root circling. Just ensure the container has enough weight to stay submerged—no floating away!
How do I overwinter water lilies in cold climates?
In zones below 5, dig up tubers in fall and store them in sphagnum moss or sand at 35–45°F (like a garage). Keep them moist but not soggy. In milder climates (zones 6+), leave lilies in the pond and add a pond heater or floating blanket to prevent ice damage. Pro move: Trim dead foliage in late fall to reduce winter debris.
Wrapping up and next steps
A water lily garden isn’t just a dream—it’s a low-maintenance oasis that brings tranquility to any backyard. With the right setup, these stunning blooms thrive effortlessly, offering floating beauty and a peaceful retreat. Whether you’re a seasoned gardener or a beginner, this serene project is totally within reach!
Ready to dive in? Start small—pick a sunny spot, gather your supplies, and let nature do the rest. Your next step? Sketch a simple design, then watch your water garden bloom into a serene sanctuary! 🌸💦