How To
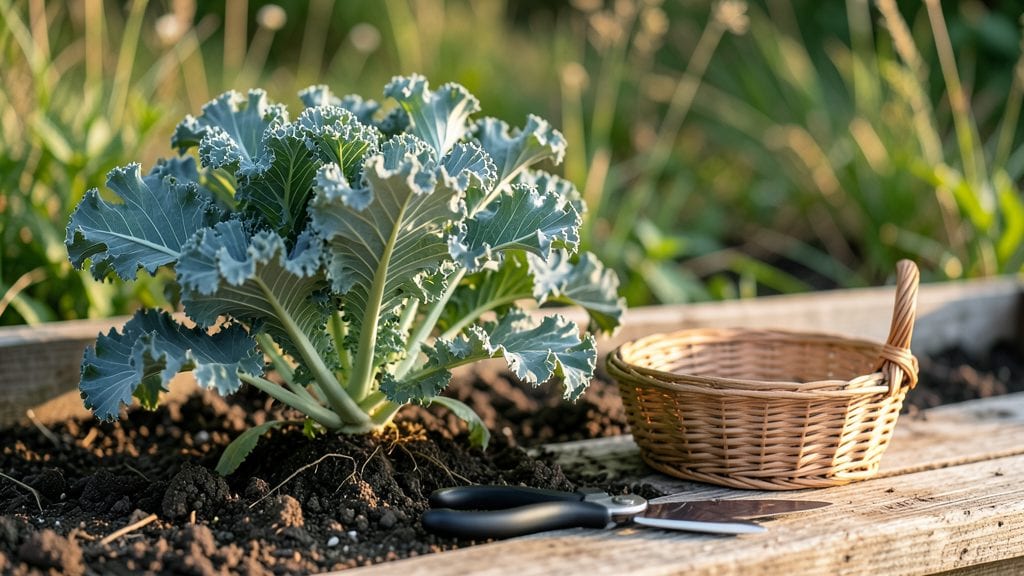
Picking kale from your garden the right way keeps those 🥬 leaves crisp and your plants producing for weeks—so you’re not left with bitter stalks or a sad, bare patch.
Harvesting kale at the wrong time turns your hard work into tough, woody leaves or—worse—lets the plant bolt before you’ve even tasted half the harvest. I’ve made that mistake more times than I’d like to admit, and trust me, you’ll want to avoid it.
Here’s the secret: timing matters just as much as technique. You’ll learn when to snip leaves (without harming the plant), how to spot the perfect harvest window, and even how to coax a second round of growth from your kale—so you’re not left scrambling for greens by fall.
By the end, you’ll know exactly when to pick for tender stems, how to cut without stressing the plant, and how to store or prep your harvest so it stays fresh longer. Let’s get started.


When to harvest kale: ideal stages for tender stems and flavorful leaves
Timing your kale harvest correctly ensures crisp, sweet leaves instead of bitter or woody ones. The best time to harvest depends on leaf size, stem thickness, and temperature cues—not just days after planting.
For example, curly kale and red Russian varieties mature faster than lacinato (dinosaur kale), which develops thicker stems. Ignoring these cues often leads to bolting (premature flowering) or stunted regrowth.
Start checking leaves when they reach 6-8 inches long—this is the ideal harvest window for most varieties. Look for deep green or purple coloration and firm texture; if leaves feel soft or yellowing, they’re past their prime.
Harvesting too early means smaller yields, while waiting too long risks bitter flavors and stem hardness. Temperature also plays a role: cool fall weather (50–60°F) enhances sweetness, while hot summer days (above 80°F) can stress plants and reduce quality.
Here’s a quick reference to help you spot the perfect harvest stage:
| Harvest Stage | Leaf Characteristics | Stem & Size | Temperature Ideal | Action |
|---|---|---|---|---|
| Early Harvest | 4–6 inches, tender | Thin stems, soft | 50–70°F | Pick outer leaves; encourage regrowth |
| Prime Harvest | 6–8 inches, crisp | Firm stems, ¼-inch thick | 50–60°F | Harvest whole leaves or cut stems |
| Late Harvest | 8+ inches, tough | Woody stems, bitter | Below 40°F or above 80°F | Avoid; risk bolting or poor flavor |
Avoid the common mistake of harvesting entire plants at once—this shocks the root system and reduces future yields. Instead, use the cut-and-come-again method: snip outer leaves 1–2 inches above the stem to allow inner leaves to mature.
For lacinato kale, which grows in long stems, harvest by cutting the entire stalk at the base when leaves are fully developed. This method extends the harvest season by 4–6 weeks compared to picking individual leaves.
Watch for bolting signs like tall flower stalks or yellowing leaves—this means your kale is stressed, often due to heat or drought.
If this happens, harvest immediately to salvage what you can, then remove the plant to prevent reseeding. Cold-hardy varieties like red Russian kale can tolerate light frosts (20–25°F) and may even taste sweeter after a light freeze.
Use row covers in winter to protect tender varieties like lacinato from harsh frost.
Morning is the best time to harvest because leaves are crisp and hydrated after overnight dew. Avoid picking after rain or in midday heat, as this can cause leaves to wilt or develop bacterial spots.
Use clean, sharp pruners or a serrated knife to make clean cuts; dull tools crush stems and invite pests. Rinse leaves briefly in cool water to remove dirt, then pat dry with a paper towel to prevent rot.
For fall harvests, aim to pick kale 4–6 weeks before the first frost—this gives plants enough time to mature but avoids freeze damage.
In winter gardens, use mulch or cold frames to insulate plants and harvest as needed. Spring-planted kale should be harvested by late summer to prevent bolting; if you miss this window, replant for a fall crop. Succession planting every 2–3 weeks ensures a steady supply year-round.
Store harvested kale in the crisper drawer of your fridge for 5–7 days or wrap leaves in a damp paper towel inside a plastic bag to extend freshness. For long-term storage, blanch and freeze leaves—this preserves nutrients and flavor for up to 12 months.
Freezing works best for lacinato kale, while curly kale holds up well in salads or smoothies when stored properly.
Pro tip: Fertilize lightly after harvesting to encourage regrowth. Use a balanced 10-10-10 fertilizer or compost tea to replenish nutrients without overstimulating the plant. Avoid high-nitrogen fertilizers, which can lead to leafy but bitter growth.
With the right timing and care, your kale plants can produce harvests for months, even in cool-season gardens.
Step-by-step kale harvesting techniques for different varieties
Harvesting kale correctly preserves its nutrient-rich quality while encouraging regrowth. Different varieties—like curly kale, lacinato, or red Russian—require tailored approaches. For example, bushy curly kale benefits from selective leaf picking, while tender lacinato stems need gentle handling to avoid tearing.
Using the right tools and timing prevents stress, ensuring your plants stay productive for weeks.
Before harvesting, inspect your kale for mature leaves (6–8 inches long) with deep coloration and crisp texture. Avoid leaves showing signs of yellowing, bolting (flowering), or pest damage, as these indicate poor quality.
Early morning harvests yield the freshest leaves, as evening dew can promote rot. Always use clean, sharp tools to minimize plant trauma.
How to Pick Kale From Garden
-
Step 1: Choose Your Method
For outer leaves, grasp the stem near the base and twist gently or use clean scissors to snip. For whole plants, cut 1–2 inches above soil to leave a small stub for regrowth.
-
Step 2: Use the Right Tools
Avoid dull knives or fingers—opt for pruning shears or a sharp knife. For delicate lacinato stems, use tweezers to pluck individual leaves without damaging the plant.
-
Step 3: Variety-Specific Tips
Curly Kale: Pick outer leaves first to protect the center growth. Avoid over-harvesting more than 1/3 of leaves at once. Lacinato: Harvest whole leaves by cutting the entire stem to prevent woody stems from forming. Red Russian: Snip young leaves (4–6 inches) for milder flavor or wait for larger leaves (8+ inches) for heartier texture.
-
Step 4: Post-Harvest Care
After harvesting, water deeply to reduce transplant shock. Apply a light mulch (straw or grass clippings) to retain moisture and protect roots. Avoid fertilizing immediately—wait 1–2 weeks for recovery.
-
Step 5: Troubleshoot Common Issues
Leaf Damage: Use gloves to avoid tearing. For ragged edges, harvest in dry conditions. Plant Stress: Yellowing leaves? Check for overwatering or nutrient deficiency. Apply balanced fertilizer (10-10-10) if needed. Bolting: Harvest all leaves immediately and avoid late-season planting in warm climates.
For continuous harvests, space out picking sessions every 1–2 weeks, focusing on outer leaves first. This method lets your kale regenerate while keeping it productive for up to 6 months in cool climates.
If your plants bolt too early, blame heat stress or short daylight—opt for shade cloth or succession planting in late summer.
Pro tip: Store harvested kale in the crisper drawer of your fridge, wrapped in a damp paper towel, for up to 1 week. For longer storage, blanch and freeze leaves to preserve their nutrients and crispness.
With the right techniques, your kale patch can become a year-round superfood source! 🥬