Watering
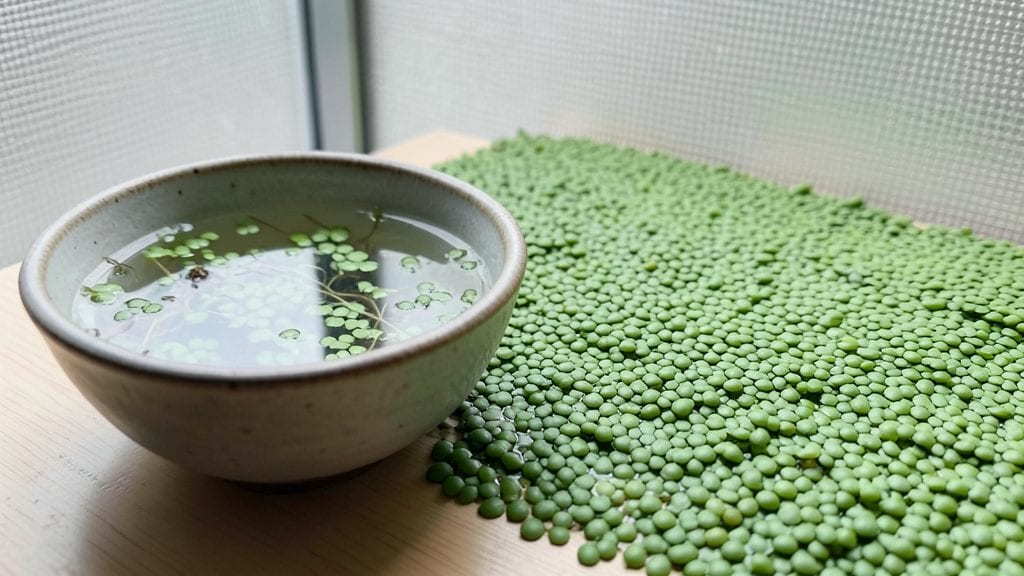
A bowl water garden turns any sunny windowsill into a thriving micro-ecosystem. ✨ I started mine with just a ceramic bowl, a handful of water lilies, and a tiny fountain—now it’s a lush, self-cleaning pond that hums with life.
The best part? No chemicals, no fish food, just plants that work together to keep the water crystal clear.
You’ll need a shallow container (at least 6 inches deep), a small pump or air stone for oxygen, and plants like water lettuce or Java fern that thrive in still water.
A few pebbles at the bottom help anchor roots while keeping the pump hidden. My setup runs on a simple battery-powered pump, so it’s quiet and energy-efficient.
Within weeks, you’ll see tiny frogs or dragonflies visiting, and the water stays fresh for months without draining. The mossy edges and floating blooms create a serene focal point—perfect for offices, patios, or even bathroom shelves. It’s gardening without the mess or the space.
Works in any climate, from sunrooms to balconies, and scales from a 6-inch bowl to a 2-foot-wide pond. The key is balance: too many fish? Add more plants. Too much sun? Shade the bowl slightly. Let’s make yours a mini ecosystem that actually works.
📚 In This Guide
- What you need
- Instructions
- Tips and common mistakes
- Wrapping up and next steps
What you need
- ● Container: A wide, shallow bowl (glass, ceramic, or plastic) with a diameter of at least 12 inches (larger for bigger plants).
- ○ Optional: A clear container (like a glass fishbowl) to better observe the ecosystem.
- ● Water: Dechlorinated water (use a water conditioner or let tap water sit for 24 hours). ~2-3 gallons (adjust based on bowl size).
- ● Substrate: 1-2 cups of small pebbles or gravel (for drainage).
- ○ 1 cup of activated charcoal (optional but highly recommended to prevent algae and odors).
- ● 1-2 cups of nutrient-rich soil or aquarium substrate.
- ● Plants: 1-2 small aquatic plants (e.g., Java Fern, Anubias, or Moss).
- ○ Optional: A tiny floating plant (like Duckweed) for extra oxygen.
- ● Tools: Small spoon or tongs (for planting).
- ● Spray bottle (to mist plants gently).
- ○ Optional: Aquarium net (for removing debris).
- ● Decor: Smooth stones, driftwood, or tiny figurines (ensure they’re non-toxic!).
- ● Lighting: A small LED grow light (if placing indoors with low natural light).
- ● Fish or Snails: 1-2 small, low-maintenance creatures (e.g., Nerite Snails) to help clean the ecosystem.
- ● Air Pump: A tiny air stone (for oxygenation if using fish).
Step-by-Step instructions for building a bowl water garden
Here's how to create a thriving, low-maintenance ecosystem in just a few simple steps.
🪴 Step 1: Select and Prepare Your Bowl
Choose a shallow, wide bowl with a smooth interior—think ceramic, glass, or glazed ceramic. The bowl should be at least 6 inches deep and 12 inches wide to accommodate plants and roots comfortably. I like to use a decorative bowl with a flat base for stability. Clean it thoroughly with warm, soapy water and rinse well to remove any residues.
Place a 1-inch layer of small pebbles at the bottom for drainage. This layer prevents root rot by allowing excess water to drain while keeping plants anchored. Use pebbles that are ¼ to ½ inch in diameter—small enough to support plants but large enough to allow water flow.
💧 Step 2: Layer Gravel and Add Plants
Next, add a 2-inch layer of larger gravel (about ½ to 1 inch in diameter) on top of the pebbles. This creates a buffer zone that keeps roots from sitting directly in water while still allowing them to absorb moisture. Press the gravel down lightly to create a stable base for your plants.
Select plants that thrive in shallow water, like water hyacinth, miniature lotus, or small aquatic ferns. Choose 4 plants total (as per the servings) and trim their roots to fit the bowl. Place them evenly around the bowl, spacing them about 3 inches apart. Avoid overcrowding—roots need room to spread and access water.
☀️ Step 3: Fill with Water and Position
Fill the bowl with dechlorinated water (let tap water sit out for 24 hours or use a water conditioner) until the water level reaches just below the top of the gravel layer. This ensures roots stay moist but not submerged. Use a gentle stream to avoid disturbing the plants or stirring up gravel.
Position your bowl in a location with bright, indirect light—think 4-6 hours of sunlight daily. Direct sun can cause algae growth, while too little light weakens plants. You’ll notice healthy plants developing vibrant green leaves within 2-3 weeks. If leaves turn yellow, your bowl may need more light or a slight water change.
⏰ Step 4: Maintain Balance and Observe
Check the water level weekly and top off with dechlorinated water as needed. Over time, you may see tiny green algae on the water’s surface—that’s normal! Just skim it off with a clean spoon to keep the ecosystem balanced. Avoid overfeeding; these plants rely on natural nutrients from the water.
Watch for signs of imbalance: foul odors mean excess organic matter, while mushy roots signal overwatering. If you spot pests like snails or insects, remove them immediately. A healthy bowl garden stays clear, vibrant, and odor-free. With minimal care, your ecosystem will thrive for months!
Tips & tricks for perfect bowl water gardens
Creating a thriving aquatic ecosystem in a bowl is easier than you think—here are my go-to strategies for success.
Layering Secret: The 1-inch pebble layer in Step 1 isn't just for drainage—it's also what prevents your plants from floating. Pack them slightly tighter than you think, especially around the edges, to create a stable foundation. I've seen too many bowls where plants drift away because the pebbles weren't compacted enough. This simple step makes all the difference for a balanced look.
Plant Selection Tip: When choosing your 4 plants in Step 2, pick varieties with different growth habits. I recommend pairing a fast-growing water hyacinth with slower-growing miniature lotus—they complement each other beautifully. Trim roots to about 2 inches long before planting, which helps them establish faster in the shallow water environment.
Lighting Strategy: The 4-6 hours of bright indirect light in Step 3 is your golden window for success. If your space only gets morning sun, rotate the bowl every few days so all plants get equal exposure. I've noticed plants on the sunny side grow faster initially, but the shaded ones catch up once you start rotating them regularly.
Water Wisdom: That 24-hour dechlorination period in Step 3 is non-negotiable for fish-free ecosystems. If you're in a hurry, use a water conditioner instead—it works just as well. I've also found that adding a few drops of liquid seaweed fertilizer to the water at planting time gives your plants a nice growth boost without requiring any maintenance beyond the weekly top-offs.
Pro Tips for Bowl Water Garden
- Creating a thriving aquatic ecosystem in a bowl is easier than you think—here are my go-to strategies for success.
- Layering Secret: The 1-inch pebble layer in Step 1 isn't just for drainage—it's also what prevents your plants from floating.
- Plant Selection Tip: When choosing your 4 plants in Step 2, pick varieties with different growth habits.
Frequently asked questions
Got questions about creating your own bowl water garden?
You’re not alone! Here are answers to the most common queries to help you get started confidently.
How often do I need to maintain a bowl water garden?
A well-balanced bowl water garden is self-sustaining once established! With the right plants (like water hyacinth or duckweed) and a small pump (if needed), maintenance is minimal. Check water levels weekly and trim overgrown plants monthly. Pro tip: Add a few snails or shrimp to help control algae naturally!
How long does it take for a bowl water garden to mature?
Patience pays off! A basic setup with hardy plants (e.g., water lettuce or anubias) can look lush in 4–6 weeks. For a fully balanced ecosystem (with fish or beneficial insects), allow 2–3 months as microbes and plants establish. Troubleshooting: If growth stalls, check light (6+ hours/day) and nutrient levels (fish waste or liquid fertilizer helps!).
Can I use tap water in my bowl water garden?
Yes, but let it sit for 24–48 hours first to remove chlorine and chemicals. Chlorine can harm plants and beneficial bacteria. For faster results, use a water conditioner. Alternative: Rainwater or filtered water works best! Avoid distilled water—it lacks essential minerals.
Are fish necessary for a bowl water garden?
Not at all! Fish (like guppies or bettas) add beauty but aren’t required. A plant-only garden thrives with oxygenating plants (e.g., hornwort) and floating cover (duckweed). Fish lovers should start with 1–2 small fish per 5 gallons and monitor water quality closely. Warning: Overstocking = ammonia spikes = plant/fish stress!
What do I do if my bowl water garden smells bad?
Smelly water usually means excess waste or decay. First, reduce feeding (if fish are present) and add more oxygenating plants. Next, perform a 20–30% water change and vacuum debris. Prevention tip: Keep a lid (with ventilation holes) to limit mosquito breeding and speed up decomposition.
Wrapping up and next steps
A bowl water garden isn’t just a space-saving design—it’s a thriving mini-ecosystem that brings nature’s beauty and tranquility to any corner of your home. Whether you’re drawn to its self-sustaining magic or the joy of nurturing aquatic life, this project is as rewarding as it is simple.
Start small, experiment with plants, and watch your little oasis flourish!
🌱 Ready to dive in? Gather your supplies, follow the steps, and soon you’ll have a serene, low-maintenance water garden that’s all yours. Happy planting! 💧✨