Container Gardens
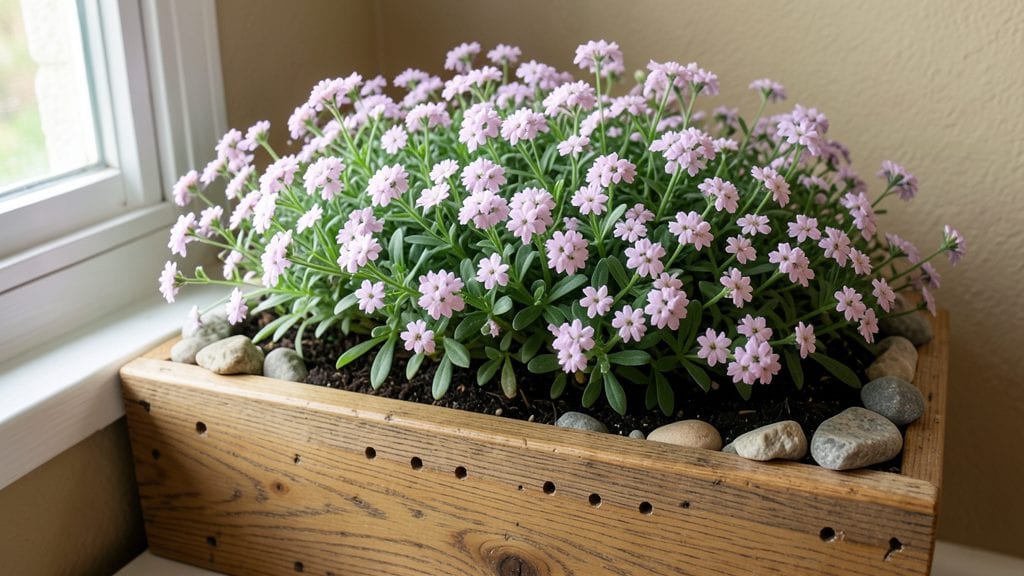
Year-round window box gardening turns blank walls into vibrant, fragrant displays that hum with life. 🌿 I've transformed my own dull apartment façade into a pollinator magnet by mixing perennials, annuals, and herbs that bloom from spring through frost.
The key isn't complexity—it's layering plants with complementary needs so they thrive together without constant fuss.
Start with a sturdy box that drains well (drill holes if needed) and fill it with lightweight potting mix. My go-to combo uses one-third coconut coir for moisture retention and two-thirds perlite or vermiculite to prevent soggy roots.
For small spaces, shallow boxes (6-8 inches deep) work perfectly for trailing flowers like lobelia or sweet alyssum paired with upright varieties like snapdragons or dianthus.
You'll end up with a living tapestry that changes color with the seasons—think purple cleome in summer, golden sedum in fall, and winter jasmine for early spring fragrance. The best part? These boxes attract bees, butterflies, and hummingbirds while keeping maintenance simple with weekly watering and monthly deadheading.
Advanced gardeners can add tiered designs or edible herbs like thyme and chives, while beginners stick to pre-planned mixes. The beauty is in the customization—whether you want bold color blocks or soft pastel blends, window boxes let you create exactly what your space needs.
📚 In This Guide
- What you need
- Instructions
- Tips and common mistakes
- Wrapping up and next steps
What you need
- ● Window box (or planter): Choose one with drainage holes (depth: 6–12 inches; width: 12–24 inches). Wooden, metal, or plastic boxes work—just ensure it’s sturdy and weatherproof!
- ● Potting soil: 1–3 gallons (depending on box size), lightweight and well-draining (e.g., miracle-gro potting mix or cactus/succulent mix for drought-tolerant plants).
- ○ Drainage material (optional but recommended): Small rocks, gravel, or broken pottery shards (1–2 inches deep) to prevent root rot.
- ● Plants: 3–5 pollinator-friendly, compact varieties like pansies, petunias, fuchsias, lavender, or sweet alyssum (check sunlight needs!).
- ● Slow-release fertilizer: Granular or spike form (e.g., Osmocote) to nourish plants for 3–6 months.
- ● Watering can or spray bottle: With a narrow spout for precise watering.
- ● Gloves: Gardening gloves to protect your hands.
- ● Trowel or small shovel: For planting and soil adjustments.
- ● Scissors or pruners: To trim dead foliage or shape plants.
- ○ Mulch (optional): 1–2 inches of organic mulch (e.g., coco coir or pebbles) to retain moisture.
- ○ Support stakes (optional): For trailing plants like nasturtiums or ivy.
- ● Window box hardware: Screws, brackets, or a mounting kit if attaching to a wall or railing.
Step-by-Step instructions for year-round window box gardening
Here's how to transform any windowsill into a thriving, pollinator-friendly display that blooms season after season.
🪴 Step 1: Select and Prepare the Window Box
Choose a box with at least 6-inch depth—shallow boxes limit root growth and stunt plants. I prefer cedar or redwood because they resist rot naturally. If using plastic, drill extra drainage holes along the bottom to prevent waterlogging, which quickly kills roots in confined spaces.
Line the bottom with landscape fabric to filter out debris while allowing water to drain. This prevents soil from washing out while keeping roots contained. Secure the fabric with small staples or nails, then add a 1-inch layer of gravel for improved drainage. The gravel ensures excess water bypasses the roots entirely, preventing that dreaded soggy soil that invites fungal diseases.
🌱 Step 2: Layer Soil and Amendments for Optimal Growth
Fill the box with 3 gallons of high-quality potting mix, leaving 1 inch of space at the top for watering. Press the soil down lightly to eliminate air pockets, but don't compact it—roots need loose, breathable medium to spread. I like to mix in 1 cup of perlite per box to improve aeration and prevent compaction over time.
Add 1 tablespoon of balanced, slow-release fertilizer (10-10-10) to the soil mix. This ensures nutrients are available throughout the growing season without risking burn from over-fertilizing. Sprinkle the fertilizer evenly over the soil surface, then gently work it into the top 2 inches using your fingers or a small hand trowel.
☀️ Step 3: Choose and Plant Pollinator-Friendly Flowers
For year-round blooms, I plant 4-6 plants per box, mixing fast-growing annuals with perennial staples. Start with 2-3 pollinator magnets like lavender or catmint, then add 2-3 trailing plants such as sweet alyssum or creeping thyme. These combinations create vertical interest while supporting bees and butterflies.
Dig holes twice as wide as the root ball but no deeper than the container's original depth. Gently remove plants from their nursery pots and tease apart any circling roots with your fingers. Place each plant in its hole, then fill around the roots with soil, pressing lightly to eliminate air gaps. Water immediately after planting to settle the soil and encourage root contact.
💧 Step 4: Water and Position for Maximum Impact
Water thoroughly until water drains from the bottom holes, then allow the soil to dry slightly before watering again. Window boxes dry out faster than garden beds because they're exposed to wind and sun on all sides. I check moisture by sticking my finger 1 inch into the soil
Position the box where it receives 6+ hours of sunlight daily, ideally on a south- or west-facing window. If your space gets only morning sun, choose shade-tolerant varieties like impatiens or begonia. Rotate the box a quarter turn weekly so plants grow evenly toward the light rather than leaning away from it. Deadhead spent blooms regularly to encourage continuous flowering. I pinch off faded flowers with my fingers or use small pruning shears for tougher stems. This simple step extends the bloom season by redirecting the plant's energy into producing new flowers instead of seeds. Fertilize every 4-6 weeks during the growing season with the same slow-release fertilizer. In winter, reduce feeding to every 8-10 weeks since growth naturally slows. Mulch the soil surface with 1/4 inch of pine bark fines to retain moisture and suppress weeds—critical in confined window box spaces where weeds can quickly take over.✂️ Step 5: Maintain Through Seasons with Pruning and Feeding
Tips & tricks for perfect window box gardening
A few strategic moves will turn your window box from a decorative afterthought into a thriving, pollinator magnet that keeps blooming all year. Here's what I've learned after filling dozens of boxes myself.
Drainage is Non-Negotiable: In Step 1, that 1-inch gravel layer isn't optional—it's your insurance policy against root rot. I once lost an entire box of lavender because I skipped this step in a plastic container. The key is to make sure the gravel layer sits directly on the drainage holes, not floating above them. Test your setup by filling the box with water and watching it drain completely within 10 minutes. If it pools, you need more holes or a deeper gravel layer.
Soil Science Matters: When mixing your 3 gallons of potting mix in Step 2, resist the urge to skimp on the perlite. That 1 cup per box creates microscopic air pockets that prevent compaction—critical in shallow window boxes where roots have no room to escape. I've found that pre-mixed window box soils often contain too much peat moss, which holds too much moisture. For best results, blend your own mix with 60% potting soil, 30% perlite, and 10% composted bark.
Plant Placement Strategy: In Step 3, the 4-6 plant arrangement might seem crowded, but it's intentional. Place your 2-3 pollinator magnets (like lavender) at the back where they'll get maximum light exposure, then cascade the trailing plants (sweet alyssum) over the edges. This creates a natural tiered effect that attracts bees to the center flowers while providing visual interest from all angles. Pro tip: Space plants 2-3 inches apart—closer than you think, because window boxes have limited real estate.
Seasonal Light Adjustments: That quarter-turn weekly rotation in Step 4 isn't just about aesthetics—it's about preventing plants from growing lopsided toward the light. In winter when sunlight is weaker, you might need to rotate every 3-4 days instead. I also recommend moving boxes indoors during extreme weather: place them on a sunny windowsill when nighttime temperatures drop below 40°F to protect tender annuals like sweet alyssum from frost damage.
Pro Tips for Window Box Gardening
- A few strategic moves will turn your window box from a decorative afterthought into a thriving, pollinator magnet that keeps blooming all year.
- Drainage is Non-Negotiable: In Step 1, that 1-inch gravel layer isn't optional—it's your insurance policy against root rot.
- Soil Science Matters: When mixing your 3 gallons of potting mix in Step 2, resist the urge to skimp on the perlite.
Frequently asked questions
Got questions about window box gardening?
You’re not alone! Here are answers to the most common concerns to help you grow with confidence—no green thumb required.
What’s the best time of year to plant a window box?
For most climates, spring (after the last frost) and early fall are ideal. In warmer zones, you can plant year-round! Start with cool-season crops like pansies or lettuce in mild winters, and opt for heat-lovers like geraniums or petunias in summer. Always check your local frost dates for safety.
How often should I water my window box plants?
Window boxes dry out fast—sometimes daily! Check soil moisture with your finger; if the top inch feels dry, water thoroughly. Drip irrigation or self-watering boxes help, but avoid soggy soil. Early morning watering prevents evaporation and fungal issues. Pro tip: Use a spray bottle for delicate flowers like impatiens!
Can I grow pollinator-friendly plants in a window box?
Pack in compact pollinator magnets like lavender, alyssum, or mini marigolds. Avoid pesticides—even natural ones—and choose native varieties when possible. Bonus: Window boxes near open windows attract bees and butterflies while you work!
What if my window box plants look leggy or sparse?
Leggy growth? Your plants likely need more light. Rotate the box to expose all sides to sunlight, or move it closer to a south-facing window. Overcrowding or poor drainage can also stunt growth—thin out plants and ensure drainage holes exist. Fertilize lightly with a balanced liquid feed every 4–6 weeks.
Are there window box alternatives for small spaces?
Yes! Try hanging pockets (for herbs or succulents), vertical planters (wall-mounted or tiered), or even repurposed containers like teacups or colanders. For renters, fabric grow bags or lightweight plastic boxes work too. Get creative—balconies, railings, and ledges all count!
Wrapping up and next steps
Window box gardening is your ticket to a vibrant, fragrant, and eco-friendly outdoor space—no matter the season! 🌸 With the right plants, a little creativity, and consistent care, you can transform even a small ledge into a thriving haven for pollinators and your senses.
Whether you're a beginner or a seasoned green thumb, the key is to start small, stay consistent, and enjoy the process.
Ready to dive in? Pick your favorite fragrant blooms, gather your supplies, and let your window box become a year-round masterpiece! Happy gardening! 🌿