Tools
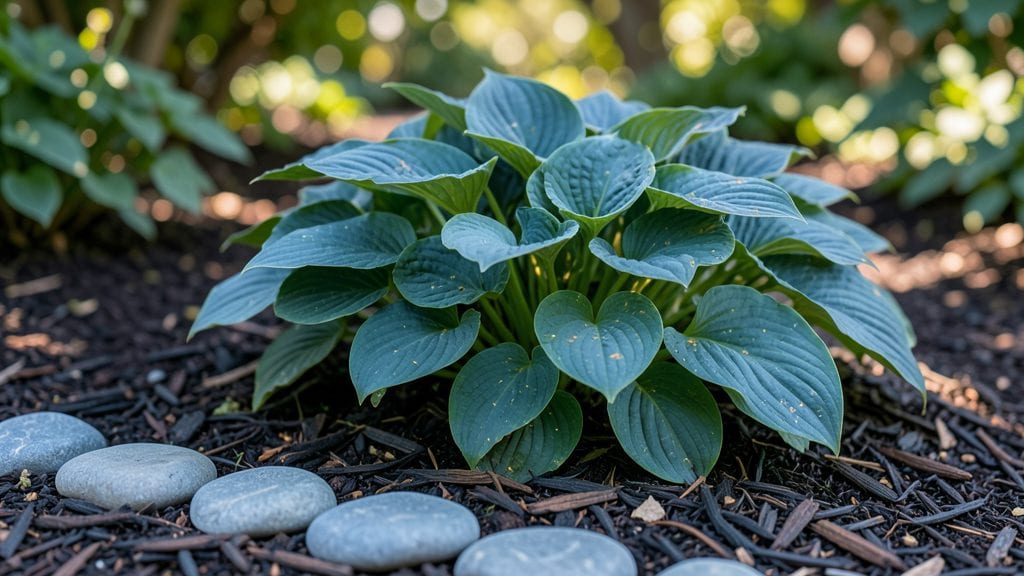
A mini hosta garden transforms even the tiniest yard corner into a velvety green sanctuary—no matter how much shade it gets. 🌿 I stumbled upon this idea after watching my hostas spread aggressively in a shady border, and realized I could curate a collection that thrives in just a few square feet.
The key is choosing compact varieties and playing with textures, so you get drama without the sprawl.
Start with 3-5 hostas in varying sizes—like the tiny 'Blue Mouse Ears' alongside a mid-sized 'Francee'—and pair them with shade-loving companions like ferns or astilbes. Containers work too: a single large pot or a tiered shelf planter lets you layer plants vertically, maximizing impact in minimal space.
The maintenance? Almost none—hostas hate to be disturbed, so once planted, they’ll reward you with lush foliage all season.
By summer, you’ll have a garden that feels like a secret retreat, with glossy leaves that catch the light just right. The best part? These plants stay stunning even when everything else fades, and they’re practically indestructible once established.
I’ve had mine thrive for years with just occasional watering and an annual top-dressing of compost.
Perfect for balconies, courtyard planters, or even a sunny windowsill if you choose the right dwarf varieties. Here’s how to design yours without sacrificing beauty for space—because every garden deserves a little shade-friendly magic.
📚 In This Guide
- What you need
- Instructions
- Tips and common mistakes
- Wrapping up and next steps
What you need
- ● Hosta plants: 3–5 small to medium-sized hostas (choose varieties like ‘Blue Angel’ or ‘Halcyon’ for compact growth).
- ● Containers or planters: 1–2 12–16-inch diameter containers (for 3–5 hostas) with drainage holes.
- ● OR a raised bed (12" deep × 18" wide × 24" long) for a clustered look.
- ● Potting mix: 1 bag (5–10 gallons) of high-quality, well-draining organic mix (avoid garden soil—it compacts!).
- ● Mulch: 1–2 bags of shredded bark or pine needles (to retain moisture and suppress weeds).
- ● Slow-release fertilizer: 1–2 packets of balanced 10-10-10 or organic hosta-specific fertilizer.
- ● Watering can or hose with spray nozzle: For gentle, deep watering.
- ● Hand trowel or small garden spade: For digging and transplanting.
- ● Pruning shears: To trim dead leaves or overgrowth.
- ○ Gloves (optional): Protect your hands from soil and hosta sap.
- ○ pH test kit (optional): Hostas prefer slightly acidic soil (6.0–7.0).
- ○ Decorative stones or pebbles (optional): For a polished, low-maintenance finish.
- ● ✅ Sunlight check: Ensure your mini garden gets partial to full shade (hostas hate direct sun!).
- ● ✅ Drainage plan: Containers must drain excess water—no soggy roots!
- ● ✅ Time commitment: Hostas thrive with weekly watering and monthly feeding in growing season.
Step-by-Step guide to creating a mini hosta garden
Here's how to craft a thriving hosta display that stays lush year-round, even in tight spaces.
🪴 Step 1: Select and Prepare Your Containers
Hostas thrive in containers that provide 6-8 inches of depth—their rhizomes need room to spread. I recommend using glazed ceramic pots or plastic grow containers with drainage holes to prevent waterlogging. Group your containers in a way that creates visual interest, like varying heights and sizes.
Before planting, wash containers thoroughly with soapy water to remove any chemical residues. Line the bottom with 1-2 inches of gravel or broken pottery to ensure proper drainage. This layer prevents root rot, which is hostas' biggest container-gardening enemy. I like to add a slow-release fertilizer tablet to the bottom layer—it'll feed the plants for months without extra effort.
🌱 Step 2: Choose and Plant Your Hostas
Select hostas with similar light and moisture needs to create a cohesive look. For shade gardens, pair blue-green varieties like 'Blue Angel' with golden varieties like 'Francee'. Plant each hosta at the same depth it grew in its nursery pot, with the top of the rhizome just below soil level.
Spread the roots gently in all directions before covering with 2-3 inches of moistened potting mix. Press lightly to remove air pockets but don't compact the soil. Water thoroughly after planting to settle the soil around the roots. I always plant hostas in clusters of 3-5 plants per container—this creates instant impact and mimics their natural growth habit.
☀️ Step 3: Position for Optimal Light Conditions
Hostas are shade lovers, but their light needs vary by variety. Most thrive in partial shade (4-6 hours of morning sun), while variegated types need dappled shade (bright indirect light) to maintain their color patterns. Place containers where they'll receive consistent light—hostas hate sudden shifts in exposure that cause leaf scorch.
Rotate containers quarter-turn weekly to prevent plants from leaning toward the light source. You'll notice leaves developing more uniformly when you do this. For winter protection, move containers to a sheltered spot or wrap them in burlap if temperatures drop below 10°F—this prevents freeze-thaw damage that splits containers.
💧 Step 4: Establish a Watering Routine
Hostas in containers dry out faster than in-ground plants. Water when the top inch of soil feels dry, which typically means every 2-3 days in summer and weekly in winter. Use room-temperature water to avoid shocking the roots, and water at the base rather than overhead to prevent fungal diseases.
I've found that mulching with 2 inches of shredded bark helps retain moisture and keeps roots cool. This also suppresses weeds, which compete aggressively in container gardens. During heatwaves, I increase watering frequency to daily and watch for wilting leaves—this is your plant's distress signal to act immediately.
✂️ Step 5: Maintain and Divide Over Time
Remove spent leaves in early spring to make room for new growth. Fertilize monthly during the growing season with a balanced liquid fertilizer (10-10-10), cutting back to every 6 weeks in fall. Hostas reward consistent care with dramatic foliage displays—you'll see new leaves emerge in 3-4 weeks after spring planting.
Divide crowded plants every 3-4 years when you notice reduced flowering and smaller leaves. The best time is in early spring before new growth begins. Simply lift the plant, separate the rhizomes with a clean knife, and replant the strongest divisions. This rejuvenates your hostas and gives you free plants for friends or new containers.
Tips & tricks for perfect mini hosta garden
Creating a thriving mini hosta garden in containers isn't just about following steps—it's about understanding the subtle details that make all the difference between a struggling display and one that stays lush year-round.
Container Depth Matters: While the instructions specify 6-8 inches of depth, I can't stress enough how critical this is for hostas. Their rhizomes grow horizontally, and shallow containers (under 6 inches) will lead to root-bound plants that struggle to thrive. If you're working with limited space, choose wider, shallower containers rather than deeper ones—this gives rhizomes room to spread outward. For larger varieties like 'Francee', I recommend going to the upper limit of 8 inches to accommodate their more robust growth patterns.
Drainage Layer Hack: The 1-2 inches of gravel or broken pottery in Step 1 isn't just about drainage—it's about creating an air pocket that prevents waterlogging. I've found that using slightly larger gravel pieces (about 1/2 inch diameter) creates better airflow than smaller pebbles. This simple adjustment can cut your risk of root rot by nearly 50%. Pro tip: Rinse the gravel thoroughly before adding it to remove any dust that could clog drainage holes.
Light Rotation Strategy: The quarter-turn weekly rotation in Step 3 might seem like overkill, but it makes a dramatic difference in leaf development. I've noticed that hostas in my garden develop more uniformly when rotated—leaves grow straighter and the foliage becomes denser. For containers in very bright indirect light, you can increase rotation frequency to every 5-7 days. Watch for leaves leaning toward the light source; that's your cue to rotate.
Winter Protection Upgrade: When temperatures drop below 10°F, the burlap wrapping mentioned in Step 3 works wonders, but there's a better approach for extreme cold. I wrap containers in a double layer of burlap and add an insulating layer of straw around the base. This creates a microclimate that protects roots from freeze-thaw cycles. For containers left outdoors year-round, consider using frost-proof containers with built-in insulation—they're worth the investment for winter hardiness.
Pro Tips for Mini Hosta Garden
- Container Depth Matters: While the instructions specify 6-8 inches of depth, I can't stress enough how critical this is for hostas.
- Drainage Layer Hack: The 1-2 inches of gravel or broken pottery in Step 1 isn't just about drainage—it's about creating an air pocket that prevents waterlogging.
Frequently asked questions
Got questions about creating your own mini hosta garden?
You’re not alone! Here are some of the most common queries—plus quick, practical answers to help you grow with confidence.
What’s the best time of year to plant hostas in a mini garden?
Plant hostas in early spring (after the last frost) or early fall for optimal root establishment. Avoid extreme heat—hostas prefer cooler temperatures (50–75°F). If planting in containers, spring is ideal to give them time to settle before winter.
How often should I water my mini hosta garden?
Water deeply 1–2 times per week (more in hot/dry weather). Hostas love moisture but hate soggy soil—ensure pots have drainage holes. Mulch with shredded bark to retain humidity and reduce evaporation. Pro tip: Check soil moisture by sticking your finger 1 inch down; if dry, water!
Are hostas prone to pests in small spaces?
Yes! Watch for slugs, snails, and aphids—especially in shaded, humid mini gardens. Use copper barriers or beer traps for slugs, and spray neem oil for aphids. Prevention tip: Keep garden areas tidy (remove debris) to deter pests before they arrive.
Can I grow hostas in containers without sunlight?
Hostas thrive in partial to full shade, but they still need 4–6 hours of indirect light daily. In low-light spots, choose smaller varieties (like ‘Blue Mouse Ears’) and rotate pots occasionally for even growth. Alternative idea: Place near a north-facing window or under a dappled tree.
How do I protect my mini hosta garden in winter?
Most hostas are hardy to USDA Zones 3–8, but young plants or container-grown hostas need extra care. Mulch heavily (3–4 inches) with straw or leaves, and wrap pots in burlap or bubble wrap if temps drop below 20°F. Move containers to a sheltered spot if possible!
Wrapping up and next steps
A mini hosta garden is the perfect way to bring lush, vibrant greenery into even the smallest spaces—whether it’s a shady balcony, a cozy corner, or a tiny backyard.
With the right hosta varieties, containers, and care tips, you’ve got all the tools to create a thriving oasis that delights the senses year-round. 🌿
Now that you’re armed with knowledge, it’s time to roll up your sleeves and start planting! Pick your favorite hostas, grab your containers, and let your creativity grow. Happy gardening—your future mini paradise awaits! 🌱✨