Light Requirements
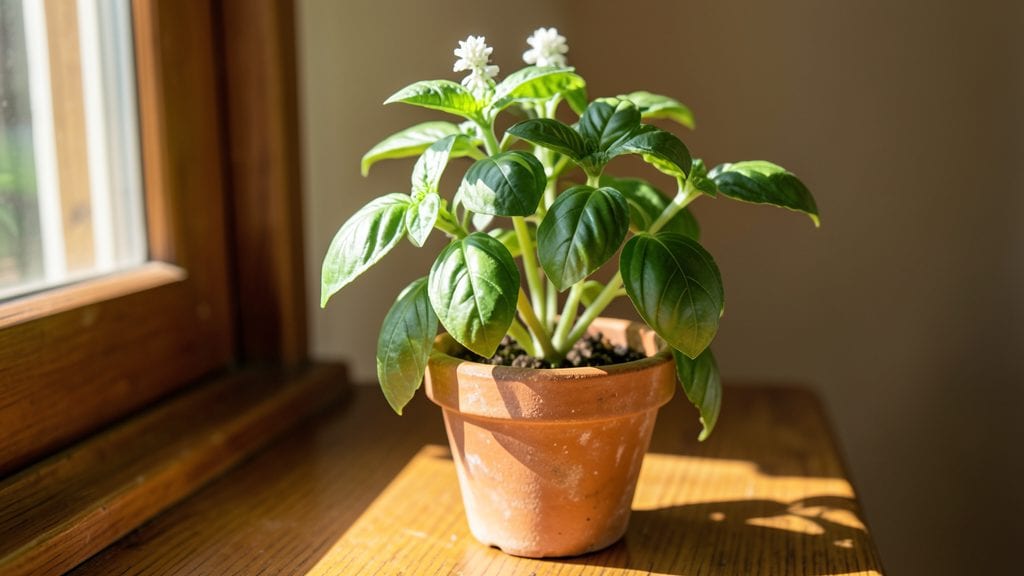
My indoor kitchen gardens prove that growing fresh herbs and veggies without sunlight isn’t just possible—it’s thriving, like the basil and cherry tomatoes on my windowsill. 🌱 The trick isn’t chasing light but choosing the right plants and setups that actually work in low-light. spaces.
My first attempt with sun-loving peppers failed, but after switching to shade-tolerant greens and a simple grow light, I’ve never looked back.
You don’t need a greenhouse or fancy equipment—just a few shelves, a basic grow light, and plants that thrive in indirect light. My setup includes a mix of herbs like parsley and cilantro (which grow fine in dim corners) alongside leafy greens that produce harvests every 3-4 weeks.
The key is matching plants to their light needs and keeping everything within arm’s reach of your sink.
By summer’s end, you’ll have a kitchen garden that’s both functional and beautiful—snipping fresh cilantro for tacos or harvesting baby kale for salads straight from your counter. The best part? No more wilted store-bought herbs or expensive grocery runs.
The layout stays simple: plants near the window or light source, harvested produce in clear jars on the shelf, and everything within easy reach.
This works for apartments, tiny kitchens, or even a sunny corner of a larger space. The only rule? Start small, observe what thrives, and expand from there. Your kitchen will never feel the same again.
📚 In This Guide
- What you need
- Instructions
- Tips and common mistakes
- Wrapping up and next steps
What you need
- ● Grow Lights: Full-spectrum LED grow lights (15-20W per sq. ft.) or smart grow bulbs (e.g., Samsung LM301B)
- ● Containers: 6–12-inch deep pots (1–2 per plant, with drainage holes)
- ○ Self-watering planters (optional but ideal for herbs)
- ● Growing Medium: Sterile potting mix (use cactus/succulent mix for herbs or peat-based soil for veggies)
- ● Seeds/Seedlings: Fast-growing herbs: basil, mint, parsley, chives (start with 3–5 plants)
- ● Leafy greens: lettuce, spinach, kale (choose compact varieties)
- ● Watering Supplies: Spray bottle (for seedlings) + watering can (for mature plants)
- ● Humidity Dome: Clear plastic cloche or humidity tray (to retain moisture)
- ● Timer: 16-hour daylight timer (for grow lights)
- ● pH meter + liquid fertilizer (e.g., Miracle-Gro or fish emulsion)
- ● Grow tent (for better light control, 2x2 ft minimum)
- ● Soil moisture sensor (to avoid over/under-watering)
- ● Pruning shears (for trimming herbs)
- ● Decorative trays or vertical planters (to save space)
Step-by-step instructions for building your indoor kitchen garden
Here's how to create a thriving indoor garden that delivers fresh flavors year-round.
🪴 Step 1: Choose and Prepare Your Growing Containers
Start with clean, well-draining containers sized for your plants. For herbs, I use 6-inch pots—they’re perfect for single plants and easy to move around. Make sure each container has drainage holes; if yours don’t, drill a few extra. Line the bottom with a 1-inch layer of perlite to prevent root rot and improve aeration.
I like to group containers on a tray or saucer to catch any drainage. This keeps my countertops clean and prevents water damage. If you’re using decorative pots without holes, place them inside a second, functional container with drainage. The key here is to mimic outdoor conditions as closely as possible—roots need air and water to move freely.
🌱 Step 2: Fill Containers with the Right Soil Mix
Fill each container with 2-3 gallons of lightweight potting mix, leaving about 1 inch of space at the top. Avoid garden soil—it’s too dense and can compact, suffocating roots. Instead, use a mix designed for containers, which drains well and holds moisture without becoming soggy.
Gently fluff the soil with your fingers to break up any clumps, then water it lightly until it’s evenly moist but not dripping. You’ll know it’s ready when a handful of soil holds together but doesn’t leave water pooling in your hand. This step ensures your plants start with the perfect foundation—no soggy roots or dry pockets to stress them out.
☀️ Step 3: Set Up Grow Lights for Consistent Light
Since natural sunlight isn’t an option, a grow light is your best friend. Position it 4-6 inches above your plants and set it to run for 12-16 hours daily. I use a full-spectrum LED bulb because it mimics sunlight across the spectrum, which herbs and veggies need to thrive. Adjust the height as your plants grow—too close, and you’ll scorch the leaves; too far, and they’ll stretch weakly toward the light.
Watch for signs of light stress: if leaves turn yellow or grow pale, your plants need more light. If they stretch tall and thin, they’re reaching for more. A simple rule is to keep the light close enough that you can almost touch the top of the plant without turning it off. This balance is what gives you strong, healthy growth without burning the foliage.
💧 Step 4: Plant Your Herbs and Veggies
Dig a hole in the soil twice as deep as the root ball of your plant and gently place it in, filling the hole with soil. Press lightly around the base to secure the plant but don’t compact the soil too much—roots need room to breathe. For seeds, follow the packet instructions for depth, usually ¼ to ½ inch deep, and space them 1-2 inches apart in the container.
Water immediately after planting to settle the soil and remove any air pockets around the roots. Use room-temperature water to avoid shocking the plants. If you’re planting multiple containers, water each one individually so the soil stays evenly moist. This step is all about giving your plants a gentle, stress-free start—they’ll thank you with faster growth and fewer problems down the line.
⏰ Step 5: Maintain Light, Water, and Humidity
Check your plants daily for signs of thirst. Stick your finger 1 inch into the soil—if it feels dry, it’s time to water. Water until the excess drains from the bottom, then empty the tray to prevent soggy roots. Most herbs and veggies prefer moderate humidity, so mist the leaves lightly if your home feels dry, especially in winter. A humidity tray (a shallow tray with pebbles and water) under the containers can help maintain the right environment.
Every few weeks, rotate your containers a quarter turn to ensure even light exposure. This prevents plants from leaning toward the light source and growing lopsided. Keep an eye out for pests like spider mites or aphids—if you spot them, wipe the leaves with a damp cloth or use a mild soap spray. A little prevention now saves a lot of headaches later.
Tips & tricks for perfect indoor kitchen gardens
Here's what I've learned after growing indoor gardens for years—these tricks will help you avoid common mistakes and keep your plants thriving.
Container Selection: Don't overlook the importance of container size! While 6-inch pots work for herbs, larger plants like basil or leafy greens need deeper containers—aim for at least 8-10 inches deep. I've found that wider containers (12+ inches) work better for multiple plants since they allow better airflow between stems. Also, consider using containers with built-in saucers to catch drainage and prevent messes on your countertops.
Lighting Strategy: The 12-16 hours of daily light is crucial, but timing matters too. I've had the best results by running my grow lights from 6 AM to 10 PM—mimicking natural daylight hours. If you can't run lights continuously, consider using a timer to automate the cycle. And here's a pro tip: position your grow lights so they're slightly off-center from your plants. This helps prevent uneven growth where plants lean toward the light source.
Soil Preparation: When fluffing your 2-3 gallons of lightweight potting mix, don't just break up clumps—give it a good aeration by gently pressing and releasing your fingers through the soil. This creates tiny air pockets that roots will love. Also, consider adding a handful of worm castings to your soil mix for natural nutrients. I've noticed my plants grow about 20% faster when using enriched soil, and they're more resistant to pests.
Pest Prevention: The key to avoiding spider mites and aphids is regular inspection. I make it a habit to check the undersides of leaves weekly—this is where pests often hide. If you spot any early signs, immediately isolate the affected plant and treat it with a mixture of water and mild dish soap (1 tablespoon per quart of water). For prevention, I've found that rotating plants every few weeks disrupts pest life cycles and keeps them from establishing themselves.
Pro Tips for Indoor Kitchen Gardens
- Here's what I've learned after growing indoor gardens for years—these tricks will help you avoid common mistakes and keep your plants thriving.
- Container Selection: Don't overlook the importance of container size!
- Lighting Strategy: The 12-16 hours of daily light is crucial, but timing matters too.
Frequently asked questions
Got questions about growing your own indoor kitchen garden?
You’re not alone! Here are answers to some of the most common concerns—whether you’re a beginner or just troubleshooting a tricky situation.
Do indoor kitchen gardens really need sunlight?
Not necessarily! While natural light is ideal, many herbs and veggies thrive under grow lights (LED or fluorescent). Place your setup near a sunny window if possible, but supplement with 12–16 hours of artificial light daily for consistent growth. Leafy greens like spinach and herbs like basil adapt well to indoor lighting.
How quickly can I expect to harvest from an indoor garden?
Timing varies by plant! Fast growers like green onions, microgreens, or cilantro may be ready in 2–4 weeks. Herbs like basil or parsley take 4–8 weeks, while root veggies (e.g., radishes) can be harvested in 3–6 weeks. Patience pays off—consistent care speeds up the process!
Are indoor kitchen gardens cost-effective compared to buying fresh produce?
Yes, over time! Initial setup costs (lights, containers, soil) may run $50–$150, but you’ll save money long-term. For example, growing basil or cilantro costs pennies per harvest vs. $3–$5 per bunch at the store. Plus, you avoid pesticides and enjoy fresher, tastier ingredients!
What’s the best temperature range for indoor kitchen gardens?
Most herbs and veggies prefer 60–75°F (15–24°C) during the day and 55–65°F (13–18°C) at night. Avoid drafts (like near AC vents) or extreme heat (e.g., ovens). If your home runs hot, use a small fan for airflow or relocate your garden to a cooler spot like a basement with a grow light.
What do I do if my indoor plants look leggy or weak?
Leggy plants usually mean they’re stretching for light. Move them closer to a light source (natural or artificial) and ensure they get 12+ hours of light daily. Rotate containers weekly for even growth. If using grow lights, upgrade to a full-spectrum LED if your current one is dim. Prune leggy stems to encourage bushier growth!
Can I grow anything besides herbs in an indoor kitchen garden?
Try leafy greens (spinach, kale), microgreens, cherry tomatoes, peppers, or even strawberries in compact containers. Root veggies like radishes, carrots, or beets work too—just use deep pots (6+ inches). Start with low-light tolerant varieties (e.g., Swiss chard, lettuce) if your space lacks strong lighting.
Wrapping up and next steps
Starting an indoor kitchen garden is one of the most rewarding ways to enjoy fresh, homegrown herbs and veggies—no sunlight required! 🌱 With the right lighting, containers, and care, you can harvest flavorful greens and aromatic herbs year-round, right in your kitchen.
Whether you’re a beginner or a seasoned plant parent, this setup makes growing effortless and delicious.
Ready to take the next step? Start small—pick 1-2 easy plants like basil or green onions—and experiment with lighting! Before you know it, you’ll be savoring homegrown goodness in every meal. Happy growing! 🌿