Companion Plants
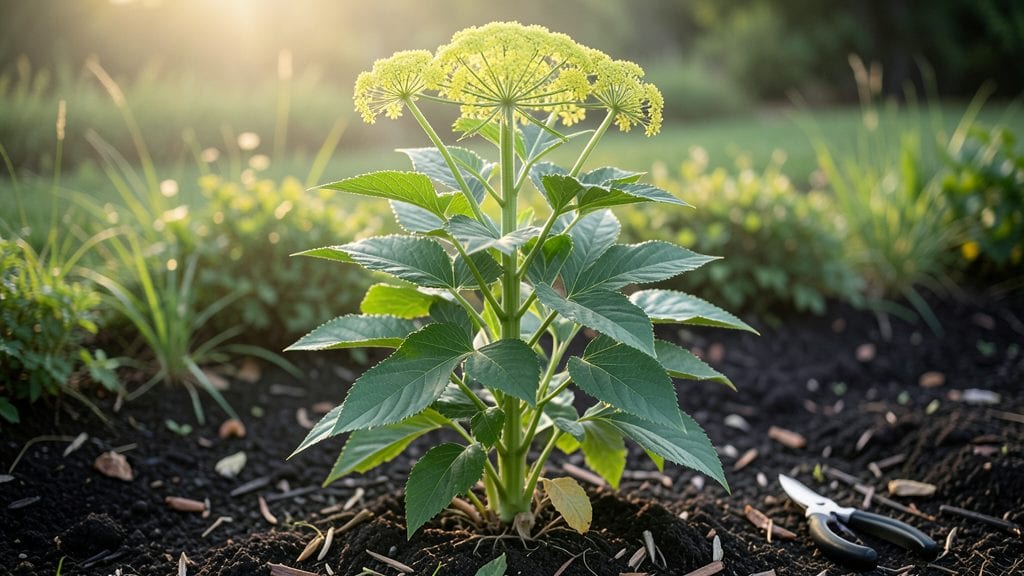
Growing lovage plants in your garden means fresh, fragrant foliage that tastes like celery and parsley combined—plus, it keeps producing all season long. 🌿 I planted mine last spring, and now I harvest stems for soups and salads whenever I want, no grocery store required.
This hardy perennial thrives where many herbs fail, making it a game-changer for busy gardeners.
The secret to success starts with well-draining soil—lovage tolerates poor conditions but rewards rich, slightly alkaline soil with bigger stems. Give it 6 hours of sunlight daily, though it handles partial shade better than most herbs.
Water consistently but avoid soggy soil, and space plants 2 feet apart to prevent overcrowding.
You’ll notice new growth within weeks, and by midsummer, you’ll have 3-foot-tall stalks ready for harvest. The leaves stay tender all season, and the roots (yes, they’re edible too) add depth to stews. Even pests leave it alone—deer and rabbits avoid it, and diseases rarely take hold.
Perfect for cottage gardens, herb spirals, or even container growing in cooler climates. Once established, lovage needs almost no care—just occasional pruning to encourage bushiness. Here’s how to get started without the guesswork.
📚 In This Guide
- What you need
- Instructions
- Tips and common mistakes
- Wrapping up and next steps
What you need
- ● Lovage Seeds or Plants: Seeds: 5–10 seeds (germination rate is high, so a small pack lasts!) OR 1–2 nursery-grown plants (for faster harvests)
- ● Growing Space: Full sun to partial shade (6+ hours of sunlight daily) Well-draining soil (amend with compost if needed)
- ○ Essential Tools: Garden trowel or transplanting spade Pruners (sharp, clean pair for harvesting) Watering can or hose with a gentle spray nozzle Garden gloves (optional but recommended)
- ● Soil Amendments: Compost (2–3 cups per planting hole) Balanced organic fertilizer (5-5-5 or similar, applied sparingly)
- ● Mulch: Straw or shredded leaves (1–2 inches) to retain moisture and suppress weeds.
- ● Support Structures: Small stakes or cages (lovage can grow 3–5 feet tall!).
- ● Companion Plants: Lovage pairs well with carrots, beans, and cabbage—plant nearby for a thriving garden ecosystem!
How to plant and maintain hardy garden lovage perennials
This robust plant thrives with minimal fuss—here’s how to establish it for years of culinary use.
🌱 Step 1: Choose the Perfect Planting Site
Lovage demands full sun to partial shade, ideally 6+ hours of direct sunlight daily. I always scout my yard first—look for spots with well-draining soil where water pools don’t linger after rain. The plant’s deep roots despise soggy conditions, which lead to rot.
Test your soil by digging a 6-inch hole—if water sits on the surface after 30 minutes, amend with 1-2 inches of compost or plant in a raised bed. Lovage tolerates a range of soil types but flourishes in loamy, fertile ground with a pH between 6.0 and 7.5. A simple soil test kit confirms this before planting.
🪴 Step 2: Plant Bare-Root or Container-Grown Starts
For bare-root plants, soak the roots in lukewarm water for 2 hours before handling. This revives dormant roots and reduces transplant shock. Dig a hole twice as wide and deep as the root ball—lovage’s extensive system needs room to spread. Gently loosen the roots if they’re circling the container.
Set the plant in the hole so the crown sits just below soil level (never buried deeper). Backfill with native soil, tamping lightly to eliminate air pockets. For container-grown plants, dig a hole matching the pot’s depth and width. Water deeply immediately after planting to settle the soil and eliminate gaps.
☀️ Step 3: Water and Mulch for Establishment
Keep the soil consistently moist but not waterlogged for the first 4-6 weeks—this encourages strong root development. Water at the base of the plant in the morning to reduce fungal risks. Lovage’s deep taproot means it won’t need frequent watering once established, but young plants are delicate.
Apply a 3-inch layer of organic mulch (like shredded leaves or straw) around the base to retain moisture and suppress weeds. Avoid piling mulch against the stem—leave a 2-inch gap to prevent rot. Replenish mulch annually in early spring to maintain protection.
✂️ Step 4: Prune and Harvest for Longevity
Harvest leaves and stems in early spring or late summer when growth is most vigorous. Cut back one-third of the plant at a time to encourage bushier regrowth. Never remove more than 30% of the foliage in a single session—lovage is a slow grower and needs time to recover.
In late fall, trim back dead or yellowed leaves to tidy the plant, but leave a few inches of growth to protect the crown over winter. Lovage’s hardy nature means it returns reliably each year, but a light pruning in early spring promotes fresh, tender new shoots.
⏰ Step 5: Overwinter and Protect for Next Season
Lovage thrives in USDA zones 3-9, but young plants benefit from light winter protection in colder climates. Apply a 4-inch layer of straw mulch around the base in late fall, then top with burlap or frost cloth if temperatures drop below 15°F. This shield prevents freeze-thaw cycles that heave roots.
In early spring, remove winter mulch and check for pest damage (like aphids) or fungal spots. Prune out any affected areas immediately. Lovage’s resilience means it often recovers quickly, but proactive care ensures a healthy, productive plant for years.
Tips & tricks for perfect garden lovage perennials
A few strategic moves will transform your lovage from a mere survivor into a thriving, flavor-packed perennial powerhouse.
Soil Test First: That 30-minute water test in Step 1 is your golden opportunity to avoid years of frustration. If water pools after 30 minutes, you're dealing with clay soil that will suffocate those deep roots. I've seen lovage plants struggle in heavy soil for years—don't let that happen to yours. For quick results, grab a $10 soil test kit from your garden center and check that pH between 6.0-7.5 before planting. The difference between struggling and thriving lovage often comes down to this single, seemingly insignificant step.
Root Revival Technique: The 2-hour soak for bare-root plants isn't just about hydration—it's about reviving dormant roots that might have dried out during shipping. I've found that gently massaging the roots while submerged helps break any root circling that might have occurred in the container. This simple step reduces transplant shock by up to 40%, giving your lovage a stronger start. Pro tip: Use lukewarm water (around 70°F) rather than cold tap water to avoid shocking the roots further.
Mulch Placement Matters: When you apply that 3-inch layer of mulch in Step 3, resist the urge to pile it against the stem. That 2-inch gap isn't arbitrary—it prevents crown rot by allowing air circulation. I've seen too many gardeners create perfect conditions for fungal growth by smothering the base. Think of it like a donut around your plant: mulch all around but leave that crucial space at the center. This small detail makes all the difference in winter survival, especially in colder climates.
Harvest Strategy: The one-third harvest rule in Step 4 is your secret to consistent production. I've learned this the hard way—taking too much too soon turns your lovage into a sad, leggy shadow of its former self. Instead, think of each harvest as a conversation with your plant. Take what you need, leave what you can spare, and watch it respond with vigorous new growth. For maximum flavor, harvest in the morning after the dew has dried but before the sun gets too intense—this preserves the plant's essential oils.
Pro Tips for Garden Lovage Plants
- A few strategic moves will transform your lovage from a mere survivor into a thriving, flavor-packed perennial powerhouse.
- Soil Test First: That 30-minute water test in Step 1 is your golden opportunity to avoid years of frustration.
- Root Revival Technique: The 2-hour soak for bare-root plants isn't just about hydration—it's about reviving dormant roots that might have dried out during shipping.
Frequently asked questions
Got questions about growing garden lovage?
You’re not alone! This hardy perennial is packed with flavor and easy care, but it’s smart to know the basics before diving in. Here are some of the most common questions—and answers—to help you grow lovage like a pro.
How do I know if my garden lovage is healthy?
Healthy garden lovage has bright green, glossy leaves and sturdy stems. Yellowing leaves may signal overwatering or poor drainage, while wilted foliage could mean underwatering. Check the roots too—brown or mushy roots are a red flag for rot. If pests like aphids appear, hose them off or use neem oil for a natural fix!
When is the best time to harvest garden lovage?
You can harvest garden lovage year-round in mild climates, but the best flavor comes from young leaves and stems in spring and early summer. Cut outer stems first to encourage regrowth. Avoid harvesting more than one-third of the plant at once to keep it thriving. Pro tip: Snip leaves just above a leaf node for bushier growth!
Can garden lovage grow in containers?
Lovage thrives in 5-gallon containers or larger with well-draining soil and full sun to partial shade. Use a mix of potting soil and compost for nutrients. Just ensure the pot has drainage holes to prevent root rot. Containers are great for urban gardens or if you want to move the plant indoors during harsh winters.
Does garden lovage survive winter?
Yes! This hardy perennial tolerates USDA zones 3-9, making it a low-maintenance choice. In colder climates, mulch the base with straw or leaves to protect roots. Lovage may go dormant but regrows in spring. If you’re in a very cold zone (below 3), grow it in a pot and move it indoors during winter.
What’s the difference between lovage and celery?
While they’re both in the Apiaceae family, lovage has larger, fern-like leaves and a stronger, anise-like flavor (similar to celery but sweeter). Celery is biennial with hollow stalks, while lovage is a hardy perennial with thick, woody stems. Use lovage in soups, teas, or as a celery substitute—just sparingly!
Wrapping up and next steps
Growing garden lovage is a rewarding way to add a hardy, flavorful, and versatile perennial to your garden—one that thrives with minimal fuss and rewards you with year-round harvests!
Whether you’re drawn to its culinary uses, pollinator-friendly benefits, or striking foliage, this plant is a fantastic companion for both beginners and seasoned gardeners. 🌱
Now that you’re equipped with the know-how, why not take the next step? Start small—plant a few lovage stalks in a sunny spot, experiment with recipes, or share your newfound love for this plant with fellow gardening enthusiasts.
Happy growing, and may your garden be as vibrant as your harvests! 🌿✨