Tools
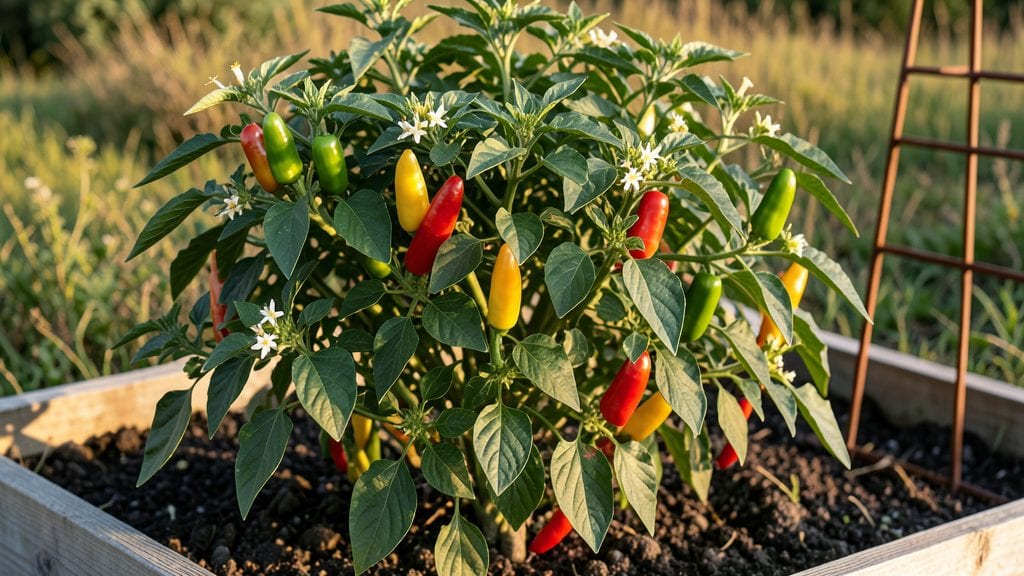
Transform your balcony or small yard into a garden hot peppers powerhouse with containers—where fiery flavors thrive even in limited space. 🌿 I’ve grown everything from mild jalapeños to ghost peppers in 5-gallon pots, and the secret isn’t fancy setups—it’s matching heat levels to your growing conditions.
The right variety in the right container can produce peppers all summer long, even on a balcony.
Start with soil that drains fast but holds moisture—think 60% potting mix, 30% compost, and 10% perlite. Containers need at least 10 inches of depth for most varieties, and bigger pots mean bigger yields.
Morning sun is a must, but afternoon shade keeps leaves from scorching in hot climates. Water when the top inch feels dry, and always use well-draining pots with drainage holes.
By midseason, you’ll be harvesting peppers that pack serious heat—think glossy red habaneros or deep purple shishitos. The key is consistent care: a balanced fertilizer every 4-6 weeks and pruning to encourage bushier growth.
Even in small spaces, a single container can produce enough peppers to freeze, dry, or share with fellow spice lovers.
Works for beginners and pros alike—just adjust varieties based on your heat tolerance and space. Whether you’re growing for salsa, hot sauce, or just the thrill of heat, this method delivers results. Let’s get those seeds started!
📚 In This Guide
- What you need
- Instructions
- Tips and common mistakes
- Wrapping up and next steps
What you need
- ● Hot Pepper Seeds or Seedlings: Choose 3–5 varieties (e.g., Habanero, Jalapeño, Cayenne, or Ghost Pepper). Start with 3–6 seeds per pepper type (or 1–2 seedlings per container if buying transplants).
- ○ Containers: Minimum 5-gallon pots (1 per pepper plant for optimal growth). Ensure pots have drainage holes to prevent root rot. Use fabric grow bags (optional but great for airflow).
- ● Potting Mix: High-quality, well-draining mix (e.g., 60% peat moss, 30% perlite, 10% compost). Avoid garden soil—it compacts and retains too much moisture.
- ● Fertilizer: Balanced, water-soluble fertilizer (e.g., 10-10-10 or 20-20-20 NPK ratio). Start with 1 tbsp per gallon of water every 2–3 weeks after transplanting.
- ● Watering Can or Hose with Nozzle: Use a gentle spray nozzle to avoid displacing soil.
- ● Pruning Shears or Scissors: Sterilized tools for harvesting and pruning (clean with rubbing alcohol between uses).
- ○ Support (Optional but Helpful): Cage or trellis for taller varieties (e.g., Cayenne or Thai Peppers).
- ● Sunlight: Full sun (6–8+ hours daily)—place containers in the sunniest spot possible (south-facing windows or balcony).
- ● Warmth: Peppers thrive in 70–90°F (21–32°C) soil temps. Use a heat mat indoors if needed.
- ● Patience: Hot peppers take 60–120 days to mature, depending on the variety.
- ○ Safety Gear (Optional): Gloves (if handling spicy peppers—some varieties pack a punch!). Eye protection when pruning (to avoid accidental pepper dust irritation).
Step-by-Step instructions for growing hot peppers in containers
Here's how to cultivate fiery, productive pepper plants in containers—no garden bed required.
🌱 Step 1: Select and Prepare Containers
Choose 5-gallon containers with drainage holes—peppers need room for roots to spread and hate soggy feet. I use fabric grow bags because they allow excess moisture to evaporate while still providing sturdy support. Fill each container with 2 gallons of well-draining potting mix mixed with 1 cup perlite to prevent compaction.
Tap the container gently to settle the mix, then create a planting hole with your finger—just deep enough to bury the root ball of your pepper plant. The reason for this prep is simple: peppers thrive in loose, airy soil that mimics their native tropical conditions. If you skip the perlite, roots will suffocate and stunt growth.
🌱 Step 2: Plant Transplants at the Right Time
Wait until after your last frost date and when nighttime temperatures stay above 55°F. Pepper plants are heat-lovers—they’ll sulk and refuse to grow if chilled. Plant one pepper per container, positioning it so the soil line sits ½ inch below the rim of the pot. This prevents water from spilling over when you water.
Gently firm the potting mix around the roots to eliminate air pockets, but don’t pack it down like you’re building a wall. You’ll see the plant wobble slightly—that’s normal and means the roots have room to expand. Water deeply right after planting to help settle the soil and remove any air gaps.
☀️ Step 3: Provide Full Sun and Consistent Heat
Peppers demand 6-8 hours of direct sunlight daily—no compromises. A south-facing balcony or patio works best, but if you’re growing indoors near a window, supplement with a grow light positioned 6 inches above the plants for 12-14 hours daily. Without enough light, stems stretch weakly and peppers develop poor heat levels.
Keep containers in a spot where temperatures stay between 70-85°F during the day. If your evenings dip below 60°F, move pots indoors or use a small space heater to maintain warmth. You’ll notice leaves curling or yellowing if it’s too cold—this is your cue to adjust the environment immediately.
💧 Step 4: Water Deeply and Maintain Consistent Moisture
Water when the top 1-2 inches of soil feel dry to the touch—peppers hate both drought and soggy roots. I use a watering can with a narrow spout to direct moisture straight to the base of the plant, avoiding wet foliage that can invite fungal diseases. Aim for 1 gallon of water per container every 2-3 days, adjusting for heat or humidity.
Here’s the thing—peppers are sensitive to moisture fluctuations. If you let them dry out completely, blossoms will drop, and you’ll lose potential peppers. But overwatering causes root rot, so always check soil moisture before watering. A simple finger test is all it takes to keep your plants happy.
✂️ Step 5: Prune and Harvest for Maximum Heat
Once your pepper plants reach 18 inches tall, pinch off the first few flowers to encourage bushier growth. This redirects energy into stronger stems and more productive branches. You’ll see new side shoots forming within 1-2 weeks—these are where your hottest peppers will develop.
Harvest peppers when they reach full color and firmness—this ensures maximum heat and flavor. Use clean pruning shears to snip stems just above a leaf node. Regular harvesting stimulates more production, so don’t wait until peppers are overripe. If you notice peppers turning red but staying small, your plant may need more sunlight or nutrients.
Tips & tricks for growing fiery container peppers
These battle-tested strategies will help you cultivate hot peppers that pack serious heat and thrive in containers year-round.
Container Selection Matters: The 5-gallon size is non-negotiable—peppers need that root space to develop properly. I've seen growers use smaller pots and wonder why their plants struggled. Fabric grow bags are my go-to because they prevent root circling while allowing excess moisture to evaporate. If you must use plastic, drill extra drainage holes—peppers despise soggy roots. The perlite in Step 1 isn't optional either; it creates the airy soil structure these tropical plants crave. Without it, roots suffocate and growth stalls.
Heat Management is Critical: Those 70-85°F daytime temperatures in Step 3 aren't just suggestions—they're essential for pepper production. I've learned this the hard way after watching plants wilt when evenings dipped below 60°F. For indoor growers, position your grow lights 6 inches above the plants for those 12-14 hours of daily light. Too far away and stems stretch weakly; too close and leaves scorch. A simple thermometer near your plants will become your best friend—peppers will show you exactly when they're stressed through leaf curling or yellowing.
Watering Wisdom: The 1-2 inch soil dryness test in Step 4 is your golden rule. I use my finger to check moisture daily—this prevents both drought stress (which causes blossom drop) and overwatering (which leads to root rot). That 1 gallon every 2-3 days is just a guideline; adjust based on your climate. In summer heat, you might need daily watering, while cooler weather could extend it to every 4 days. Always water at the base to keep foliage dry, which prevents fungal diseases that can devastate your crop.
Pruning for Maximum Heat: When your plants hit 18 inches in Step 5, those first flowers might look tempting, but pinch them off! This redirects energy to stronger stems and more productive branches. I've seen plants that produced 50% more peppers after this simple pruning. Watch for new side shoots forming within 1-2 weeks—these are where your hottest peppers will develop. And when harvesting, always use clean pruning shears to avoid disease transmission between plants. The more you harvest, the more your plant will produce—it's like giving it permission to keep making peppers!
Pro Tips for Garden Hot Peppers
- These battle-tested strategies will help you cultivate hot peppers that pack serious heat and thrive in containers year-round.
- Container Selection Matters: The 5-gallon size is non-negotiable—peppers need that root space to develop properly.
- Heat Management is Critical: Those 70-85°F daytime temperatures in Step 3 aren't just suggestions—they're essential for pepper production.
Frequently asked questions
Got questions about growing your own garden hot peppers?
You’re not alone! Here are answers to the most common queries—from spicy beginners to seasoned gardeners.
How long does it take for hot peppers to grow and produce fruit?
Most garden hot peppers (like jalapeños, habaneros, or cayennes) take 60–90 days from transplanting to harvest, depending on the variety. Start seeds indoors 8–10 weeks before your last frost for a head start. Patience pays off—some peppers (like ghost peppers) can take even longer!
Why are my hot peppers not spicy?
Spice levels depend on maturity, genetics, and growing conditions. Underripe peppers lack heat, while overripe ones turn sweet. Ensure full sun (6–8 hours/day), consistent watering, and proper fertilization. Pro tip: Harvest when peppers are firm and fully colored for maximum kick!
Can I grow hot peppers in containers year-round?
Hot peppers thrive in containers with 5+ gallon pots and well-draining soil. In cooler climates, move pots indoors near a sunny window or under grow lights during winter. Just avoid drafts and keep soil warm (peppers hate cold roots). Bonus: Dwarf varieties like ‘Apache’ or ‘Mini Jalapeño’ are perfect for small spaces!
What pests should I watch for with hot peppers?
Common culprits include aphids, spider mites, and pepper maggots. Inspect leaves regularly for holes or webbing. Use neem oil or insecticidal soap for mild infestations. For maggots, cover soil with mulch and remove damaged fruit promptly. Companion planting with basil or marigolds can deter pests naturally.
Do hot peppers need special care in extreme heat?
Peppers love warmth but can bolt (flower prematurely) or turn bitter in scorching temps (above 90°F). Provide afternoon shade, mulch to retain moisture, and water deeply at the base (avoid wetting leaves). If flowers drop, try hand-pollinating with a soft brush. Varieties like ‘Carolina Reaper’ handle heat better than others.
Wrapping up and next steps
Growing your own garden hot peppers is a rewarding journey that brings bold flavors and vibrant colors to your kitchen—and your containers! Whether you’re a seasoned gardener or a curious beginner, these fiery friends thrive with just a little patience, the right tools, and a sunny spot.
Now that you’re armed with materials, tips, and troubleshooting tricks, it’s time to roll up your sleeves and plant those seeds.
Start small—maybe a single container or two—and let your confidence (and pepper collection!) grow. Before you know it, you’ll be swapping jars of homemade hot sauce or sizzling up a spicy dish that’s all yours. Happy growing, and may your harvest be extra hot! 🌶️🔥