Pruning
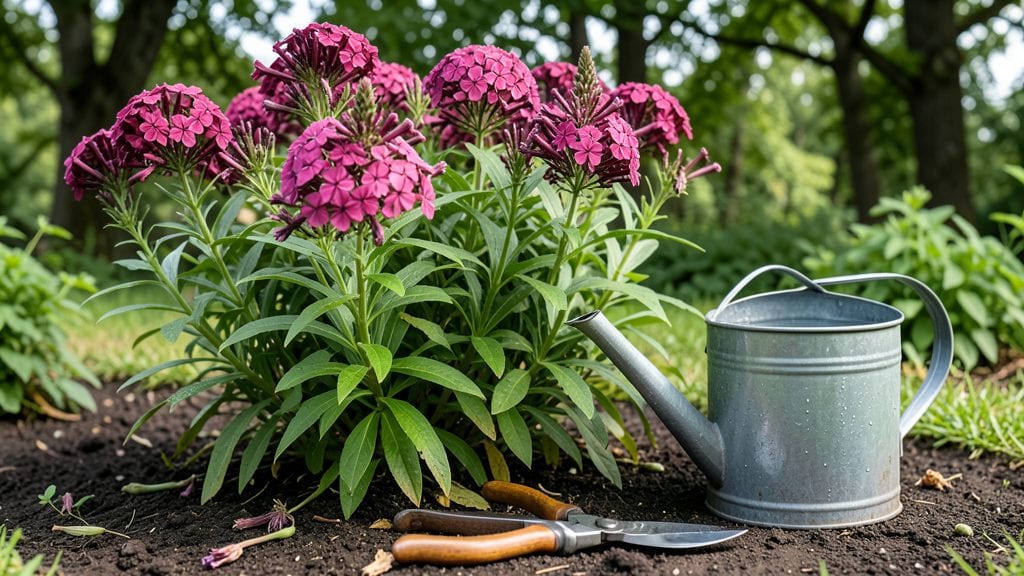
Deadheading garden phlox isn’t just about tidying up—it’s the secret to nonstop blooms from early summer until frost. ✨ I used to watch my phlox fade after one glorious flush, but after mastering this simple technique, my plants now put on a second show that rivals the first.
The key is timing and precision, not brute force.
You’ll need sharp pruners (or clean scissors), a sunny afternoon, and about 10 minutes per plant. The goal is to remove spent blooms just above a set of healthy leaves—never the leaf clusters themselves.
This trick tells the plant, "Keep going!" instead of "You’re done." Most gardeners skip this step, which is why their phlox peter out by July.
What you’ll get is a bush that stays lush and productive for months, with flowers that open fresh and vibrant. The more you deadhead, the more energy the plant puts into new blooms instead of seed production.
My phlox now towers over my neighbors’, and the scent? Unmatched. The best part? You can start anytime after the first flush appears.
Works for all phlox varieties—dwarf, border, or tall—and even extends the season in cooler climates. The only rule: don’t cut into old wood, or you’ll stunt next year’s growth. Now grab those shears and let’s keep those blooms coming!
📚 In This Guide
- What you need
- Instructions
- Tips and common mistakes
- Wrapping up and next steps
What you need
- ● Pruning shears or sharp bypass pruners – Choose a pair with clean, sharp blades (4- to 6-inch blades work best).
- ● Garden gloves – Heavy-duty, preferably with a textured grip for comfort.
- ● Disinfectant (rubbing alcohol or bleach solution) – 1 part bleach to 9 parts water (for sterilizing tools).
- ● Trash bag or bucket – For collecting spent blooms and debris.
- ○ Hose with a spray nozzle – Optional but helpful for rinsing tools and refreshing plants post-pruning.
- ● Hand pruners or scissors – For smaller, hard-to-reach blooms.
- ● Knee pads or a small stool – If your phlox is tall or ground-level pruning is uncomfortable.
- ● Garden twine or plant ties – If your phlox needs light staking after pruning.
- ● Compost bin or mulch – To recycle spent blooms into nutrient-rich soil.
How to deadhead garden phlox for longer blooms
Here’s the simple method I’ve used for years to keep my phlox flowering until frost.
✂️ Step 1: Identify and Remove Spent Blooms
Wait until a single bloom on the stem has fully faded and its petals have dropped—this signals the flower is spent. Using clean, sharp pruners or your fingers, pinch off the bloom just above the first set of healthy leaves or leaf nodes below it. You’ll see tiny buds forming there, ready to open into new flowers.
Don’t cut too far down—this removes potential blooms. If you’re unsure, look for the small green buds hidden among the foliage. Those are your future flowers, so preserve them. I always work in the morning when buds are fully open and easy to spot.
✂️ Step 2: Deadhead Regularly for Continuous Blooms
Check your phlox every 2-3 days during peak bloom season. This prevents the plant from wasting energy on seed production, which drains its strength. You’ll notice new buds forming within 3-5 days of proper deadheading—watch for the tight green clusters at the base of spent stems.
If you miss a few blooms, don’t panic. Just keep up with regular deadheading, and the plant will compensate by producing more side shoots. I’ve seen phlox rebloom vigorously even when deadheaded late in the season, as long as the weather stays mild.
✂️ Step 3: Shape and Prune for Healthier Growth
After deadheading, take a moment to inspect the plant’s overall shape. Use your pruners to trim back any leggy or overcrowded stems to encourage bushier growth. Cut just above a leaf node where new growth can emerge. You’ll see fresh green shoots within 1-2 weeks if the plant is healthy.
Remove any stems that look diseased or have blackened spots—this prevents the issue from spreading. I always sterilize my pruners with rubbing alcohol between cuts to avoid transferring pathogens. A little shaping now means fewer problems later in the season.
💧 Step 4: Support with Proper Aftercare
Deadheading stresses the plant slightly, so give it a drink afterward if the soil feels dry to the touch. Water at the base rather than overhead to keep foliage dry and reduce disease risk. You’ll notice the plant perking up within a day or two, with new buds forming more vigorously.
Add a light layer of 2-3 inches of mulch around the base to retain moisture and regulate soil temperature. This keeps roots cool and encourages more blooms. I always mulch after deadheading to give the plant extra support during its recovery phase.
☀️ Step 5: Monitor for Late-Season Blooms
As summer winds down, keep an eye out for late blooms that may appear on new growth. These often emerge from the center of the plant or along side shoots. Deadhead these as well, but be gentler—phlox may slow down as temperatures drop, so don’t push it.
If frost threatens, stop deadheading entirely. The plant will focus on hardening off for winter rather than producing new blooms. You’ll still have plenty of color from any remaining flowers, and the plant will store energy for next year’s growth.
Tips & tricks for perfect garden phlox deadheading
A few simple strategies that'll keep your phlox blooming like crazy all season long.
Timing Secret: The 2-3 day deadheading schedule in Step 2 is everything. I learned this the hard way—skipping just one day can mean missed buds and weaker blooms later. Mark your calendar or set phone reminders if needed. Morning is ideal because buds are fully open, making spent blooms easier to spot. Trust me, that extra 10 minutes every few days saves you hours of frustration later when your plant looks tired.
Visual Cue for Cutting: In Step 1, when you're pinching off spent blooms, look for the tiny green buds hiding among the leaves. These are your future flowers! Cut just above the first set of healthy leaves below the spent bloom—but never below those buds. I always do a quick visual sweep of the plant before starting to spot all the potential blooms I'm protecting. This one step makes the biggest difference in how many flowers you'll get.
Pruner Prep: Sterilizing your pruners between cuts (as mentioned in Step 3) isn't just about disease prevention—it's about keeping your cuts clean. I keep a small bottle of rubbing alcohol handy and wipe my pruners after every 5-10 cuts. Clean tools also make the job easier; dull pruners crush stems instead of making clean cuts. For large plants, I use a pair of sharp bypass pruners, while for delicate stems, my fingers work perfectly.
Late-Season Strategy: When you see those late-season blooms emerging in Step 5, don't be afraid to deadhead them gently. These often come from the center of the plant where light might be limited. I've had phlox still blooming beautifully in October when I've kept up with this gentle deadheading. Just remember—when frost is in the forecast, let those last blooms enjoy their time in the spotlight without interference.
Pro Tips for Deadheading Garden Phlox
- A few simple strategies that'll keep your phlox blooming like crazy all season long.
- Timing Secret: The 2-3 day deadheading schedule in Step 2 is everything.
- Visual Cue for Cutting: In Step 1, when you're pinching off spent blooms, look for the tiny green buds hiding among the leaves.
Frequently asked questions
Got questions about deadheading garden phlox?
You’re not alone! Here are some of the most common ones—and their simple solutions to keep your phlox thriving all season.
When is the best time to deadhead garden phlox?
Deadhead phlox as soon as blooms fade to encourage new flowers. For spring-blooming varieties, start in early summer; for late-season types, wait until after their peak (usually July–August). Never cut into old wood—always snip just above a set of leaves or buds to avoid damaging the plant.
How do I deadhead phlox without ruining the plant?
Use sharp, clean pruners or scissors to avoid tearing stems. Pinch or snip just above the first set of healthy leaves or buds (about ¼ inch above). Avoid cutting into woody stems—this can stress the plant. For dense clusters, trim back one-third of the oldest stems at a time to promote bushier growth.
Can I deadhead phlox too much?
Yes! Over-pruning—especially late in the season—can weaken phlox. Limit deadheading to once or twice per week during peak bloom. Stop trimming by mid-to-late summer to allow the plant to store energy for next year. If you see sparse blooms, you may have cut back too aggressively.
What if it rains right after I deadhead?
Rain won’t harm freshly deadheaded phlox, but wet conditions can slow regrowth. If possible, deadhead on a dry day to prevent fungal issues. If rain is in the forecast, trim stems just above the next leaf node to minimize exposed cuts. Always sterilize tools with rubbing alcohol to prevent disease spread.
Are there alternatives to deadheading for long-lasting blooms?
Yes! If deadheading feels tedious, try:
- Selective pruning: Remove only the most spent blooms instead of the entire cluster.
- Fertilizing: Use a balanced, low-nitrogen fertilizer (like 10-10-10) mid-season to boost blooms.
- Dead-flowering varieties: Choose self-cleaning phlox (like ‘David’ or ‘Lipstick’) that shed spent blooms naturally.
Wrapping up and next steps
Deadheading garden phlox is your secret weapon for longer-lasting, lush blooms all season! By removing spent flowers, you encourage new growth, boost plant health, and keep your garden vibrant. With just a little effort, you’ll enjoy months of stunning color—what’s not to love? 🌸
Ready to transform your garden? Grab your shears and get clipping! Start with one cluster today, and soon, your phlox will be the star of the show. Happy pruning! ✂️💪