Container Gardens
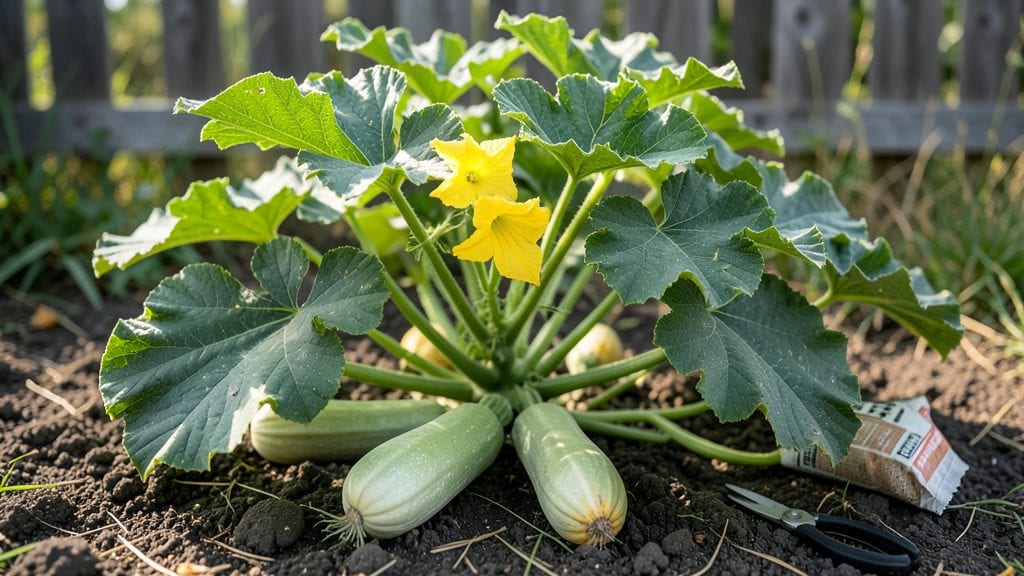
A container garden squash isn’t just possible—it’s a game-changer for small spaces and busy gardeners, turning my balcony into a productive patch with varieties like ‘Eight Ball’ and ‘Patio Star,’ which thrive in 5-gallon pots and produce bountiful harvests. 🌱 reliable harvests without sprawling vines.
The secret lies in choosing the right plants and containers, then mimicking their natural growing conditions in a compact setup.
You’ll need containers with at least 5 gallons per plant, sturdy fabric or plastic pots for stability, and well-draining soil mixed with compost. Squash craves sunlight, so place containers in 6+ hours of direct light daily, and water consistently—keeping soil moist but never soggy.
The payoff? Fresh zucchini, pattypan, or acorn squash within 6-8 weeks, all without sacrificing your backyard to vines.
Container squash also stays healthier—fewer pests, better air circulation, and easier monitoring for diseases. Prune excess leaves to boost fruit production, and watch for squash vine borers by inspecting stems early.
With this setup, you’ll harvest more consistently than in-ground gardens, and the mobility means you can move plants to follow the sun or escape pests.
Perfect for apartments, patios, or even windowsills with grow lights. Once you master the basics, you can experiment with dwarf varieties or even grow winter squash in larger containers. Let’s get those vines climbing!
📚 In This Guide
- What you need
- Instructions
- Tips and common mistakes
- Wrapping up and next steps
What you need
- ● Container: A large, sturdy pot or fabric grow bag (at least 18-24 inches deep and 12+ inches wide). Opt for 5-gallon buckets or larger—squash vines need room to sprawl! 🏺
- ● Drainage: 2-4 drainage holes (if using a pot) to prevent root rot. Add a 1-inch layer of gravel or broken pottery at the bottom.
- ● Potting Mix: A high-quality, well-draining container mix (avoid garden soil—it compacts!). Aim for 10-15 gallons per container.
- ● Squash Seeds or Seedlings: Bush varieties: ‘Eight Ball’ (zucchini), ‘Patio Star’ (acorn), or ‘Table Queen’ (yellow crookneck)—ideal for containers.
- ● Vining varieties: ‘Straightneck’ or ‘Golden Zucchini’ (may need trellising or a larger container).
- ● Fertilizer: A balanced, slow-release fertilizer (10-10-10) or compost mixed into the soil. Add a liquid feed (like fish emulsion) every 2-3 weeks during fruiting.
- ● Trowel or small shovel for planting.
- ○ Gloves (optional but handy for handling prickly vines or soil).
- ● Trellis or cage: 5-6 ft tall (for vining varieties) to save space and support heavy fruits. Use metal cages, tomato stakes, or a DIY wire trellis.
- ● Mulch: Straw or shredded leaves to retain moisture and suppress weeds.
- ○ Pruning shears (optional) for trimming excess vines or yellowing leaves.
- ● Watering can or hose with a gentle spray nozzle (squash needs 1-2 inches of water per week).
- ● Sunlight: A spot with 6-8+ hours of full sun daily—squash is a sun-worshipper! ☀️
- ● Warmth: Wait until after the last frost (soil temps should be 60°F+) to plant seeds or seedlings.
- ● Space for vines: If using a vining variety, ensure your container is near a wall, fence, or trellis for support.
Step-by-step instructions for growing squash in containers
Here's how to grow productive, space-saving squash in pots—no sprawling vines required.
🪴 Step 1: Select the Right Containers and Soil Mix
You'll need at least 5-gallon containers for each plant—squash roots spread wide, and cramped spaces stunt growth. I use fabric grow bags because they prevent root circling and allow excess moisture to evaporate. Drill drainage holes if your pots don’t have them, and line the bottom with landscape fabric to keep soil from escaping while letting water drain freely.
Fill the containers with a custom mix: blend 50% potting soil, 30% compost, and 20% perlite for aeration. This lightweight blend prevents compaction while providing nutrients. Pre-moisten the mix until it feels like a wrung-out sponge—evenly damp but not soggy. Squash roots need oxygen, and heavy soil suffocates them.
🌱 Step 2: Plant Seeds or Transplants at the Right Time
Start seeds indoors 4-6 weeks before your last frost date or buy healthy transplants from a nursery. Plant 2-3 seeds per container, burying them 1 inch deep—squash seeds germinate best in warm soil. If using transplants, choose compact bush varieties like 'Eight Ball' or 'Patio Star' to save space. Avoid vining types like zucchini in small pots.
Thin seedlings to one strong plant per container once they develop true leaves. Snip the weakest stems at the base with clean scissors—don’t pull, or you’ll disturb the roots of the remaining plant. Water gently after thinning to settle the soil around the remaining stem. This step ensures your squash has room to grow without competing for nutrients.
☀️ Step 3: Provide Full Sun and Support for Growth
Place containers in a spot with at least 6-8 hours of direct sunlight daily. Squash is sun-hungry, and insufficient light leads to weak stems and poor fruit production. If your space lacks full sun, supplement with a grow light positioned 6 inches above the plants for 12-14 hours per day. You’ll notice leaves turning pale or stretching toward light—this is a sign to adjust.
Install small trellises or cages as soon as seedlings are 3 inches tall. Even bush varieties benefit from support, as squash vines grow heavy with fruit. Use soft twine or garden ties to guide vines upward gently—never force them, or you’ll snap tender stems. Prune any side shoots that form at the base to redirect energy into fruit production.
💧 Step 4: Water Deeply and Fertilize Regularly
Water containers deeply 2-3 times per week, ensuring the top 2 inches of soil feel dry before each session. Squash roots are shallow, so consistent moisture prevents blossom-end rot and bitter fruit. Use a watering can with a narrow spout to direct water to the soil, not the leaves—this reduces disease risk. Avoid overhead watering, especially in the morning, as damp foliage invites fungal issues.
Feed plants every 2 weeks with a balanced liquid fertilizer (10-10-10) diluted to half strength. Squash are heavy feeders, and container soil depletes quickly. You’ll see new leaves emerging and vines thickening—this is your cue that the fertilizer is working. Stop fertilizing 2 weeks before harvest to let flavors concentrate.
✂️ Step 5: Harvest and Maintain for Continuous Production
Pick squash when they reach full size but before they harden—this ensures tender, flavorful fruit. Use a sharp knife or pruners to cut stems, leaving a small portion attached to the vine. Harvesting encourages more production, as the plant focuses energy on new growth rather than maturing existing fruit. Check containers every 2-3 days in peak season, as squash ripens quickly.
After harvest, trim any yellowing or diseased leaves immediately to improve air circulation. If your squash stops producing, pinch off the first few female flowers—this redirects energy to later blooms. With proper care, a single container can yield 6-10 squash per season, making it one of the most rewarding compact crops for small spaces.
Tips & tricks for perfect container garden squash
A few key strategies can transform your container garden into a productive squash powerhouse—here's what I've learned after years of trial and error.
Container Size Matters: While the instructions specify at least 5-gallon containers, I've found that 7-gallon fabric grow bags make a noticeable difference for bush varieties. The extra space gives roots room to spread without becoming root-bound, which directly translates to more vigorous plants and higher yields. If you're using standard pots, choose wider rather than deeper containers—squash roots spread horizontally, not vertically.
Soil Moisture Management: The 2-3 times per week watering schedule works well, but I've discovered a simple trick to maintain consistent moisture: add a 1-inch layer of mulch (like straw or shredded leaves) on top of your soil mix after planting. This helps retain moisture while preventing soil compaction. In hot weather, you may need to water more frequently—check soil moisture by sticking your finger 2 inches deep; if it feels dry, it's time to water.
Light Optimization: When supplementing with grow lights for the required 12-14 hours, position them just above the plant's canopy rather than fixed 6 inches away. As your squash grows, adjust the light height to maintain consistent illumination. I've also noticed that using a timer for grow lights eliminates guesswork—set it to turn on at dawn and off at dusk for automatic regulation.
Harvest Timing Secret: The instructions mention checking containers every 2-3 days, but I've found that morning harvests yield the freshest produce. Squash continues to grow after picking, so harvest when they're slightly smaller than their mature size—this encourages more frequent production. Use a sharp knife to cut stems cleanly, leaving about 1 inch attached to the vine, which helps prevent disease entry points.
Pro Tips for Container Garden Squash
- A few key strategies can transform your container garden into a productive squash powerhouse—here's what I've learned after years of trial and error.
- Container Size Matters: While the instructions specify at least 5-gallon containers, I've found that 7-gallon fabric grow bags make a noticeable difference for bush varieties.
- This helps retain moisture while preventing soil compaction.
Frequently asked questions
Got questions about growing squash in containers? You’re not alone—here are the answers to the most common ones!
What’s the best type of squash for container gardening?
Look for bush varieties like ‘Eight Ball’ zucchini or ‘Patio Star’ pumpkin. These stay compact (1–3 feet tall) and thrive in 5-gallon containers or larger. Avoid vining types like butternut squash—they need too much space!
When should I plant squash in containers?
Wait until after the last frost (when soil is at least 60°F) and temperatures stay above 50°F at night. Start seeds indoors 2–3 weeks earlier if your growing season is short. Pro tip: Use black plastic pots—they warm up faster in cool weather!
How often should I water container-grown squash?
Water deeply 2–3 times per week, ensuring soil stays moist but not soggy. Containers dry out faster than ground soil! Mulch with straw to retain moisture and prevent weeds. Watch for: Yellowing leaves = thirsty plant; wilting = overwatering.
What pests should I watch for, and how do I stop them?
Squash bugs, aphids, and squash vine borers are common. Prevent them with row covers early on. For borers, wrap the base of stems with aluminum foil (they hate it!). Handpick bugs or spray with neem oil for organic control.
Can I grow more than one squash plant in a container?
Yes! If space allows, plant one bush-type squash per 5-gallon container. For larger containers (10+ gallons), you can fit 2–3 small plants, but avoid overcrowding—they’ll compete for nutrients. Bonus: Try companion planting with basil or marigolds to deter pests!
Wrapping up and next steps
Growing squash in containers is a game-changer for urban gardeners—it’s space-efficient, rewarding, and packed with flavor! 🌱 Whether you’re a beginner or a seasoned pro, these compact hacks prove you don’t need a backyard to enjoy a bountiful harvest.
Start small, experiment with varieties, and watch your green thumb thrive!
Ready to dive in? Pick your favorite squash, grab a container, and plant your seeds today! Your future meals (and Instagram-worthy vines) will thank you. Happy gardening! 🌿