Advice
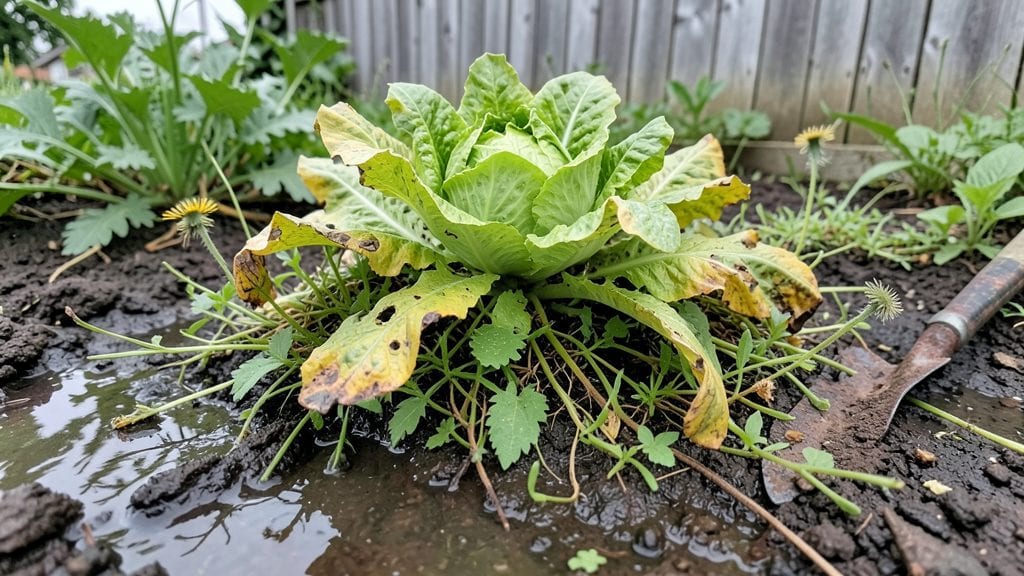
Bad gardening habits are silently sabotaging your plants—often before you even notice. 🌱 I’ve seen it happen time and time again: overwatering that drowns roots, skipping soil tests that leave nutrients lacking, or pruning at the wrong time and stunting growth.
The good news? These mistakes are fixable, and the changes won’t take long to implement.
Start by diagnosing the real issues—yellow leaves might mean overwatering or poor drainage, while stunted growth often points to nutrient deficiencies. Grab a soil test kit, a moisture meter, and a sharp pair of pruners.
These simple tools will help you spot problems early, before they become irreversible. Trust me, a few small adjustments now save hours of frustration later.
Once you identify the culprits, the fixes are straightforward. Water deeply but less often, amend your soil with compost, and prune only when new growth is ready to take over.
Within weeks, you’ll see stronger stems, brighter blooms, and plants that actually thrive—not just survive. The key is consistency, not perfection.
This isn’t about guilt—it’s about turning things around. Even the most seasoned gardeners have had to unlearn bad habits. What matters is catching them early and giving your plants the care they deserve. Let’s get your garden back on track, one habit at a time.
📚 In This Guide
- What you need
- Instructions
- Tips and common mistakes
- Wrapping up and next steps
What you need
- ● Garden Gloves – A sturdy pair (2-3) to protect your hands from thorns, dirt, and sharp tools. Look for breathable, durable materials like leather or reinforced synthetic fabrics.
- ● Hand Trowel – 1 medium-sized (6-8 inches) for digging, transplanting, and weeding. Stainless steel or aluminum heads are ideal for longevity.
- ● Pruning Shears – 1 pair with bypass blades (for clean cuts) or anvil blades (for thicker branches). Bypass shears are gentler on plants.
- ● Garden Fork – 1 sturdy, 4-tined fork (12-18 inches) for aerating soil, breaking up compacted earth, or lifting heavy roots.
- ● Watering Can or Hose – A 1-2 gallon watering can with a rose attachment for precision, or a lightweight hose with adjustable nozzles for larger areas.
- ● Mulch – 2-3 bags of organic mulch (e.g., shredded bark, straw, or compost) to retain moisture and suppress weeds. Aim for 2-3 inches of coverage.
- ● Compost or Fertilizer – 1 bag of balanced organic fertilizer (10-10-10 or similar) or compost to replenish nutrients in depleted soil.
- ● Soil pH Test Kit – 1 kit to check soil acidity/alkalinity. Adjust with lime (to raise pH) or sulfur (to lower pH) if needed.
- ● Knee Pads – For comfort during long gardening sessions.
- ● Wheelbarrow – To haul soil, mulch, or debris easily.
- ● Spray Bottle – For diluted vinegar or neem oil solutions to deter pests naturally.
- ● Garden Journal – A notebook or app to track plant progress, watering schedules, and fixes for recurring issues.
- ● Safety Gear – Sunglasses, a wide-brimmed hat, and sunscreen for sunny days.
How to identify and fix common gardening mistakes
Even experienced gardeners slip up—here’s how to spot and correct the most destructive habits before they ruin your plants.
🌱 Step 1: Overwatering and the Signs of Root Rot
I’ve drowned more plants than pests ever have, and the worst part? You won’t see the damage until it’s too late. Check soil moisture by sticking your finger 1 inch deep—if it’s damp, wait. Overwatering suffocates roots by cutting off oxygen, leading to root rot, which turns stems mushy and black.
Fix it by letting the top 2-3 inches of soil dry out completely between waterings. If your plant is already struggling, trim away any blackened roots and repot in fresh, dry potting mix. This habit is especially deadly in containers, where water has nowhere to escape.
💧 Step 2: Ignoring Soil Drainage and the Compaction Trap
Packing soil too tightly or using heavy garden soil instead of lightweight potting mix creates a brick-like barrier that roots can’t penetrate. You’ll know you’ve overcompacted when water pools on the surface instead of soaking in, or when seedlings struggle to push through the soil.
To fix it, fluff the top 2 inches of soil with a fork or your fingers to create air pockets. For containers, always use potting mix with perlite or vermiculite to improve drainage. I’ve seen gardeners swear by "heavy soil" for stability, but roots need breathable space to grow.
☀️ Step 3: Neglecting Light Adjustments as Plants Grow
Leggy, stretched-out seedlings or yellowing leaves mean your plants are reaching for light. This happens when you place them under a grow light too far away or move them to a shadier spot as they grow. The fix? Keep lights 2-4 inches above seedlings and raise them as plants grow to maintain that distance.
For outdoor plants, rotate pots a quarter turn weekly so they grow evenly toward the sun. I’ve seen basil plants grow into lopsided monsters because they leaned toward the window—don’t let that happen to yours.
✂️ Step 4: Pruning at the Wrong Time or Too Aggressively
Snipping back plants without knowing the right time or technique can stunt growth or invite disease. For example, cutting into woody stems (like roses or shrubs) in late summer encourages tender new growth that won’t survive winter. Instead, prune right after flowering or in early spring before new growth starts.
If you’ve already over-pruned, don’t panic. Focus on keeping the plant healthy with proper water and light, and it’ll bounce back. I’ve seen gardeners hack off half a plant in one go—only to watch it regrow stronger than ever.
🪴 Step 5: Skipping Seasonal Soil Prep and Fertilizer Rotation
Using the same soil year after year depletes nutrients and invites pests. I’ve seen gardens where the same patch of soil produces fewer tomatoes each year because the plants starved for nitrogen. Fix it by amending soil with 2-3 inches of compost every spring and rotating crops to prevent nutrient depletion.
For containers, refresh the top 1-2 inches of soil annually with fresh potting mix and a slow-release fertilizer. This keeps roots fed without overwhelming them, and you’ll notice healthier foliage within weeks.
Tips & tricks for perfecting your gardening game
Even the most seasoned gardeners fall into these traps—here's how to spot them early and save your plants.
Soil Test Before You Plant: I can't stress this enough—test your soil before adding any plants. Most garden centers offer cheap soil test kits. You'll discover if your soil is too acidic, alkaline, or nutrient-deficient before you waste time planting incompatible species. For example, blueberries need acidic soil (pH 4.5-5.5), while tomatoes thrive in slightly acidic to neutral soil (pH 6.0-6.8). This simple step prevents years of frustration with underperforming plants.
The Right Watering Rhythm: When you check that top 1 inch of soil in Step 1, pay attention to the weight. Lift your pot—if it feels light, it's time to water. If it's heavy, wait another day. Morning watering is always better than evening because it gives foliage time to dry before nightfall, reducing fungal risks. I've seen gardeners water daily just because "that's what the schedule says," but plants need different amounts based on temperature, humidity, and season.
Light Adjustment Hacks: For indoor plants under grow lights, use a simple ruler to maintain that 2-4 inch distance mentioned in Step 3. I mark the distance with tape on my light fixture so I don't have to measure every time. For outdoor plants, place a small mirror near your window—if the plant's shadow is longer than the plant itself, it needs more light. This visual trick helps me spot light-starved plants immediately.
Pruning Tool Maintenance: Sharp, clean pruners are your best defense against disease. After each use, wipe blades with rubbing alcohol and oil them lightly to prevent rust. Dull shears crush stems instead of making clean cuts, which invites infections. I keep a small bottle of alcohol and some oil in my gardening toolbox—it's a habit that's saved me from losing multiple plants to bacterial infections after pruning.
Pro Tips for Bad Gardening Habits
- Even the most seasoned gardeners fall into these traps—here's how to spot them early and save your plants.
- Soil Test Before You Plant: I can't stress this enough—test your soil before adding any plants.
- The Right Watering Rhythm: When you check that top 1 inch of soil in Step 1, pay attention to the weight.
Frequently asked questions
Got questions about common gardening mistakes and how to fix them? You’re not alone! Here are some frequently asked questions to help you turn those "oops" moments into "aha!" victories.
Why do my plants keep dying despite my best efforts?
Overwatering, poor soil drainage, or incorrect sunlight exposure are often the culprits. Many gardeners assume more water = happier plants, but roots need air too! Test your soil’s moisture by sticking your finger 1-2 inches deep—if it’s damp, wait before watering again. Pro tip: Use well-draining pots or raised beds to prevent soggy roots.
Can I fix over-fertilized plants, or is it too late?
Not always! If you’ve overdone it with fertilizer, flush the soil with water to dilute excess salts. Monitor your plants for crispy edges or yellowing leaves—these are red flags. For severe cases, repot with fresh soil or prune damaged foliage. Prevention tip: Always follow package instructions and fertilize in smaller, frequent doses rather than one big hit.
How do I stop weeds from taking over my garden?
Weeds thrive when soil is bare or compacted. Mulch your garden beds with straw, wood chips, or even grass clippings to block sunlight and smother weeds. Pull them early (when they’re young) and consistently—don’t let them go to seed! Bonus hack: Use vinegar or boiling water for stubborn weeds, but spot-treat to avoid harming your plants.
Is it okay to prune my plants at any time of year?
Timing matters! Prune flowering plants after they bloom to encourage new growth, while evergreens and fruit trees benefit from late winter/early spring trims. Avoid heavy pruning in fall—it stresses plants before winter. Rule of thumb: If you’re unsure, prune during the plant’s dormant season for the safest results.
What’s the easiest way to fix compacted garden soil?
Compacted soil suffocates roots and blocks water. Loosen it with a garden fork or aerator, then amend with compost, sand, or perlite. Avoid walking on garden beds, and mulch heavily to protect soil structure. For lawns, core aeration in fall or spring works wonders. Quick fix: Top-dress with a thin layer of compost and let nature do the rest!
Wrapping up and next steps
Breaking bad gardening habits isn’t just about fixing mistakes—it’s about nurturing a thriving, sustainable green space that brings joy (and maybe even a few homegrown tomatoes!). 🌱 From overwatering to ignoring soil health, small tweaks can make a huge difference.
Start by picking one habit to improve this season, and watch your garden—and your confidence—grow.
Ready to turn things around? Grab your gloves, revisit your notes, and plant the seeds of change—literally! Whether it’s testing your soil or adjusting your watering schedule, every step forward is a victory. Happy gardening! 🌿